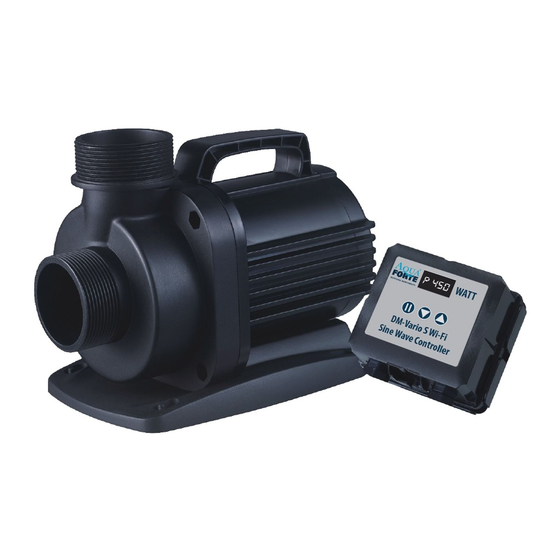
AQUA FORTE DM-Vario 10000S Manuel - Sayfa 2
Su Pompası AQUA FORTE DM-Vario 10000S için çevrimiçi göz atın veya pdf Manuel indirin. AQUA FORTE DM-Vario 10000S 8 sayfaları.

Performance parameter table:
Model
Voltage
Wattage
10000S AC220-240V 50/60Hz
34-85 W
22000S
AC220-240V 50/60Hz
70-200W
30000S
AC220-240V 50/60Hz
130 -360W
40000S
AC220-240V 50/60Hz
105-450W
180-600W
50000S
AC220-240V 50/60Hz
Warning:
- The power cord should not be used coiled to avoid induction problems.
- Do not connect to any voltage other than that shown on the rating label of the pump.
- Do not pump flammable liquids. The pump is only intended to be used in ponds.
- The maximum operation depth is 1.5m. Do not use with water above 35
- The supply cord can not be replaced. lf the cord is damaged the appliance should be scrapped.
- The pump is not intended for use by young children or infirm persons without supervision.
- To protect against the risk of electrical shock, do not immerse the plug in water or other liquid.
- This appliance is not intended for use by persons (including children) with reduced physical, sensory or mental
capabilities, or lack of experience and knowledge, unless they have been given supervision or instruction
concerning use of the appliance by a person responsible for their safety. Children should be supervised to ensure
that they do not play with the appliance.
Note: for outdoor use, the power socket must be installed with the leakage current protecting device, and the
leakage current shall not exceed 30 mA.
Caution:
Always disconnect from electrical outlet before cleaning, maintenance and handling the pump. Don' t operate
without water. Do not lift the pump by holding the power cord. Do not use the pump in liquids having a
°
temperature exceeding 35
C. Use the pump only in freshwater. Please use the pump only when it is completely
submerged in water. Do not use the pump in swimming pools!
lnstallation:
The pump is suited for both wet and dry applications. In a dry setup the pump must be under water level as it is
not self-priming. For dry setup the external strainer house must be removed for the connection of the pipe
fittings.
The pump has a dry-running protection function; when the water level is lower than the pump in let, the pump
will automatically stop after 2 minutes. lt will try again after 30 seconds. lf there is still no water the pump will
completely stop. You can reset this by removing the power cable from the power outlet and plug it back in.
Under water, the pump must take in as clear as possible water. Never place the pump in a muddy area or on sandy
pond bottoms. Put the pump on a small pedestal (e.g. a stone). lgnoring these instructions can cause blockage of
the strainer house around the pump. Heavily polluted water will cause problems for the rotor to run smooth and
the pump performance will decrease. In a worst case scenario the rotor will totally block and the pump will burn
out. Complete blockage of the pump strainer house will prevent motor cooling which can cause burn outs.
2
Flow
Max.Head
6 - 10m
3
/h
5.5 m
3
12 - 22 m
/h
7.5 m
17 - 30m
3
/h
11.0 m
3
25 - 40m
/h
6.6 m
30 - 50m
3
/h
8.5 m
°
C
Maintenance: Always unplug power cord before handling the pump!
..
2. Turn pump house 45
1. Remove the screws
counter clockwise (only DM30000S) from the pump body
4. Take rotor out and clean
with water and brush
Technica! drawing
Pump house
Caution:
The pump shaft can not be removed!
lf the pump fails to operate, check the following:
• Check the outlet and try another outlet to ensure the pump is getting electrical power.
• NOTE: Always disconnect from electrical outlet before handling the pump.
• Check the pump outlet and tubing for kinks and obstructions. Algae may block them, please flush out the algae
with a garden hose.
• Check the in let to ensure it is not clogged with debris.
• Remove the pump in let to access the impeller area. Turn the rotor to ensure it is not broken or jammed.
• Monthly maintenance will prolong your pump' s life.
• NOTE: Ensure that the electrical cord loops below the electrical outlet to form a "Drip Loop' '. This will prevent
water from running down the cord into the electrical outlet.
°
3. Pull the pump house away
5. Put pump body in a vertical
position and fill with a mild lime
scale remover (like cleaning
vinegar). lmmerse rotor in a plastic
bowl/container filled with the same
lime scale product and leave both
for 24 hours. After 24h rinse off with
water and re-assemble pump.
Handle
Pump�---.i...
body
0-rin
mp base /
Pump controller
S
crews
�
Rubber feet
®
�
3
