Bionaire BCH9234-CN Talimat Broşürü - Sayfa 4
Isıtıcı Bionaire BCH9234-CN için çevrimiçi göz atın veya pdf Talimat Broşürü indirin. Bionaire BCH9234-CN 11 sayfaları. Bionaire bch9440-cn heater with advanced digital thermostat
F E AT U R E S - O P E R AT I O N S
Base Assembly
Step 1:
If the base is in two halves, snap them
together by sliding slots of one base half into
slots of second base half. Refer to Figure 3.
Step 2:
Run the power cord through the center of the
assembled base. To assemble the base to the
unit (either one or two-piece base) first make
sure the side marked "Rear" is facing the
back of the heater. Line up holes of the base
with holes on bottom of pedestal (or heater
housing if no pedestal is included), and secure
with 4 provided screws. Refer to Figure 4.
Step 3:
Lace the power cord through the cord minders
on the underside of the base. Refer to Figure 5.
Step 4:
Turn the heater right side up on a flat level
surface prior to beginning operation.
Remote Control
Your heater comes with a remote control, unpack the
remote control from box. This includes one lithium
battery, CR2025/3V. Please note this remote control will
not work through walls. Remove battery before
discarding the remote.
NOTE: REMOVE THE PROTECTIVE COVER FROM THE
BATTERY PRIOR TO BEGINNING OPERATION.
Figure 6
B
A. Battery Cover Lock
B. Battery cover
A
Insert pin here
Battery Replacement
1. Locate the battery compartment on the back of the
remote control handset. Insert a small object (such as
a pin or paper clip) into the hole of the battery cover
lock (see Figure 6) and slide out the battery cover.
2. Remove old battery.
3. Place new battery into battery compartment.
4. Slide battery compartment into the remote control
handset until the Battery Cover Lock is securely
latched.
5. For your convenience, a remote control holder is
integrated into the back of the heater housing.
NOTES:
• THIS PRODUCT CONTAINS A BUTTON BATTERY. IF
SWALLOWED, IT COULD CAUSE SEVERE INJURY IN
JUST 2 HOURS. SEEK MEDICAL ATTENTION
IMMEDIATELY.
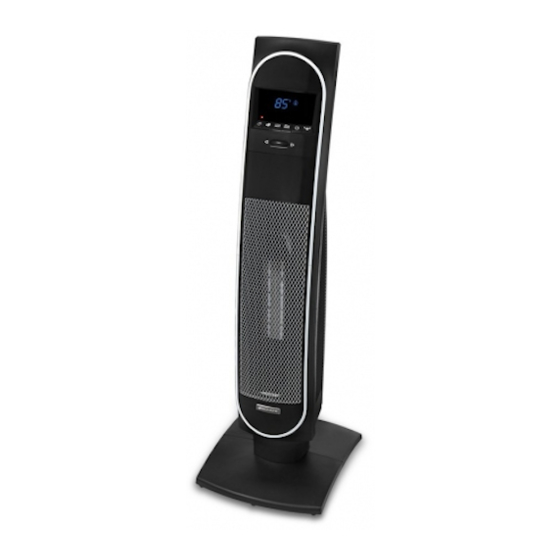
Figure 7
D
E
A Control Buttons
B LCD Display
C Dial Wheel
A
C
B
D Power Light
E Remote Control