Creek Audio Destiny Kullanım Talimatları - Sayfa 2
Amplifikatör Creek Audio Destiny için çevrimiçi göz atın veya pdf Kullanım Talimatları indirin. Creek Audio Destiny 4 sayfaları. Integrated amplifier
Ayrıca Creek Audio Destiny için: Kullanım Talimatları (4 sayfalar), Kullanım Talimatları (4 sayfalar), Kullanım Talimatları (4 sayfalar)
Destiny Integrated Amplifier
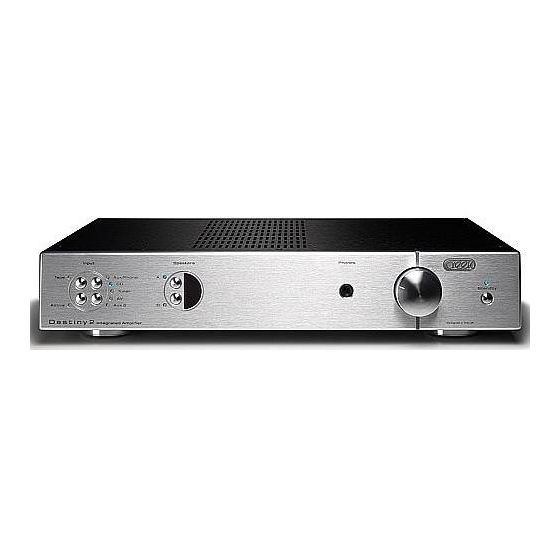
Front Panel
Tape
Inputs
Active
Rear Panel
Power
Switch
AC Mains Input
& Mains Fuse
Operating the Destiny Amplifier (Quick set-u u p)
Connect an input signal from a line level source, like CD, Tuner, Tape etc. to the amplifier using a high grade interconnect
cable. Connect loudspeakers to the amplifier to the screw terminals on the rear panel using high grade speaker cables.
Switch the amplifier on with the rear panel switch next to the power cord, marked 0 for off and 1 for on. Press the push
button marked Standby on the right hand side of the front panel. Select the desired input using the up-down input selector
switches or the remote control handset. Select the desired loudspeaker output from the front panel. Turn the volume up to
the desired level and enjoy the music.
amplifier.
Input connection and Switching
The push button switches on the left-hand side of the front panel marked Input are used to select and listen to any of the
desired inputs and adjust the pre-amp from passive to active. To select an input, press the up or down button to sequence
through five inputs until you reach your choice, indicated by LED's. The separate button marked Tape overrides the other
inputs, to allow the Destiny to monitor the output of a tape recorder. This can also be done by remote control.
As all the line input levels are the same, it is not necessary to use the precise input as described. You may, for example, plug
a CD player into the Tuner input and obtain exactly the same result and performance as the dedicated CD input. However,
for added flexibility, the first input on the Destiny amplifier can be configured either for Phono or Auxiliary line. To connect a
turntable, it is necessary to first have an optional Destiny MM or MC Phono plug-in board fitted. Alternatively Creek Audio
produces a separate range of OBH Phono pre-amplifiers. For additional plug-in options for Destiny, ask your dealer for full
details or, view Creek's website http://www.creekaudio.com. You may also write to [email protected]
Pre/power Connections
The pre-amp output and the power amp inputs are available through RCA sockets on the rear panel. This is helpful if you wish
to bi-amp the Destiny. The default setting from the factory is with the pre-amp connected to its power amp. However, when
using an external device, such as a sub-woofer or graphic equaliser etc. it may be necessary to separate the pre and power
amps. To do this there is a switch placed next to the two sets of sockets, recessed behind the rear panel to avoid accidental
use. To join or separate the sockets, push the recessed button with a matchstick or similar device. When joined the button is
in the out position. N.B. Switch the amplifier off before making any changes in order to avoid any pops, clicks or other unwant-
ed noises.
Speakers
Creek
Speakers
Link
A
Speakers
B
All these setting will be remembered by the amplifier the next time you turn on the
Headphones
Volume
Pre Tape Tape
Out
Out
In
Power Pre/
In Power
Standby
Inputs
Ground
Post