Cisco Small Business Pro SPA 504G Kullanıcı Kılavuzu

IP Telefon Cisco Small Business Pro SPA 504G için çevrimiçi göz atın veya pdf Kullanıcı Kılavuzu indirin. Cisco Small Business Pro SPA 504G 2 sayfaları. 4-line ip phone
Ayrıca Cisco Small Business Pro SPA 504G için: Kurulum ve Kullanım Kılavuzu (8 sayfalar), Kullanıcı Kılavuzu (18 sayfalar), Hızlı Başlangıç Kılavuzu (2 sayfalar), Hızlı Başlangıç Kılavuzu (2 sayfalar), Kurulum ve Kullanım Kılavuzu (19 sayfalar), Hızlı Başlangıç Kılavuzu (5 sayfalar), Kurulum ve Kullanım Kılavuzu (9 sayfalar), Hızlı Başlangıç Kılavuzu (7 sayfalar), Kullanıcı Kılavuzu (8 sayfalar), Kullanıcı Kılavuzu (2 sayfalar), Hızlı Başlangıç Kılavuzu (14 sayfalar), Hızlı Kullanım Kılavuzu (2 sayfalar), Hızlı Başlangıç Kılavuzu (18 sayfalar), Hızlı Başlangıç Kılavuzu (7 sayfalar), Manuel (7 sayfalar), Yapılandırma Kılavuzu (12 sayfalar), Yapılandırma Kılavuzu (12 sayfalar), Kullanıcı Kılavuzu (8 sayfalar), Hızlı Başlangıç Kılavuzu (21 sayfalar), Kullanıcı Kılavuzu (12 sayfalar), Hızlı Başlangıç Kılavuzu (2 sayfalar), Hızlı Referans Kartı (2 sayfalar), Manuel (5 sayfalar), Hızlı Referans Kılavuzu (4 sayfalar), Hızlı Kullanım Kılavuzu (9 sayfalar), Talimatlar (2 sayfalar), Hızlı Referans Kılavuzu (2 sayfalar), Yapılandırma (8 sayfalar)
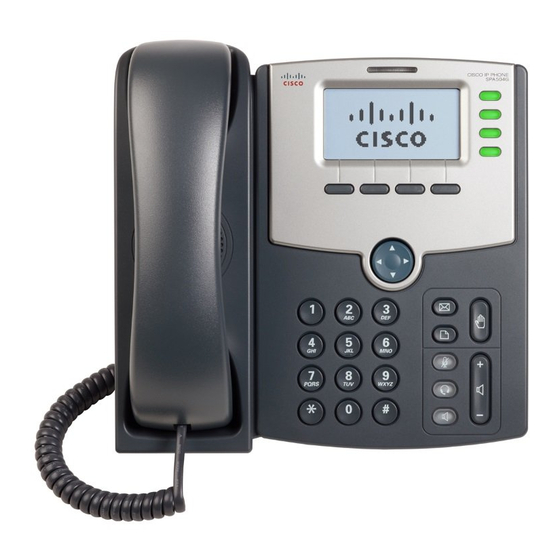
Cisco Small Business Pro SPA 504G Kullanıcı Kılavuzu
BASIC PHONE FEATURES
PLACING A CALL
Pick up the handset and enter the
Using the Handset:
number. Or Enter number first and pick up handset.
Using the Hands-Free Speakerphone:
1.
With the handset on-hook, press any assigned line key,
or
and dial the number.
2.
Or dial the number, and then press the DIAL Button.
No special dialing to get an outside line to make a call
To send calls quickly, press # after dialing number.
ANSWERING A CALL
Pick up the handset
Using the Handset:
Press
or the line key, or
Using the Speakerphone:
the ANSWER soft key.
CALL TRANSFER
1.
During a call, press the Xfer soft key (the active call is
placed on hold).
2.
Place a call to the party to which you want to transfer the
call, Enter the number and press the Dial softkey).
3.
After speaking with the second party, press the Xfer soft
key to complete the transfer.
To BLIND transfer, press the soft key bxfer. Enter the
number, and press the dial softkey.
Transfer may be cancelled during establishment by press-
ing the CANCEL soft key. Then press the resume softkey
CONFERENCE CALLS
To create a three-way local conference call:
1.
Call the first party.
2.
Press the CONF soft key to create a new call (the active
call is placed on hold).
3.
Place a call to the second party.
4.
When the second party answers, press the CONF soft
key again to join all parties in the conference.
Holding the call on originator's phone will place the other
parties in the conference also on hold.
CUSTOMIZING YOUR PHONE
CONTACT DIRECTORY
To add a contact in your local phone directory:
1.
Press the DIR soft key.
2.
Enter name from the dial pad.
3.
Use the down arrow to move to the next field
4.
Enter contact's phone number.
5.
Press save soft key to save entry.
To edit a contact:
1.
Press the DIR soft key and scroll to highlight the con-
tact to edit. Select with the check button.
2.
Press the EDIT soft key and make the necessary
changes similar to entering a contact originally above.
3.
Press save soft key to save entry
RING TYPE
You can select different rings to match your preferences and
distinguish between calls on lines.
To change the incoming ring:
1.
Press MENU. The scroll down to number 4 (RING
Tone). (Or use the key pad and press the corre-
sponding selection number.4)
2.
Using the ˄ or ˅, highlight the desired ring type. Press
the PLAY soft key to hear the selected ring type.
3.
Press the SELECT soft key to change to the selected
ring type.
4.
Press MENU button to return to the idle display.
.
DESTINCTIVE RINGING / CALL TREATMENT
You can set distinctive incoming ringing tones for different
contacts in your local directory.
To set a distinctive ring for a local contact:
1.
Press the dir soft key
2.
Scroll to the desired contact number previously entered
in the contact directory ,and select edit.
3.
Scroll to ring then press the option soft key.
4.
Select desired ringtone
5.
Press select and save.
USING VOICEMAIL
TO ACCESS THE VOICE PORTAL
Press the envelope key
The first time you log in:
1.
Enter YOUR EXTENSION (default pass code) followed
by the # key.
2.
Press 0 for Mailbox Options.
3.
Press 1 to record your unavailable Message.
4.
After recording you may accept (1), listen to the re-
cording (2), or re-record (3).
5.
To change your password press option 5.
6.
Re-enter your new pass code followed by the # key.
7.
Listen for the system confirmation that your pass code
was changed (or be prompted to repeat the process).
Subsequent log in:
From your own phone:
Press the Envelope key and enter your password.
From an outside phone:
Site with Auto-Attendant (greeting)
1.
Call into your office and when the Auto-Attendant
answers press * key.
2.
Enter your mailbox number and password.
Site without Auto-Attendant (greeting)
1.
Dial your phone number and when your voicemail an-
swers, press * key. You will then be prompted for your
password.
QUICK TOUCH REFERENCE
After log in from the Voice Portal Main Menu, press the
following keys or combination of keys to complete the voice
messaging action desired.
PRESS "0" MAILBOX OPTIONS
KEY(S)
FUNCTION
1
Record Unavailable Message
2
Record Busy Message
3
Record Your Name
4
Manage Temporary Message
1
Record Temporary Message
2
Revert to Standard Message
5
Change Password
PRESS "1" READ VOICEMAILS
KEY(S)
FUNCTION
3
Advanced Options
1
Send Reply
3
Message Envelope
5
Leave a Message
4
Play Previous Message
5
Repeat Current Message
6
Play Next Message
7
Delete Current Message
8
Forward Message
9
Save Message in Folder
0
Save in New Messages
1
Save in Old Messages
2
Save in Work Messages
3
Save in Family Messages
4
Save in Friends Messages
#
Exit
*
Help
PRESS "2" CHANGE FOLDERS
KEY(S)
FUNCTION
0
Switch to New Messages
1
Switch to Old Messages
2
Switch to Work Messages
3
Switch to Family Messages
4
Switch to Friends Messages