Cisco 7841 Manuel - Sayfa 6

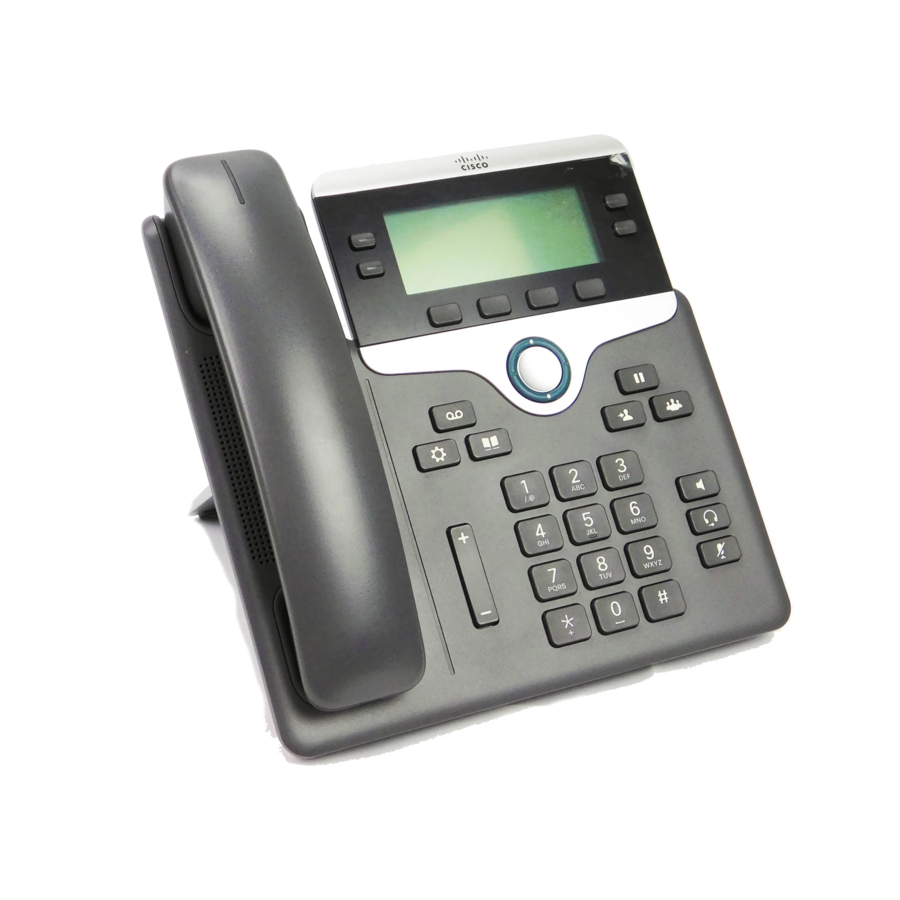
Konferans Sistemi Cisco 7841 için çevrimiçi göz atın veya pdf Manuel indirin. Cisco 7841 20 sayfaları. Classroom phone
Ayrıca Cisco 7841 için: Sürüm Notları (16 sayfalar), Hızlı Başlangıç Kılavuzu (2 sayfalar), Hızlı Referans Kılavuzu (4 sayfalar), Hızlı Referans (4 sayfalar), Hızlı Kurulum ve Kullanım Kılavuzu (12 sayfalar), Referans Kılavuzu (11 sayfalar), Hızlı Referans Kılavuzu (7 sayfalar), Hızlı Referans Kılavuzu (7 sayfalar), Kullanıcı Kılavuzu (2 sayfalar), Hızlı Referans Kılavuzu (2 sayfalar), Hızlı Referans Kılavuzu (2 sayfalar), Manuel (2 sayfalar), Manuel (27 sayfalar), Ürün Yazılımı Geçişi Ana Kılavuzu (31 sayfalar), Manuel (43 sayfalar), Hızlı Referans Kılavuzu (4 sayfalar), Hızlı Başlangıç Kılavuzu (2 sayfalar), Kurulum Kılavuzu (39 sayfalar), Kullanma (4 sayfalar), Hızlı Kullanım Kılavuzu (2 sayfalar), Manuel (7 sayfalar), Özellikler Kılavuz (4 sayfalar), Yeniden Yapılandırma Kılavuzu (2 sayfalar), Kullanıcı Referans Kılavuzu (5 sayfalar), Hızlı Referans Kartı (2 sayfalar), Hızlı Kurulum Kılavuzu (12 sayfalar), Hızlı Başlangıç Kılavuzu (2 sayfalar), Hızlı Kılavuz (3 sayfalar), Hızlı Referans Kartı (2 sayfalar), Hızlı Referans Kartı (2 sayfalar), Hızlı Başlangıç Kılavuzu (2 sayfalar), Hızlı Referans Kılavuzu (3 sayfalar)

Cisco 7841 Manuel
Change the Viewing Angle of Your Phone
Procedure
Step 1
Remove the handset from the cradle and pull the plastic tab from the handset rest.
Step 2
Rotate the tab 180 degrees.
Step 3
Hold the tab between two fingers, with the corner notches facing you.
Step 4
Line up the tab with the slot in the cradle and press the tab evenly into the slot. An extension protrudes from
the top of the rotated tab.
Step 5
Return the handset to the handset rest.
Change the Viewing Angle of Your Phone
You can change the angle of the phone, except the Cisco IP Phone 7811, to eliminate glare on the screen.
Procedure
Step 1
Unplug the phone from the network.
Step 2
Place the phone so that the keypad faces the desktop.
Step 3
Grasp one side of the footstand with one hand and place your other hand on the phone.
Step 4
Hold down the phone and pull up on the footstand.
Step 5
Turn the footstand over.
Step 6
Push the footstand back into the phone until the stand locks into place.
Step 7
Place the phone upright and plug it into the network.
Connect to the Network
You need to connect the phone to the network.
• Wired network connection—The phone is plugged into the network with an Ethernet cable.
After connecting the phone to the network, your phone may be set up for:
• Mobile and Remote Access Through Expressway—If your administrator sets up Mobile and Remote
Share a Network Connection with Your Phone and Computer
Both your phone and your computer must connect to your network to function. If you only have one Ethernet
port, then your devices can share the network connection.
Your Phone
6
Access Through Expressway and you connect your phone to the network, it connects to the Expressway
server.
Your Phone