CRU WiebeTech UltraDock UDv5.5 Hızlı Başlangıç Kılavuzu - Sayfa 2
Teşhis Ekipmanları CRU WiebeTech UltraDock UDv5.5 için çevrimiçi göz atın veya pdf Hızlı Başlangıç Kılavuzu indirin. CRU WiebeTech UltraDock UDv5.5 4 sayfaları.

2
CRU WiebeTech UltraDock UDv5.5 Quick Start Guide
1 DRIVE INSTALLATION
a. Use the provided screws to attach the protective metal plate to the bottom of your 3.5" drive.
This step is optional. The purpose of the bottom plate is to provide protection to the drive
electronics of your hard drive.
b. If you're attaching an IDE/PATA drive, configure the jumpers on the rear of the drive to Master.
Consult the instructions on your hard drive's label.
c. Connect the UltraDock UDv5.5 to the drive (or adapter), using the IDE ribbon and Molex power
cables for IDE/PATA drives or the unified SATA data/power cable for SATA drives.
d. If you're using an adapter, connect the drive to the adapter.
e. Connect a eSATA, FireWire, or USB cable from your computer to the corresponding port on
the UltraDock UDv5.5.
f. Provide power to the UltraDock UDv5.5. Connect the included AC adapter or a SATA power
cable from the inside of your computer case.
g. Turn on the power switch.
You are now ready to use the UltraDock UDv5.5 to access the attached drive. If the drive is
already formatted, it can be used right away. If the drive is brand new, or its format is not compat-
ible with your computer, the drive will need to be formatted before being used.
Formatting a drive will erase all data on the drive, so be sure to back up your data
before beginning this operation.
2 HOW TO USE THE LCD INTERFACE
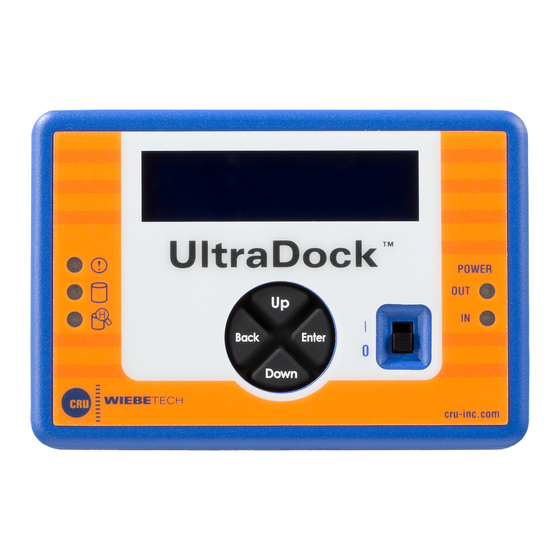
Use the LCD and 4-button navigation interface to view information about the attached drive
and the UltraDock UDv5.5. On the 4-button interface, Up and Down allow you to scroll through
options, while Enter selects an option and Back goes back to the previous screen.
MENU ITEM
View Drive Info
View Dock Info
Create HPA/DCO
Displays a submenu of items that display information about the attached drive, including
temperature, capacity, serial number, firmware revision, S.M.A.R.T. information, and
more.
Displays a submenu of items that display information about the Forensic UltraDock,
including the product name, unique ID number, and firmware version.
Allows you to create an HPA (host protected area) or a DCO (device configuration over-
lay) of the size you specify.
ACTION
