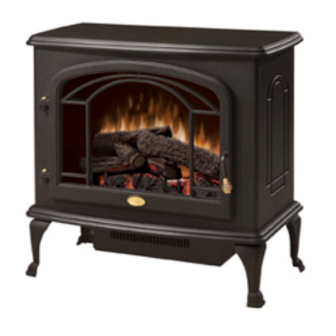
Dimplex 6900470759 Servis Kılavuzu - Sayfa 10
Soba Dimplex 6900470759 için çevrimiçi göz atın veya pdf Servis Kılavuzu indirin. Dimplex 6900470759 12 sayfaları.

and separate the cover from the heater and light as-
sembly.
4.
Locate the heater assembly and disconnect the wiring
connections noting their original locations.
5.
Remove heater mounting bracket screws and set aside
heater assembly.
6.
Properly orient the new heater assembly and connect
all of the wiring clips and connections.
7.
Reassemble in the reverse order as above.
TO REPLACE THE POWER CORD
WARNINg: If unit was operating prior to servicing
allow at least 10 minutes for light bulbs and heating ele-
ment to cool off to avoid accidental burning of skin.
WARNINg: Disconnect power before attempting any
maintenance or cleaning to reduce the risk of electric
shock or damage to persons.
1.
Gently place stove on its back on a flat surface.
2.
Remove the heater cover retaining screws located on
the bottom of the stove and lower heater and light as-
sembly out onto the floor.
3.
Remove all of the mounting screws on the heater cover
and separate the cover from the heater and light as-
sembly.
4.
Locate and disconnect the power cord wiring connec-
tions noting their original locations.
5.
With needle nose pliers grasp the power cord strain
relief grommet from inside the heater cover and push
while twisting to remove.
6.
Pull the power cord out through the hole in the heater
cover.
7.
Install the new power cord through the hole in the
heater cover and connect all of the wiring connections
in their original locations.
8.
Install the power cord retaining grommet on the power
cord and insert into the hole in the heater cover.
9.
Reassemble in the reverse order as above.
TO REPLACE REMOTE CONTROL
RECEIVER BOARD
WARNINg: If unit was operating prior to servicing
allow at least 10 minutes for light bulbs and heating ele-
ment to cool off to avoid accidental burning of skin.
WARNINg: Disconnect power before attempting any
maintenance or cleaning to reduce the risk of electric
shock or damage to persons.
1.
Open door by pulling the handles.
2.
Loosen the 2 retainers on the inner sides of the unit by
turning counter clockwise.
3.
Remove 4 screws that secure the top on the rear of the
unit.
10
4.
Lift the top off of the unit. Carefully remove the mirror
and store in a safe place to prevent damage.
5.
Locate the circuit board on the rear wall of the unit.
6.
Remove wiring connections from circuit board noting
their original locations.
7.
From inside the unit, break off the 4 mounting studs
by grasping with pliers and twisting on the protruding
part of the stud, push the remainder of the studs out
through the back panel.
! NOTE: New mounting studs are supplied with the
replacement circuit board
8.
Reassemble in the reverse order as above.
TO REPLACE LOg SET DRIVER
BOARD - DS7425DLX MODEL ONLY
WARNINg: If unit was operating prior to servicing
allow at least 10 minutes for light bulbs and heating ele-
ment to cool off to avoid accidental burning of skin.
WARNINg: Disconnect power before attempting any
maintenance or cleaning to reduce the risk of electric
shock or damage to persons.
1.
Open door by pulling the handles.
2.
Loosen the 2 retainers on the inner sides of the unit by
turning counter clockwise.
3.
Remove 4 screws that secure the top on the rear of the
unit.
4.
Lift the top off of the unit. Carefully remove the mirror
and store in a safe place to prevent damage.
5.
Locate the circuit board on the rear wall of the unit.
6.
Remove wiring connections from circuit board noting
their original locations.
7.
From inside the unit, break off the 4 mounting studs
by grasping with pliers and twisting on the protruding
part of the stud, push the remainder of the studs out
through the back panel.
! NOTE: New mounting studs are supplied with the
replacement circuit board
8.
Reassemble in the reverse order as above.
www.dimplex.com
