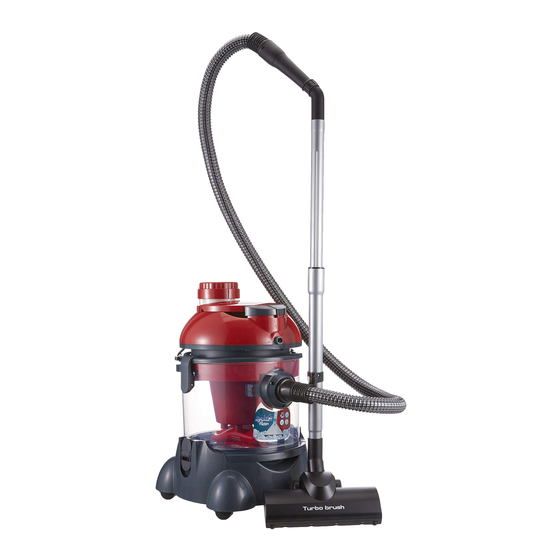
Arnica Hydra Rain PLUS Kullanım Kılavuzu - Sayfa 12
Elektrikli Süpürge Arnica Hydra Rain PLUS için çevrimiçi göz atın veya pdf Kullanım Kılavuzu indirin. Arnica Hydra Rain PLUS 16 sayfaları. Shampoo vacuum cleaner with water filter

C3 - Shampoo hose connection adapter
C4 - Water level indicator
D.
WHEEL GROUP
D1 - Wheel chassis
D2 - Wheel
D3 - Locking peg
E. HOSE GROUP
This group contains suction hose with hand grip, shampoo hose
group and suction tubes. Suction hose is connected to container
group by inserting the suction hose into the suction inlet. Suction
tubes are connected to hand grip if necessary. Handgrip contains a
mechanical sliding for regulating suction power and shampoo
trigger for spraying the water and shampoo. Hose group can be
placed onto the motor unit by the help of hanger.
E1 - Suction hose fixing part
E2 - Shampoo hose fixing part
E3 - Shampoo hose
E4 - Clips
E5 - Suction hose
E6 - Shampoo trigger
E7 - Suction power control
E8 - Handgrip
E9 - Suction tube
E10 - Tube hook
F. SHAMPOO NOZZLE
It is used for sucking liquids on the carpets, mats, floors. Water
and shampoo is sprayed through this accessory. For floors it is
used with hard floor adapter attachment.
F1 - Shampoo nozzle
F2 - Hard floor adapter
G. MINI WETSWEEP
This nozzle is very suitable for shampooing furniture, curtains and
sucking liquids on the narrow surfaces.
H. ACCESSORIES GROUP
There are various accessories for different cleaning purposes
H1 - Accessories Holder
H2 - Crevice Nozzle
H3 - Round Nozzle
H4 - Upholstery Nozzle
H5 - Nozzle
H6 - Perfume
H7 - Shampoo
Turbo Brush
The brush has a removable brush bar cover which gives you easy
access to the brush bar and a switch which allows you to vacuum
hard floors without the risk of scratching in addition to vacuuming
carpets and rugs.
T1 -Brush body
T2 -Rubber bumper seal
T3 -Brush soleplate
T4 -Small wheels
T5 -Elbow and tilt mechanism
T6 -Large wheelies
T7 -Big Brush bar cover
T8 -Spiral brush bar
T9 -Brush bar cover access latches
T10 - Hard floor and carpet selector
III. TECHNICAL FEATURES
Voltage
Power (IEC)
Electric Insulation Class
Degree of Protection
Cord Length
Weight
Used Life
IV. PREPARING FOR USE
• ATTENTION – Do not insert the mains plug into the wall socket
until the appliance is completely ready for use
• Detach the shampoo hose between shampoo reservoir and
back side of Motor Unit by pulling carefully.
• Lift up the Motor Unit using the handle provided, take the
attachments out of the container.
• When unpacking, please check that all parts are included and
undamaged.
• Keep the accessories for further uses
• Make sure that foam filter is fixed on the float case.
• Put the motor unit back onto the appliance and close the
clamps.
•To connect the hose, insert it into the hose connector.
V. OPERATING THE APPLIANCE
DRY VACUUMING
• Always be sure that the mains plug is removed from the wall
socket.
• Make sure that the container, tubes and hose group are dry
and clean.
• Unlock the clamps and lift the motor unit upside down.
• Do not use the appliance without the foam filter.
• Lift up the motor unit
• Remove the water filter body and fill container with clean water
(Max. 2 lt). Replace water filter body.
•Put the motor unit back onto appliance and lock the clamps.
• Fit the cleaning accessories most suited to the type of operation
to be performed, on to the suction tubes or directly in to the
handgrip.
• For effective cleaning the following accessory can be used.
» Nozzle (H5) for removing dust from carpets, mats and hard
floor surfaces.
» Crevice nozzle (H2) for cleaning narrow corners and hard to
reach places
» Directly suction tube (E9) for sucking soil, shavings, crumbs, fluff.
» Upholstery Nozzle (H4) and the suction tube for removing
dust from shelves, books, lamp shades, frames, ornaments,
curtains, clothes, electronic equipment's, surfaces.
• Pull the mains cord out of the appliance and insert the mains
plug into the wall socket. Push the On/Off Button (A2) to switch
the appliance on.
ATTENTION : Do not operate the pump
SHAMPOOING AND WET VACUUMING
• Lift the motor unit from the container.
•Make sure that the foam filter is inserted. (Figure 5)
• Remove water filter tube. It may cause extremely bubbling.
12
: 230V
, 50Hz
~
: 2400 W Max.
: II
: IPX4
: 6 m.
: 11,5 kg / 7 kg
: 10 Year
