Cypress CM-393 Kullanım Kılavuzu - Sayfa 3
Medya Dönüştürücü Cypress CM-393 için çevrimiçi göz atın veya pdf Kullanım Kılavuzu indirin. Cypress CM-393 7 sayfaları. Cypress scart/video to hdmi scaler box

(4). Operation Controls and Functions:
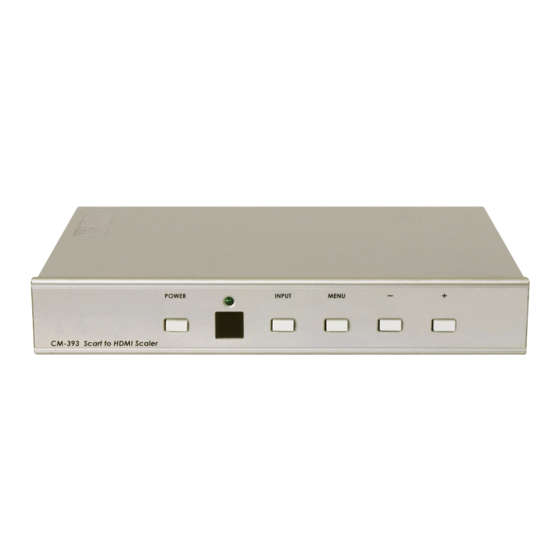
Front Panel
1. Power button and LED indicator:
Press the button once to power on the unit, Press again to power off (Standby).
when the unit is powered on, the LED illuminates in green. When the unit is in
standby the LED illuminates in RED. To complete power off the unit disconnect
the power cable from the power plug on the back of the unit.
2. Input select button:
Press the button repeatedly to select your desired input source by toggling
though 6 input sources.
Scart 1
Scart 2
The factory default input setting is scart 1.
The CM-393 has last memory capability to memorize the last input selected
before power down and to return to that input when power back on again.
3. IR Sensor: Infrared remote control sensor.
4. Menu/Enter: This button serves two purposes.
a. Press the button to enter OSD main control menu as shown in the "OSD Operation".
b. To act as a "enter" key to enter sub menu of your selected item.
5/6. +/- button: Press the button to move up or down the cursor to your
desired parameter. Or after a parameter is selected, Press the button to alter
the value of your selected parameter.
Rear Panel
1
1. DC power jack: 5V 2A DC power input.
2. SCART 1: Use a scart cable to connect the scart output of your source
equipment to this scart input.
The DC voltage on scart pin-16(fast blanking) from the source equipment will
decide whether output from source device is RGB Sync or composite.
In case if pin-16 is floating or pull high, the CM-394 will set to RGBS mode.
Otherwise it will be set to composite mode. The detection of pin-16
voltage from the source and therefore the signal format is carried out
automaticaly on CM-393.
3. SCART 2: Use a scart cable to connect the scart output of your 2nd scart
source to this scart input of the CM-393.
POWER
1
3
composite
S-video
2
3
INPUT
MENU
2
4
5
HDMI 1
CV
SV
Audio
Audio
In
In
4
5
7
8
6
2
6
HDMI 2
9
10
