Astrapool E35 Посібник з монтажу та експлуатації - Сторінка 7
Переглянути онлайн або завантажити pdf Посібник з монтажу та експлуатації для Системи фільтрації води Astrapool E35. Astrapool E35 10 сторінок. Salt chlorinator

- 1. Operating Instructions
- 2. Table of Contents
- 3. General Overview
- 4. Chlorinator Control Installation
- 5. Cell Installation
- 6. Pool Preparation
- 7. Programming
- 8. Chlorine Output
- 9. Setting the Right Chlorine Output and Filtration Time
- 10. Chlorinator Maintenance and Troubleshooting
- 11. Maintenance of Your Chlorinator
- 12. Troubleshooting
- 13. Warranty
Cell Maintenance
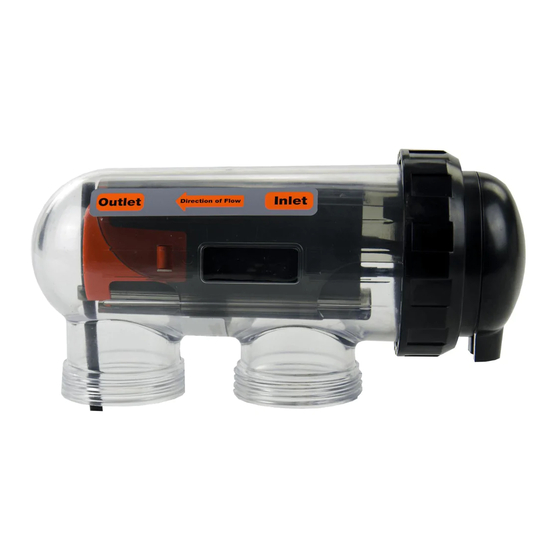
Your E-SERIES Chlorinator has an automatic cleaning feature that under normal conditions, will keep the cell plates clear of
deposits of salt and calcium.
E25 Series cells have a negative charge sensor that monitors the flow and salt levels of the water. This sensor is designed to
be fail safe. As it is negative charge deposits of calcium or other debris may be deposited on it and cause it to indicate a low
salt or no flow condition. Should a low salt condition be indicated, have your salt level checked at your local pool shop. If
the low salt condition persists, or a no flow condition is indicated when the supply pump is operating, you may need to
manually clean your chlorinator Cell.
Cell Cleaning Instructions:
Close applicable valves
-
-
Disconnect the Chlorinator from the Mains by removing the 3 pin plug
-
Disconnect the cell wires
Undo the barrel nuts connecting the cell to your filtration system
-
Turn the cell upside down (inlet and outlet on top) and fill the cell with a mix of 1 part Hydrochloric acid to 10
-
parts water and leave standing for a few minutes. As an alternative, you may use an approved commercial Cell
cleaning solution
Repeat if necessary and then rinse well in clean water
-
Re-install the cell ensuring o-rings are correctly located and barrel nuts are tightened to prevent leaks
-
Re-connect cell wires with wing nuts supplied making sure the blue wire is connected to the blue terminal.
-
Incorrect connection may damage your chlorinator control. Tighten wing-nuts to ensure the electrical
connection is sound
Return all valves to their normal positions, re connect power to the Chlorinator and turn on at power point.
-
WARNING: Follow safety instructions provided with the Hydrochloric acid or cleaning solution. When handling
Hydrochloric Acid, the use of eye protection, mask and gloves are highly recommended. Extreme caution should be
taken whenever handling Hydrochloric Acid or Cell Cleaning Solution.
MAINTENANCE OF YOUR CHRLORINATOR
Maintenance Schedule: Your new product incorporates moving parts and withstands high velocity water with
chemicals in it. Some of these parts will wear in the normal course of use and require regular checks and
maintenance. Performing these checks and maintenance will identify parts that have worn and require
repair/replacement before further serious damage is sustained. A small amount of regular care and attention to your
pool equipment will help ensure long life and trouble free performance.
To protect against extremes of temperature, your unit is vented to allow expensive electronics to cool.
Ants and some insects are often attracted to the warmer, dry environment inside the enclosure. We
recommend that, with power turned off, you spray a surface insecticide on the surfaces surrounding the
control to prevent ant and insect ingress. Repeat every three months or as necessary.
Timing
Fortnightly
Three Monthly
Six Monthly
Important note: Regular maintenance is important to ensure long life and trouble free performance of your pool
equipment. If unable to perform the maintenance yourself, contact your local AstralPool office who will arrange a trained
service technician to perform the maintenance for you.
INST 363 E Series Salt Chlorinator V05.17
Maintenance Check
Check cell for calcium build up
Check water chemistry
Check cable connections to cell
Check cell connections for leaks
Check for insects/ants
Check chlorine levels and pump operating
hours
Prevent insect ingress to controller
Service action (if required)
Soak electrode in mixture of 10 parts water
to 1 part acid. Use a soft brush only if
required
Balance pH in pool and adjust output of unit
to ensure satisfactory production of chlorine
Ensure no water contact is occurring with
pins
Isolate Pump, turn power off, clean and
grease O rings or replace if necessary
Spray a surface insecticide on the
surfaces around the unit to prevent ant and
insect ingress.
Adjust timer and output depending on
demand for current season.
Turn controller off, use an insect spray and
spray onto walls around controller. Do not
spay directly into unit.
7
