Drawmer 1976 Посібник оператора - Сторінка 8
Переглянути онлайн або завантажити pdf Посібник оператора для Комп'ютерне обладнання Drawmer 1976. Drawmer 1976 13 сторінок. Stereo 3 band saturation and width processor

Please note that the following procedure is only a guide. All audio is different, requiring numerous settings, however, this
should give a good staring point:
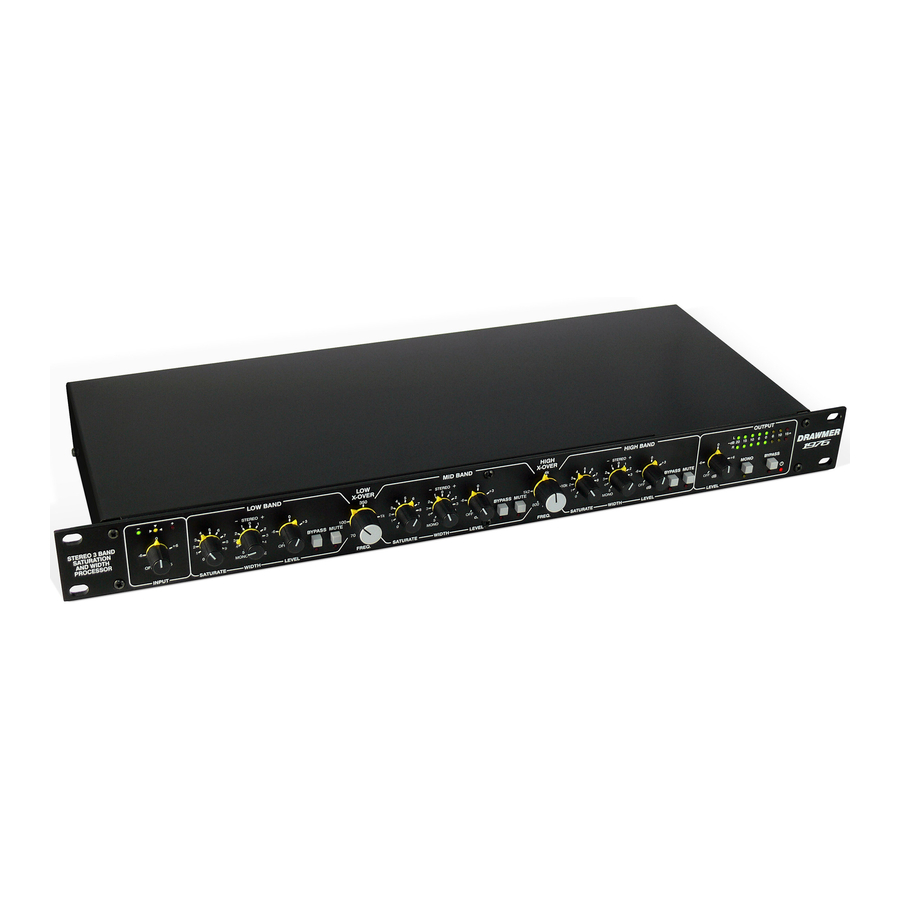
1) Set the front panel as shown in the diagram below: the Input vertical to 0dB, Set the controls to be the same
on all bands - Saturate fully counter-clockwise to 0, Width vertical at 0, and Level vertical at 0dB. Set the
Low X-Over to 70Hz and the High X-Over to 15kHz. Set the Output level vertical to 0dB. All switches
should be off.
2) Adjust on the Input knob so that the meter above reads the central, Yellow led for the majority of the signal. If
the green led is lit saturation will have a lesser effect on the signal and with red lit more saturation occurs but, in
addition, the level of each band is effected to a greater extent.
3) With the Low X-Over Frequency set fully counter-clockwise, and the High X-Over Frequency set fully clockwise,
listen to the audio and bring in the two knobs to the positions that you think the cross-over points should be set
- generally to separate the main bass and treble sounds from the mid-range. Using a combination of Mute and
Bypass switches for the various bands allows the operator to monitor only the frequencies that are required and so
tune the low, mid and high frequencies. (See 'Useful Frequencies' opposite)
4) Rotate the Saturate controls until the desired amount of saturation is hear for each band.
5) Because the saturation can have an affect on the gain, at this point it may be necessary to adjust the Level
control of each band to maintain a balance within your mix, emphasizing each band as you desire.
6) Whilst listening to the stereo mix adjust the Width control of each band until the desired stereo image is
achieved, rotating clockwise to widen the signal and anticlockwise to make it narrower.
7) Just like saturation Width can have an affect on the gain so at this point it may be necessary to adjust the Level
control of each band to maintain a balance within your mix.
8) Adjust the Output Level until the meter display reads the desired output level.
9) At this point the Output Bypass switch can be toggled to listen to the affect that the 1976 is having on the audio.
Adjust to suit.
10)As a final test of the audio, activated the Mono switch. This will outline what part of the signal is lost should it be
played in mono and emphasize when you have 'gone too far' with the width control. Adjust the width controls to
suit. Remember to deactivate the switch.
8
QUICK SETUP PROCEDURE
DRAWMER 1976 O
PERATOR'S
M
L
ANUA
