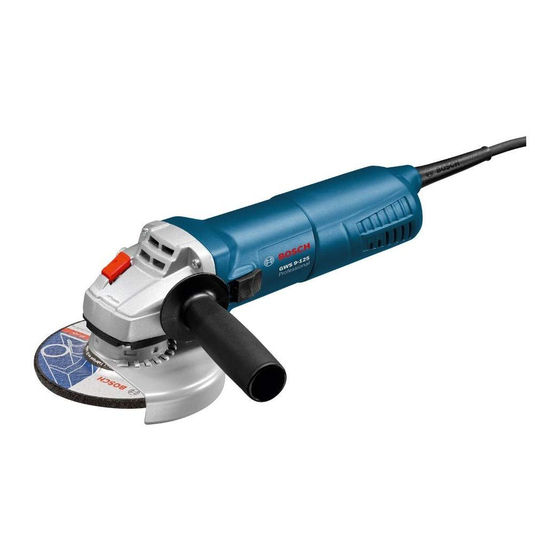
Bosch 7-115 Інструкція з експлуатації Посібник з експлуатації - Сторінка 5
Переглянути онлайн або завантажити pdf Інструкція з експлуатації Посібник з експлуатації для Електроінструмент Bosch 7-115. Bosch 7-115 7 сторінок.
Також для Bosch 7-115: Інструкція з експлуатації Посібник з експлуатації (30 сторінок), Інструкція з експлуатації Посібник з експлуатації (19 сторінок), Інструкція з експлуатації Посібник з експлуатації (43 сторінок), Оригінальна інструкція з експлуатації (13 сторінок)
Actuate the spindle locking button 1 only when the
grinder spindle is at a standstill!
Roughing/Cutting Disk
• Pay attention to the dimensions of the grinding disc. The
mounting hole diameter must fit the mounting flange 7
without play. Do not use reducer pieces or adapters.
When using a diamond cutting disk, take care that the direc-
tion of rotation arrow on the diamond cutting disk and the di-
rection of rotation of the machine (direction of rotation arrow
on the machine head) agree.
For mounting, see the illustration page.
Screw on the clamping nut 9 and tighten with the two-pin
spanner (see Section "Quick Clamping Nut").
After mounting the grinding tool and before
switching on, check that the grinding tool is cor-
rectly mounted and that it can turn freely.
Flap disc
Depending on the application, remove the blade guard 5
and mount the hand guard 12.
Place the special retainer flange 7 and the flap disc on the
grinder spindle 5. Screw on the clamping nut 9 and tighten
with the two-pin spanner.
Rubber Sanding Plate 13
Depending on the application, remove the blade guard 6
and mount the hand guard 12.
For mounting, see the illustration page.
Screw on the round nut 15 and tighten with the two-pin
spanner 11.
Cup Brush 16/Disc brush
Depending on the application, remove the blade guard 5
and mount the hand guard 12.
The grinding tool must be able to be screwed onto the grind-
ing spindle 4 until it rests firmly against the grinder spindle
flange at the end of the grinder spindle threads. Tighten with
an open-ended spanner.
Approved grinding tools
All grinding tools described in these operating instructions
can be used (roughing and cutting discs of synthetic resin-
bonded, fibre-reinforced material).
The permissible speed [rpm] or the circumferential speed
[m/s] of the grinding tools used must be at least in accor-
dance with the values given in the table.
Therefore, always observe the permissible rotational/
circumferential speed on the label of the grinding tool.
máx. [mm]
D
b
d
115
6
D
b
D
115
–
[mm]
d
[min
]
[m/s]
–1
22,2
11 000
80
–
11 000
80
Quick clamping nut
Instead of the clamping nut 9, the quick clamping nut 10
(accessory) can be used. Grinding tools can be mounted
without using tools.
17
10
1
11
1
Never loosen a tight quick clamping nut with pliers but
use a two-pin spanner. Insert the two-hole spanner as
shown in the illustration.
Initial operation
Observe correct mains voltage: The voltage of the power
source must agree with the voltage specified on the name-
plate of the machine. Equipment marked with 230 V can al-
so be connected to 220 V.
To start the machine, press the On/Off switch 2 forward.
To lock the On/Off switch 2, press it down in the front position.
To switch off the unit, release the On/Off switch 2 or press
the rear tip of it down.
Operating instructions
• Clamp the workpiece if it does not remainstationary
due to its own weight.
• Do not strain the machine so heavily that itcomes to
a standstill.
• Roughing and cutting discs become veryhot while
working; do not touch until theyhave cooled.
Rough Grinding
With an approach angle of 30° to 40°, the best
roughing results can be achieved. Move the ma-
chine back and forth with moderate pressure. In
this manner, the work piece will not become too hot, does
not discolour and no ridges are formed.
Never use a cutting disc for roughing.
Flap disc
With the flap disc (accessory), curved surfaces and profiles
(contour sanding) can be worked.
Flap discs have a considerably higher service life than
sanding sheets, lower noise level and lower sanding tem-
peratures.
(accessory)
The quick clamping nut 10
may be used only for roughing
and cutting discs.
Use only a flawless, undam-
aged quick clamping nut 10.
When screwing on, take care
that the side with printing does
not point to the grinding disc.
The arrow must point to the in-
dex mark 17.
Lock the grinder spindle with the
spindle locking button 1. Tighten
the quick clamping nut by force-
fully turning the grinding disc in
the clockwise direction.
A properly tightened undam-
aged, quick clamping nut can
be loosened by hand turning the
knurled ring in the counter-clock-
wise direction.
15