3M 3MRO401 Посібник з монтажу та експлуатації - Сторінка 6
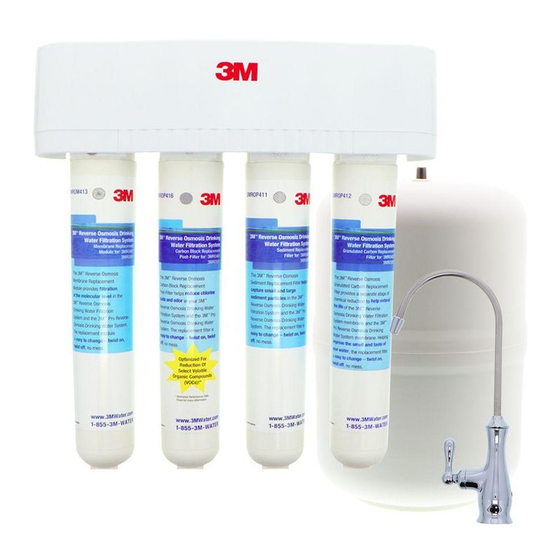
Переглянути онлайн або завантажити pdf Посібник з монтажу та експлуатації для Системи фільтрації води 3M 3MRO401. 3M 3MRO401 12 сторінок. Reverse osmosis drinking water filtration system
Також для 3M 3MRO401: Інструкція з монтажу та експлуатації для (12 сторінок)
Drilling hole through Porcelain/Enamel/Ceramic Sinks
If you are reading this section, professional installation is highly
recommended.
Recommended Tools:
•
Variable Speed Drill
•
Porcelain Cutter Tool Set (7/8" Size)
•
Plumber's Putty
Note: It is important to understand this procedure.
1. The glassy layer of porcelain/enamel/ceramic must be scored
through to the metal base, creating a disk.
2. This disk must be removed while protecting the surrounding deco-
rative coating against chipping or fracturing.
3. The base metal must be drilled through to complete the hole.
Procedure:
1. Mark center for 7/8" hole.
2. Form a dam of shallow putty around hole location and fill with
enough water to lubricate carbide drill bit.
3. Carefully drill pilot hole through porcelain/enamel/ceramic and base
metal using a carbide pilot drill bit. Always operate drill with light
pressure at slow speed (300 - 400 rpm).
4. Drill porcelain/enamel/ceramic using special 7/8" cutting tool,
making certain a complete ring has been cut through to the sink's
metal base.
5. Change to metal cutting drill bit and drill out the center of the ring,
making sure not to contact other rim of decorative coating. Cut
through metal sink base.
E. MOUNT THE FAUCET
Undercounter installations require a faucet with a built-in air gap
such as the one included with the system.
Countertop
Undercounter Installation With An Air Gap Faucet (Air Gap is provided
by hole 1" above faucet base):
1) Familiarize yourself with all of the components shown in the air gap
2) Slide the chrome base plate and rubber washer up the threaded
3) Connect the 1/4" green tubing supplied in the installation kit to the
4) From above the sink counter-top, feed the air gap tubing and the
5) From below the sink/countertop, install the slotted washer, plastic
6) After rechecking the faucet orientation, tighten the base nut until the
F. PREPARE THE SYSTEM FOR INSTALLATION
7 psi (48 kPa). Note: Check the storage tank air pre-charge. Adjust it if
necessary. To help keep the membrane as clean as possible, the RO
membrane cartridge has been shipped separately in a sealed plastic bag.
Faucet with Air Gap
Side View
Faucet washer
Escutcheon plate
Bottom washer
Slotted washer
Mounting spacer
Base nut
Threaded nipple
Hex nut
1/4" x 3/8" Tube Connector
Blue 3/8" Product
water tubing
6
faucet diagram. (See Fig. 2)
base of faucet.
smaller barb on the air gap faucet. Push it on firmly until it seats.
threaded nipple through the faucet washer, escutcheon plate and
bottom washer into the faucet mounting hole and position the
faucet spout over the sink.
spacer, base nut and hex nut onto the threaded nipple and tighten
it by hand.
faucet feels secure, then tighten the hex nut.
Check to see that the air charge in the empty tank is approximately
Back View
Air Gap hole
1/4" Standard
green tubing
Black 3/8" Reject
tubing to drain
1/4" x 3/8" Tube Connector
Fig. 2
Mounting spacer
Special red "SFC"
tube from RO
Blue 3/8" Product
water tubing connection