ELEKTRA KUP Інструкція з експлуатації - Сторінка 10
Переглянути онлайн або завантажити pdf Інструкція з експлуатації для Кавоварка ELEKTRA KUP. ELEKTRA KUP 19 сторінок. Professional espresso coffee machines
A
USE
1
SWITCHING ON THE APPLIANCE
The machine switches on by pressing the button marked with the symbol
working front of the same.
When the machine is switched on, it automatically loads water into the boiler and, only when
the boiler is full, does it switch on the heating, so as not to damage the heating elements.
The following alert is displayed:
" WAIT: MACHINE IS HEATING UP "
When the boiler has reached the working pressure, the alert change as the following:
" MACHINE READY "
Now is possible to make coffee.
2
NIGHT CYCLE
Through the setting of a time of day, the machine enters into a state of partial operation
during which the temperature in the boiler is kept at a very low temperature (40°C).
In this state buttons with automatic dosing are not enabled, only the manual dosing buttons
can be operated.
The following alert is displayed during the night cycle:
" MACHINE IN SLEEP MODE - NIGHT CYCLE "
When this period of time has elapsed, the machine resumes normal operation.
See the following paragraphs.
Such cycle, as it does not cool down the machine completely, allows less scale deposits to
accumulate in its hydraulic components and to save energy.
3
DISPLAY OF FUNDAMENTAL PARAMETERS
When "Enter" pushbutton is pressed, the following operating parameters are displayed for a
given time, one after the other:
-
TIME AND DATE
-
BOILER PRESSURE.
-
SET INCREASE (OR DECREASE) OF BREWING TEMPERATURE
-
WATER SUPPLY PRESSURE (WITH PUMP OFF)
-
BREWING PRESSURE (WITH PUMP ON)
-
NIGHT CYCLE START AND END TIME
4
OPERATING PARAMETERS SETTING
Pressing twice in quick succession the "ENTER" button" it allows to set the following
operating parameters:
- GROUP 1 COFFEE BREWING DOSES PROGRAMMING
- GROUP 2 COFFEE BREWING DOSES PROGRAMMING
- GROUP 3 COFFEE BREWING DOSES PROGRAMMING
- GROUP 1 COFFEE DOSES COPYING ON GROUPS 2 AND 3
- GROUP 1 CLEANING
18
- GROUP 2 CLEANING
- GROUP 3 CLEANING
placed on the
- NIGHT CYCLE SETUP
1) The main menu appear on the display, press any of the coffee buttons marked with the
"+" sign to scroll the menu to reach the desired topic.
2) Press the "ENTER" button to confirm the chosen option to scroll down the correspondent
menu or to activate the desired function.
3) Upon completing programming or consultation of the various topics, to quit the
programming options scroll the menu by the "+" button until the following signal is
displayed:
" TO QUIT PRESS "ENTER", TO REPEAT PRESS "+"
then, press the "ENTER" button: the machine automatically resumes full operation.
4.1
4.2
4.3
4.4
5
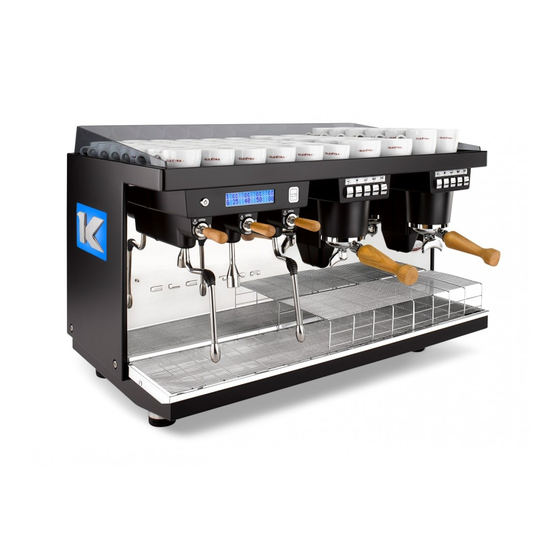
USE OF THE WORKING AREAS
The machine is divided into a coffee dispensing area on the right and a steam and hot
water dispensing area on the left.
It is thus possible to work with containers of up to 70 mm (2.76 inches) in height or up
to 130 mm (5.71 inches) in height, depending on the heights of the work counters used
(dispensing groups) and with containers of up to 150 mm (5.91 inches) in height (water
and steam wands).
Positioning the coffee grinder on the right of the machine speeds up the serving of
coffee, given its proximity to the dispensing groups.
This subdivision ensures that two operators can use the machine at the same time,
without obstructing one another-one serving teas and cappuccinos and the other serving
coffee.
Includes two independent grilles and a raised work counter for coffee area.
COFFEE DOSES SETTING
It allows to record the desired doses on each of the four push buttons
, for each group, by means of the two increasing pushbutton
"+" and decreasing pushbutton "-", and to store them by means of the "Enter" pushbutton.
GROUP 1 COFFEE DOSES COPYING ON GROUP 2 AND 3
It allows to copy the coffee doses of group 1 on group 2 and 3 in order to make the
programming of coffee doses of the whole machine faster.
GROUPS CLEANING
See chapter "B MAINTENANCE AND CLEANING ", paragraph 3.
NIGHT CYCLE SETUP
It allows to set ON or OFF the night cycle function.
19