4M Electric Dragster Інструкція з експлуатації - Сторінка 2
Переглянути онлайн або завантажити pdf Інструкція з експлуатації для Науково-освітні продукти 4M Electric Dragster. 4M Electric Dragster 2 сторінки.
D. ASSEMBLY
Follow these steps to assemble your Electric Dragster. Numbers refer to the diagrams.
1. Identify the motor housing and find the two small fins on it. These fins are at
the rear of the housing, on the upper side. The battery case fits onto the upper
side. Feed the wires from the battery case through the centre hole in the front
of the housing. Push the battery case onto the plastic pins on the housing and
secure the case with two screws.
2. Turn the motor housing over. Push the motor into the space in the centre
of the housing, so that the worm gear fits between the two short towers that
support the axle.
3. Now you need to connect the wires from the battery case to the wires from
the motor. There are two terminal holes on the outer edge of the housing next
to the holes that battery wires are fed through. Push the bare end of the red
wire from the motor and the bare end of the red wire from the battery case into
one of the terminal holes. Push in a terminal cap so that it traps both bare
wires. Repeat with the black wire from the motor and the black wire from the
battery case.
4. Rest the axle on the axle supports on the motor housing. The cog on the axle
should interlock with the worm gear on the motor.
5. Put the motor/axle cover over the motor and axle and secure it with two
screws.
6. Push a wheel onto each end of the long axle (the one with the cog on it). Now
turn the motor housing over so that the battery case is on top.
7. Find the two metal rods. Each one has a straight end and a bent end. Slide
the straight ends into the plastic sleeves on each side of the motor housing.
Twist the rods so that the bent ends are facing each other, and secure the rods
with screws through the holes under the motor housing.
8. Push a wheel onto each end of the short axle.
9
1
Battery case
Black wire
Red wire
Black wire
2
Red wire
4
Long axle
8
9. You may need help with this step as there are several parts to hold at once. Look at the two parts of the front axle
assembly. The one with two screw holes in it is the top half. The end with the screw holes faces the motor housing. Put
a screw in the central screw hole and secure the two halves together, trapping both the bent ends of the metal rods and
the short axle. Secure the rods with two more screws.
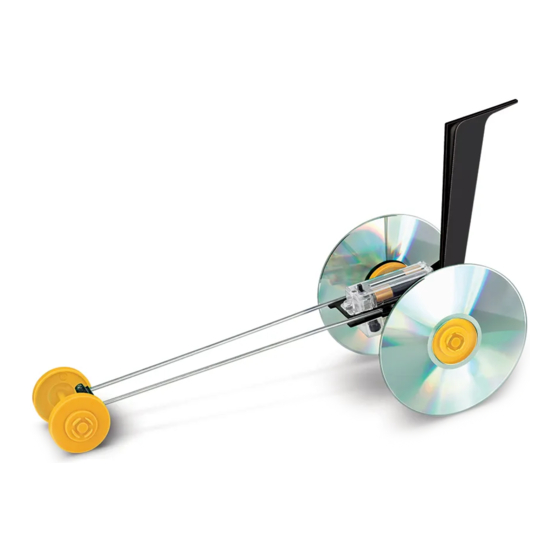
10. Push an old CD onto the outside of each wheel. The CDs should click into place.
11. Carefully push the base of the tail fin into the slot on the rear of the motor housing until it clicks in place.
12. Set the switch on the battery case to 'OFF'. Insert two 'AAA' 1.5 volt
batteries into the battery case. The negative terminal of each battery (the flat
end) goes against one of the springs in the battery case.
Congratulations! Your Electric Dragster is ready to go!
E. OPERATION
Place the Electric Dragster on the floor where there is plenty of space for it to
zoom along. Switch on the motor and watch it go!
Try marking out start and finish lines with string and timing your Dragster
along the course. Why not organise drag races with your friends?
Worm gear
7
3
12
1
11
6
4
2
10
5