Automated Logic DIAG485 Технічні інструкції - Сторінка 2
Переглянути онлайн або завантажити pdf Технічні інструкції для Системи управління Automated Logic DIAG485. Automated Logic DIAG485 3 сторінки.

Using the DIAG485
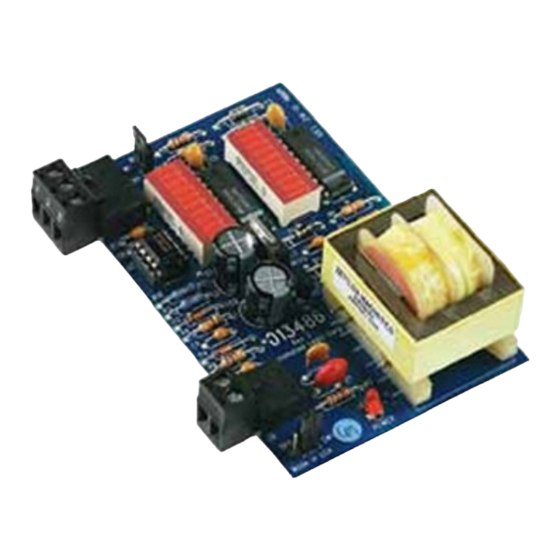
The DIAG485 (see Figure 1) is a diagnostic
board that shows the communication signal
levels on the network segment. The DIAG485
can also reduce the effects of noise on the
CMnet by adding bias.
Bias
Jumper
CMnet
Connection
+
-
Shield
Power
Connection
24VAC
Gnd
Off
On
Power Jumper
Figure 1. DIAG485
Specifications
Power 24VAC, 0.3A, 50-60Hz, 7.2VA
(Single Class 2 Source Only, 100VA or
less).
Temperature Range 0 to 130 °F (-17.8 to
54.4 °C).
Operating Humidity Range 10-90%
relative humidity, non-condensing.
Mounting
WARNING If equipment is used in a manner
not specified by the manufacturer, the
protection provided by the equipment may be
impaired.
Provide at least 1.5 inches (3.8 cm) of
clearance from each edge of the DIAG485 for
wiring.
1. Remove DIAG485 from the snap-track.
2. Mount the snap-track using self-drilling
screws. Drill directly into the plastic near
Revised 7/24/03 • DIAG485
4"
10.2 cm
2 1/2"
6.4 cm
the edges of the snap-track so that the
screws will be visible when the DIAG485
is installed. This prevents loose screws
from shorting out the back of the board.
3. Mount the DIAG485 on the snap-track by
pushing it firmly into the grooves.
Power Wiring
CAUTION The DIAG485 is a Class 2 device
(less than 30VAC, 100VA). Take appropriate
isolation measures when mounting it in a
control panel where non-Class 2 devices
(120VAC or greater) are present.
1. Make sure that the power source is off.
2. Connect the two power wires to the
connector labelled 24VAC on the
DIAG485.
3. Turn the power source on.
4. The LED labelled POWER should light
when the ON/OFF jumper is set to ON.
Communications Wiring
Two 120 Ohm terminators are included with
each DIAG485. These terminators should be
placed at each end of the segment to prevent
signal distortions (see Figure 2 on page 3).
1. Remove the DIAG485's power jumper or
place it in the off position.
2. Check the communication wiring for
shorts and grounds.
3. Connect the communication wires to the
CMnet port on the DIAG485. Be sure to
follow the same polarity as used
throughout the rest of the CMnet.
4. Replace the DIAG485's power jumper or
place it in the on position.
5. Verify communication with the network
by viewing module status reports on a
SuperVision workstation.
2
© 2003 Automated Logic Corporation
