Gainsborough H264 Інструкція - Сторінка 2
Переглянути онлайн або завантажити pdf Інструкція для Ліхтар Gainsborough H264. Gainsborough H264 4 сторінки. 200 led copper firefly solar lights
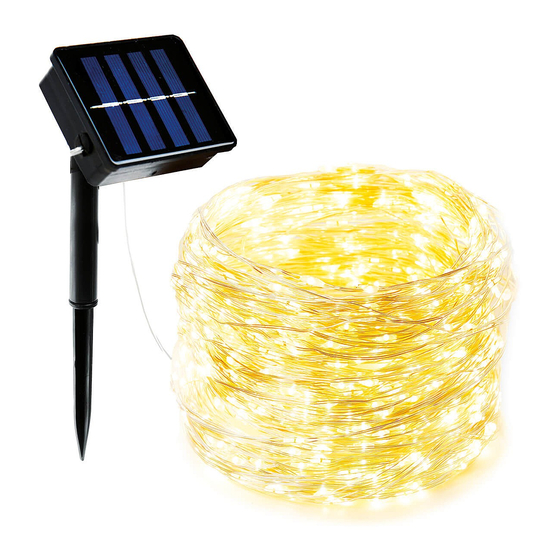
200 LED Copper Firefly Solar Lights
Please read and retain these instructions for future reference
OPERATION
•
Choose a location where the ground is soft.
•
Secure the solar panel to the tube; attach the spike to the
end of the tube.
•
Push the spike containing the solar panel securely into the
ground.
•
Adjust the angle of the solar panel so it directly faces the
sun.
•
Set switch (located on the back of solar case) to "ON"
position. Charge the solar product by placing it under direct
sunlight for at least 8 hours.
•
The light will work automatically. It will automatically charge under direct sunlight during the day time
and illuminate at night.
•
Multi function. Switch to "on" position and press MODE button to select light sequences : 1.
Combination 2. In wave 3. Sequential 4.Slow Glow 5.Chaser Flashing 6. Slow Fade 7. Twinkle Flashing
8. Steady On
NOTE: In order to verify that the switch is correctly in the "ON" position, cover the solar panel with your
hand and the light should turn on automatically.
•
• Test in the dark - the unit does not turn on during the day or when in lit areas.
•
• Arrange the chain lights as desired.
MAINTENANCE
•
Clean with a soft damp cloth.
•
Do NOT use abrasives or solvents.
•
Do NOT disassemble or attempt to repair the solar marker housing other than to replace the
rechargeable battery.
•
Clean regularly as a build up of dirt on the solar panel will reduce performance.
•
Make sure the switch is set to "ON" position.
•
Keep the solar panel clean.
•
If solar product does not light up after it has been used for around 8 – 12 months, replace the
rechargeable batteries as they may be weak or worn out. (Battery 1 pc "AA" 1.2v 800Mah, Ni-MH,
Rechargeable– Same equivalent type as recommended must be used).
Battery replacement:
Step1: Unscrew the battery compartment cover by using a Phillips head screwdriver (not included) .
Step2: Remove the exhausted battery and install 1x new AA rechargeable battery according to the +/-
polarity as beside image. Open the compartment carefully and ensure that welding wires inside the battery
terminals are not damaged.
Step3: Replace battery compartment cover, screw it back into position and make sure is properly sealed.
BATTERIES
Instructions for Use
H264
v002: 21/07/21