Copernicus DCS5 Посібник з монтажу - Сторінка 14
Переглянути онлайн або завантажити pdf Посібник з монтажу для Стелажі та підставки Copernicus DCS5. Copernicus DCS5 14 сторінок. Document camera stand
Також для Copernicus DCS5: Посібник з монтажу (13 сторінок)
Basic Usage Tips
1.
Position stand in lowest height
3.
Match the openings in the top arm with the
VGA outlet on your iPad®.
5.
For document camera function use the rear camera of your iPad .
7.
Launch camera app and adjust the Top Arm to the desired height by
depressing the valco clip and sliding the Adjustable Tube Assembly up/down.
Hold on to Top Arm during adjustment
to prevent any sudden drops
9.
By rotating the top arm 90 degrees, change between landscape and
portrait projection.
14
DCS5_DCS6 - Version A - Released September 7th, 2016 - Copernicus Educational Products Inc.
the Document Camera Stand - Tips For Use
®
Valco Clip
2.
®
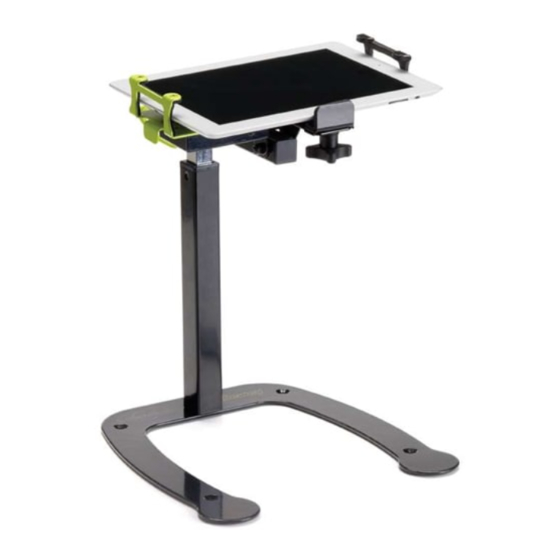
Place your iPad into the stand.
(See point 3 & 4)
If your case has a flip cover, make
sure it's open to the side.
4.
®
™
Place your iPad or iPad mini into the Top Arm.
Place one side first
Slide the moving part out
6.
®
Use Apple VGA Adapter to connect your iPad® to your projector.
8.
The Provided template helps locate your 8.5" x 11" paper without
looking through the camera. (Optional)
10.
By tilting down the top arm, switch between document camera and
tablet stand position.
Place your iPad® and let go
Use the provided VGA Strap to hold
your VGA Adapter in place and stop
it from being disconnected.
(please refer to step 5)