Adexa EC1N Інструкція з експлуатації - Сторінка 3
Переглянути онлайн або завантажити pdf Інструкція з експлуатації для Кухонна техніка Adexa EC1N. Adexa EC1N 8 сторінок. Electric crepe maker

Instruction Manual
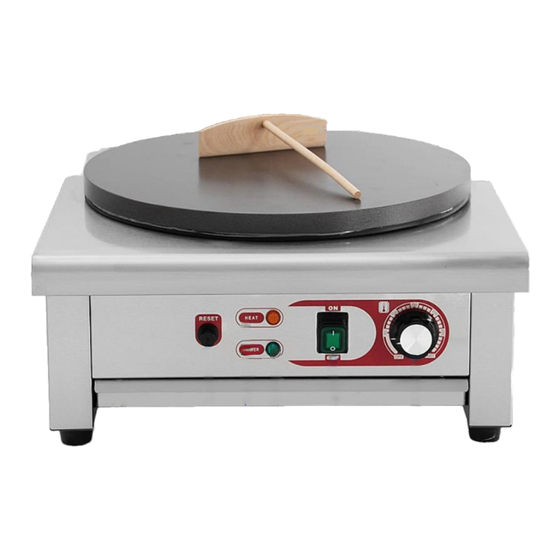
Mainly part
①
Thermostat:50-300C:Used to set or adjust the temperature of the cooking plate.
The numbers on the dial correspond with the grill plate temperature. The "0" position is off.
Reset Bottom(Over-temperature Device): The power would be cut off automatically once the
temperature over 350C
Power Indicator:This light indicates the power on.
Heat Indicator:This light indicates the element is heating. Once the set temperature has been reached the
light will go out.
Unit will continue to maintain heat and temperature with the light cycling. This is not a power indicator
light.
Drip Tray. A container that collects grease, oil and liquid from the bottom grill plate. This is removable for
draining and cleaning
On&Off Power Switch :Turn on the power ,the power indicator "Green Light" would be on
How to use it
1. Plug the power cord into the appropriate outlet.
2. Turn on the power switch .the green "Power" light will illuminate.
3. Set the desired temperature by turning the rotary temperature knob clockwise.
4. The heating element will begin to heat up and the yellow "Heating" light will illuminate.
5. When the temperature reaches the desired setting, the yellow "Heating" light will cycle on and off
with the heating element to maintain the set temperature.
6. *Pour a teaspoon of vegetable-based cooking oil onto the center of the griddle.
*Spread the oil evenly over the entire griddle surface
*Wipe the griddle after every two crepes.
* If the crepes begin sticking, spread a small amount of oil around the griddle.
*Use additional oil on the griddle in between crepes as needed
7. Turn temperature knob to the "Off" position to turn the yellow "Heating" light and heating element
off.
8. Turn off power switch ,the green "Power" light off.
⑤
② ③ ④
⑦
⑥
⑨
1. Drip Tray
⑧
2. Temperature Limiter
3. Heat Indicator
4. Power Indicator
5. On&Off Power Switch
(EC-1N without the device)
6. Thermostat
7. Rubber Feet
8. Heavy Duty Cast Iron Plate with
Teflon Coating
9. T-Spreader
2
