Jaggar Electric AFS-540LBS Посібник з монтажу та інструкція з експлуатації - Сторінка 5
Переглянути онлайн або завантажити pdf Посібник з монтажу та інструкція з експлуатації для Внутрішній камін Jaggar Electric AFS-540LBS. Jaggar Electric AFS-540LBS 8 сторінок.
1
900
4
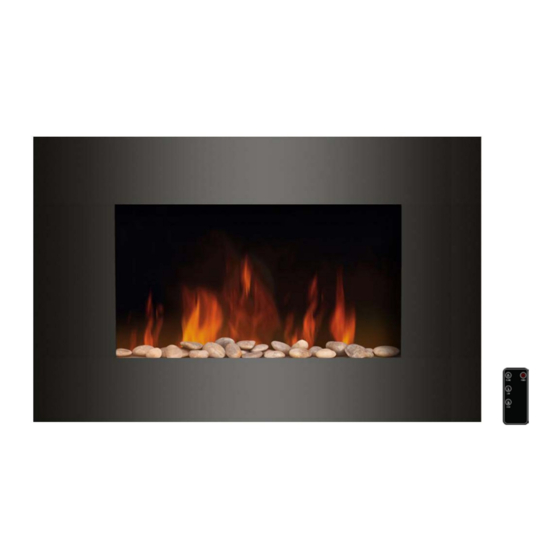
Wall Mounting Installation Option:
1.
Do not connect the heater to a power source until properly fixed to the wall and the
instructions are read fully.
2.
It is strongly recommended that this unit is attached to wall studs.
3.
Two people are recommended for wall mounting installation.
4.
Use caution while drilling holes.
5.
The minimum distances must be observed. This appliance is designed to be permanently
fixed to a wall at a minimum height of 23.5 inches from ceiling and floor. The wall bracket
must be fitted horizontally and the cable routed to the bottom right of the heater.
6.
Use the large wall bracket as a template and mark four drill positions on the wall. Make sure
that these holes are level and at the desired location.
7.
Put the wall bracket aside and drill 4 holes with a depth of 35mm using a 5/16" drill bit.
8.
Clean the holes from dust and insert one wall anchor into each hole. Make sure the edge of
the wall anchor is flush with the wall surface. NOTE: A wall anchor is not needed if the hole
is over a stud.
9.
Hold the large wall bracket in position and fix it to the wall with screws.
10. Attach the small wall bracket to the bottom of the appliance using the 2 short screws.
Make sure the screws are tight.
11. Carefully lift the appliance and hook it on the large wall bracket. Do not let the appliance go
until you are sure it is safely engaged to the wall bracket.
12. Now mark the hole position on the wall for the smaller wall bracket attached to the bottom of
the unit. Carefully remove the appliance from the large wall bracket and drill 2 holes for the
small wall bracket with a depth of 35 mm using a 5/16" drill bit.
13. Clean the holes from dust and insert one wall anchor in each of the 2 holes. Make sure the edge
2
5
plastic board
5
3
6