Garde 181ROTSLICE Посібник користувача - Сторінка 2
Переглянути онлайн або завантажити pdf Посібник користувача для Кухонна техніка Garde 181ROTSLICE. Garde 181ROTSLICE 5 сторінок. Rotary produce slicer
Please read and comply with the instructions listed on this document. To get the best service life and
performance from your machine, clean it thoroughly before and after each use by following the instructions
listed below. Minimize the use of alkaline cleaners as they may dull the finish and cause pitting.
Safety Instructions
Be careful when handling and operating the machine, as the blades are very sharp. Always keep your hands
away from the blades.
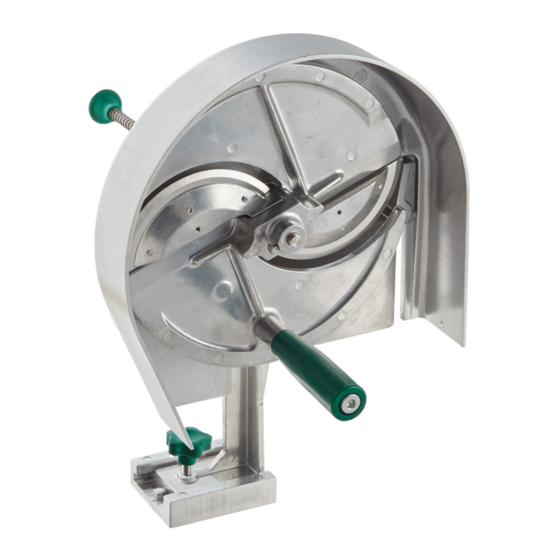
Mounting
1) Place the mounting base on the desired work surface and draw an outline of the mounting base.
2) Draw circles where the four holes of the mounting base are located then remove the mounting base from
the surface.
3) Drill ¼" (or slightly larger) holes in the work surface where the circles from the holes in the mounting base
were drawn.
4) Secure the mounting base to the work surface using the screws provided.
5) Attach the rotary slicer to the mounting base by sliding the base of the slider into the mounting base.
Twist the lock screw until the rotary slicer is firmly attached.
Adjust Slice Thickness
1) To remove the slicing assembly, turn the shaft lock to the left, and then pull the slicing assembly out of
the frame using the handle.
2) Hold the slicing assembly stationary and twist the adjusting screw located at the opposite end of the
slicing assembly (opposite the handle). Continue to twist until desired thickness is reached.
Operation
1) Check that slice thickness is set to the desired level.
2) Core, slice or cut any produce to prepare it for slicing. Make sure that the produce will fit in the trough.
3) Lift the cover plate and place produce in the trough in front of the push plate. Close the cover plate.
4) Gently push the produce towards the slicing assembly using the push plate handle, while simultaneously
rotating the slicing assembly handle.
5) For slice uniformity, rotate the slicing handle slower as slice thickness increases. This will ensure that
produce is fully advanced to the slicing plate before slicing with the next blade begins.
6) For ease of use, begin rotating the slicing assembly before advancing the produce through the trough.
This will provide a running start which will make producing the first slice easier.
USER MANUAL