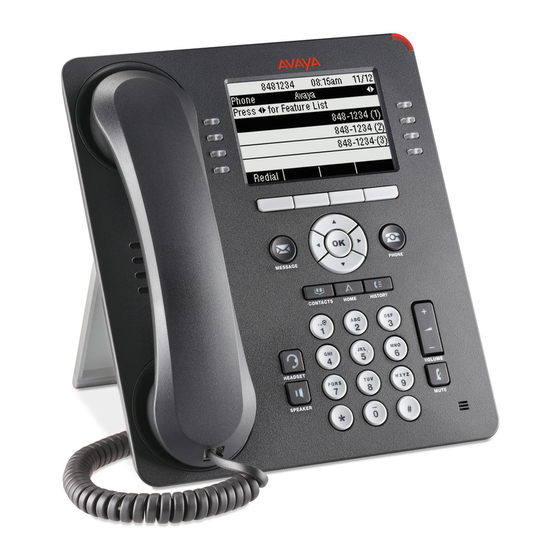
Avaya IP Office 9611 Посібник користувача - Сторінка 2
Переглянути онлайн або завантажити pdf Посібник користувача для IP-телефон Avaya IP Office 9611. Avaya IP Office 9611 11 сторінок. Duke farms
Також для Avaya IP Office 9611: Короткий довідник (5 сторінок), Посібник користувача (4 сторінок), Посібник користувача (2 сторінок), Короткий посібник (11 сторінок), Міні-мануал (8 сторінок)

Phone Features
1. From the Phone screen, scroll
For models with LEDs, the LED next to the feature name indicates if the
feature is currently on or off. If the light is on, the feature is on.
To return to the main Phone screen, press Phone or scroll
displays the System Numbers menu screen; scrolling
the Phone screen.
2. Scroll down to see the features that have been administered for your
extension.
The green LED next to the Feature button indicates if the feature is cur-
rently on or off. If the light is on, the feature is on. The red LED next to
the Feature button blinks while the feature label is displayed on the
screen.
Use this table as a cross-reference to some standard feature names with
the 9608/9611 abbreviations. Depending on how your system is adminis-
tered, not all features shown here may be available to you. For detailed
information about a feature, contact your system administrator. Features
can appear as part of the Features menu, on a softkey, or on an attached
button module, depending on how your deskphone or button module is
administered.
Feature Name
Automatic Dialing
Automatic Intercom
Call forwarding All Calls
Call Forwarding Busy/Don't
Answer
Park a Call
Call Pickup
EC500
EC500 Extended Calling
Send All Calls
to access the Features menu.
. Scrolling
again displays
Common Abbreviation
Phone number or extension
Auto Icom or AI
Cfwrdd or CFwrd
CFBDA or Ignore
Call Park
Call pickup
EC500
Extnd Call
SAC or Snd All
w w w . c o n s o l t e c h . c o m
Contacts
(You can store up to 250 name and telephone numbers)
Viewing Contacts Details
Press the Contacts button to display the Contacts screen.
Select the contact you want to view.
Press the [Details] softkey to view all information available for that contact.
Adding a New Contact
Press the Contacts button .
Press the New softkey.
Enter the name using the dialpad.
Pressing the "2" on your dialpad displays the letter "A." Pressing the 2 key again
replaces the A with a "B," pressing it again replaces the B with a "C" and pressing it again
replaces the C with a "2;" pressing it again re-displays the letter "A," and so on. Pause be-
fore entering the next character if the characters are on the same key.
If you want to remove a letter, number, space, or symbol that is in the middle
of the text you entered, use
move. Once your cursor is in the correct position, press Bksp to remove the character
Press the [More] softkey
letters or to enter numbers.
Press the [ABC] again to cycle through the options (Abc/123/abc/ABC)
Press the [More] softkey
your dialpad. Select the symbol you want to use. Press OK to select the symbol.
Press Clear to delete all text and start over.
Use the Navigation Arrows to scroll to the next field or press the corresponding Line
button to select the next field.
Enter the telephone number.
Press the [Save] softkey.
Editing a Contact
Press the Contacts button.
Select the contact entry you wish to edit.
Press the [More] softkey
Choose the field you want to edit.
Use the dialpad and softkeys to make changes to the contact information.
Press the [Save] softkey.
Deleting a Contact
Press the Contacts button.
Select the contact entry you wish to delete.
Press the [More] softkey
Press the [Delete] softkey again to confirm.
History
Viewing the History
Press the History button.
Use the
to view separate lists of your missed, answered, or outgoing calls
NOTE: You can scroll quickly to the top of the list by pressing Call Log again.
Viewing History Details
Press the History button.
Select the number you want to view.
Press the [Details] softkey.
Press the [Back] softkey to return to the list view.
Adding an Entry from the Call Log to your Contacts List
Press the History button.
Select the History entry you want to add to your Contacts list.
Press the [+Contact] softkey.
Edit name and telephone number, if necessary. Editing is same as above in Contacts
section
Press Save.
Removing an Entry from the History
From the History screen, select the entry you wish to delete.
Press the [More] softkey.
Press the [Delete] softkey
Press the [Delete] softkey again to confirm,
retain the entry.
Clearing all Entries from the History
From the History screen, select the entry you wish to delete.
Select the list you want to delete. (All Calls list, Outgoing Calls list etc.)
Press the [More] softkey.
Press the [Clear All] softkey to delete all of the entries in the list you are viewing.
Press the [Clear All] softkey again to confirm.
Call Directories
to place your cursor after the character you want to re-
Abc to change between upper and lower case
Symbols to enter characters that are not on
Edit .
Delete .
or
press the [Cancel] softkey if you wish to
