Garmin GPSMAP 8700 Інструкція з монтажу Посібник з монтажу - Сторінка 3
Переглянути онлайн або завантажити pdf Інструкція з монтажу Посібник з монтажу для Морська система GPS Garmin GPSMAP 8700. Garmin GPSMAP 8700 27 сторінок.
Також для Garmin GPSMAP 8700: Інструкція з монтажу Посібник з монтажу (6 сторінок), Інструкція з монтажу Посібник з монтажу (8 сторінок)
Mounting Considerations
This device should be mounted in a location that is not exposed to extreme temperatures or conditions. The
temperature range for this device is listed in the product specifications
exposure to temperatures exceeding the specified temperature range, in storage or operating conditions, may
cause device failure. Extreme-temperature-induced damage and related consequences are not covered by the
warranty.
• You must mount the device in a location where it will not be submerged.
• You must mount the device in a location with adequate ventilation where it will not be exposed to extreme
temperatures.
• You must mount the device at least 2.54 cm (1 in.) from cables and other potential sources of interference.
• You must mount the device in a location that allows room for the routing and connection of all cables.
Mounting the GPSMAP 8700 Black Box Device
If you are mounting the device in fiberglass, when drilling the pilot holes, use a countersink bit to drill a
clearance counterbore through only the top gel-coat layer. This will help to avoid cracking in the gel-coat layer
when the screws are tightened.
NOTE: Screws are included with the device, but they may not be suitable for the mounting surface.
Before you mount the device, you must select a mounting location, and determine what screws and other
mounting hardware are needed for the surface.
1 Place the black box device in the mounting location, and mark the location of the pilot holes.
2 Drill a pilot hole for one corner of the device.
3 Loosely fasten the device to the mounting surface with one corner, and examine the other three pilot-hole
marks.
4 Mark new pilot-hole locations if necessary, and remove the device from the mounting surface.
5 Drill the remaining pilot holes.
6 Secure the device to the mounting location.
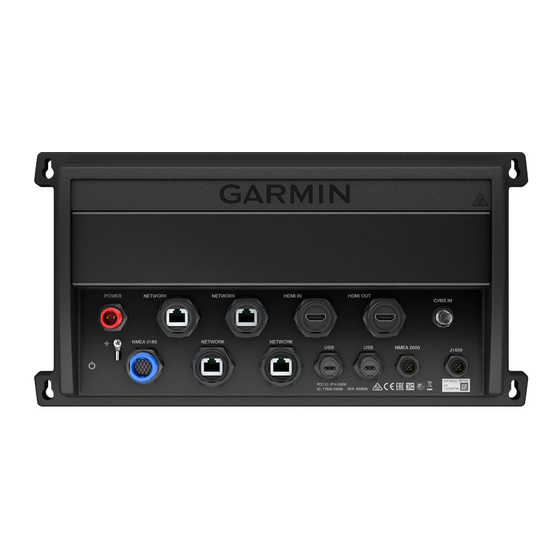
Connection Considerations
When connecting this device to power and to other Garmin devices, you should observe these considerations.
• The power and ground connections to the battery must be checked to make sure they are secured and
cannot become loose.
• The cables may be packaged without the locking rings installed. The cables should be routed before the
locking rings are installed.
• After installing a locking ring on a cable, you should make sure the ring is securely connected and the o-ring
is in place so the power or data connection remains secure.
NOTICE
(Specifications, page
NOTICE
18). Extended
3