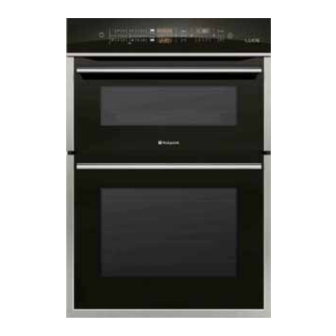
Indesit HOTPOINT LUCE DX1032CX Посібник з експлуатації - Сторінка 28
Переглянути онлайн або завантажити pdf Посібник з експлуатації для Духовка. Indesit HOTPOINT LUCE DX1032CX. Indesit HOTPOINT LUCE DX1032CX 39 сторінок. Built-in touch control electronic multifunction 60 cm double oven

Indesit
Company
FAULT CODES
FAULT
SUBCODE
01
02
03
F12
04
F13
01
F14
01
F16
01
F17
01
F18
01
F19
01
F20
01
F22
01
3/4
Service Manual UK
DESCRIPTION
Communication- MAIN
Communication - VISUAL
C o m m u n i c a t i o n
-
A L I G N M E N T W I T H M A I N
SETTING (ON BOARD SETTING
OK (CHKSUM OK))
C o m m u n i c a t i o n
-
A L I G N M E N T W I T H M A I N
SETTING + ON BOARD SETTING
CORRUPTED (CHKSUM KO))
F l o o r h e a t i n g e l e m e n t :
D I S C O N N E C T E D
INTERRUPTED / heating element
relay jammed / heating element
dispersing energy, master relay
jammed.
C i r c u l a r h e a t i n g e l e m e n t
D I S C O N N E C T E D
INTERRUPTED / heating element
relay jammed / heating element
dispersing energy, master relay
jammed.
S t e a m h e a t i n g e l e m e n t :
D I S C O N N E C T E D
INTERRUPTED / heating element
relay jammed / heating element
dispersing energy, master relay
jammed.
G r i l l 1 h e a t i n g e l e m e n t :
D I S C O N N E C T E D
INTERRUPTED / heating element
relay jammed / heating element
dispersing energy, master relay
jammed.
G r i l l 2 h e a t i n g e l e m e n t :
D I S C O N N E C T E D
INTERRUPTED / heating element
relay jammed / heating element
dispersing energy, master relay
jammed.
D i v i d e r h e a t i n g e l e m e n t :
D I S C O N N E C T E D
INTERRUPTED / heating element
relay jammed / heating element
dispersing energy, master relay
jammed.
C e i l i n g h e a t i n g e l e m e n t :
D I S C O N N E C T E D
INTERRUPTED / heating element
relay jammed / heating element
dispersing energy, master relay
jammed.
A heating element is dispersing
energy (not possible to indicate
which) or master relay jammed.
28 of 39
CHECKS
N O
1 Unplug, wait for 2 minutes, plug back in again and
test the appliance.
2 Reprogram the Main PCB.
3 Replace the Main PCB.
N O
4 Replace the Display PCB.
1 Check that the floor heating element is working
o r
properly.
2 Check connectors on component and board sides.
3 Check the state of cables.
4 Replace the Main PCB.
1 Check that the circular heating element is working
o r
properly.
2 Check connectors on component and board sides.
3 Check the state of cables.
4 Replace the Main PCB.
1 Check that the steam heating element is working
o r
properly.
2 Check connectors on component and board sides.
3 Check the state of cables.
4 Replace the Main PCB.
1 Check that the Grill 1 heating element is working
o r
properly.
2 Check connectors on component and board sides.
3 Check the state of cables.
4 Replace the Main PCB.
1 Check that the Grill 2 heating element is working
o r
properly.
2 Check connectors on component and board sides.
3 Check the state of cables.
4 Replace the Main PCB.
1 Check that the divider heating element is working
o r
properly.
2 Check connectors on component and board sides.
3 Check the state of cables.
4 Replace the Main PCB.
1 Check that the ceiling heating element is working
o r
properly.
2 Check connectors on component and board sides.
3 Check the state of cables.
4 Replace the Main PCB.
1 Check if any of the heating elements are dispersing
energy.
2 Replace the Main PCB.
English
