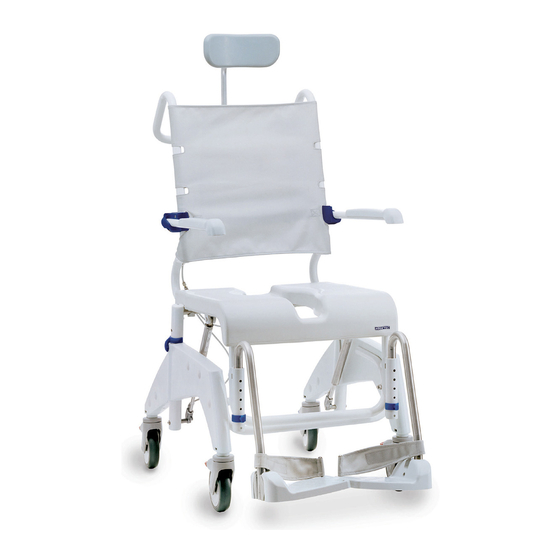
Aquatec OCEAN VIP Commode Інструкція з експлуатації Посібник з експлуатації - Сторінка 5
Переглянути онлайн або завантажити pdf Інструкція з експлуатації Посібник з експлуатації для Інвалідний візок Aquatec OCEAN VIP Commode. Aquatec OCEAN VIP Commode 10 сторінок. Commode

1.6
CE marking
The product complies with EU Directive 93/42/EEC for
medical equipment.
2
Safety instructions
2.1
Warnings and symbols
The following warnings and symbols are used in these
operating instructions:
CAUTION!
*
This notice indicates a potential hazard.
Not following these instructions can re-
sult in injury or damage.
Important!
This symbol indicates additional instructions,
information or tips.
2.2
General instructions
Lock the brakes in the parked position.
Only use the commode indoors and on even,
flat surfaces.
If you detect any malfunction, please contact
your authorised dealer immediately.
Do not modify or reconstruct the device.
Never carry out work on the pneumatic
springs. Please contact your authorised
dealer immediately if a pneumatic spring is
damaged or faulty.
Observe the information on the label. Do not
overload the commode.
* In the text, a picture illustrating the type of risk re-
places the asterisk.
EN
3
Description
3.1
Scope of delivery
The AQUATEC OCEAN VIP is supplied with the fol-
lowing parts (fig. 2):
1 Head support
2 Backrest with cover and armrests
3 Operating instructions (in plastic bag)
4 Screws (4 x) for backrest
5 Cable ties (2 x)
6 Allen key
7 Clips (2 x) for footrests (in plastic bag)
8 Footrests with heel loops (2 x)
9 Seat frame with seat plate and side sections with
casters
10 Clips (2 x) for height adjustment (inserted from the
inside)
3.2
Technical data
Dimensions
Width
Depth
Height (without head support)
Seat width
Seat depth
Seat height
Min. distance between floor
and holder for the sanitary pan
Weight
Load capacity
The label (fig. 1) provides important technical informa-
tion.
The label is attached to the inside of the right side sec-
tion.
4
Transport
You can easily disassemble the commode into its com-
ponent parts (section 3.1) for transport.
For detailed instructions on how to dismantle the de-
vice, please refer to section 5.
5
Setting up
Important!
●
Before setting up, inspect all parts for dam-
age during transport.
●
This section describes the assembly. Disas-
sembly is carried out in reverse order.
●
During assembly, make sure the parts are
positioned correctly in relation to each other
(fig. 2).
576 mm
1,058 mm
−
1,098
1,198 mm
500 mm
452 mm
500/550/600 mm
−
422
522 mm
approx. 21 kg
150 kg
11
