Cisco Cisco 7960 Посібник користувача - Сторінка 3

Переглянути онлайн або завантажити pdf Посібник користувача для IP-телефон Cisco Cisco 7960. Cisco Cisco 7960 3 сторінки. Ip phone & unity voicemail
Також для Cisco Cisco 7960: Посібник користувача (19 сторінок), Посібник користувача (12 сторінок), Індивідуальний посібник користувача (2 сторінок), Посібник (35 сторінок), Посібник користувача (15 сторінок), Посібник з встановлення та налаштування (10 сторінок), Посібник користувача (23 сторінок), Посібник користувача (14 сторінок), Довідковий посібник (2 сторінок), Короткий довідник (2 сторінок), Посібник користувача (28 сторінок), Посібник користувача (16 сторінок), Короткий посібник користувача (2 сторінок), Посібник користувача (9 сторінок), Довідковий посібник (4 сторінок), Посібник із швидкого старту (12 сторінок), Посібник (8 сторінок), Короткий довідник (12 сторінок), Посібник користувача (20 сторінок), Посібник користувача (14 сторінок), Короткий довідник (12 сторінок), Посібник адміністратора (10 сторінок), Посібник користувача (6 сторінок), Короткий посібник користувача (2 сторінок), Довідковий посібник (17 сторінок), Короткий посібник (2 сторінок), Короткий посібник користувача (2 сторінок), Посібник зі швидкого встановлення (1 сторінок), Посібник (21 сторінок), Посібник користувача (3 сторінок), Початок роботи (50 сторінок), Посібник із швидкого старту (6 сторінок), Посібник із швидкого старту (2 сторінок), Короткий довідник (2 сторінок), Посібник із швидкого старту (2 сторінок), Посібник для початківців (27 сторінок), Довідковий посібник (3 сторінок), Посібник користувача (12 сторінок), Посібник користувача (12 сторінок)
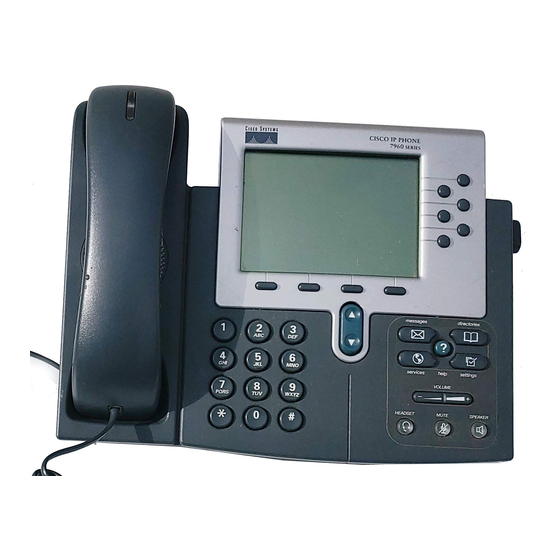
Cisco Cisco 7960 Посібник користувача
Corporate Directory List (Anyone with a v/m account)
1.
Press
Directories
2.
Press 5 on your keypad or use the
5 and press the
Select
3.
Scroll through the list to find the desired person
4.
Press the
Dial
or
Services
To use the Services button you must first login to start the
Services.
1.
Press the
Services
2.
Press the
Login
softkey
3.
For phone number type your 10-digit number
4.
Press the
Scroll
key to move down
5.
For E-mail password, enter your Portal password
(default is abcd – for a press 2, for b press 22)
6.
Press the
Submit
Services Available Include:
Speed Dials – User must log into the portal first.
Extension Mobility (Available at an extra fee)
IP Contact Center (Available at an extra fee)
Contacts Module
Check Stock Price
For more information on how to use these services, please
review the SingleLink™ Portal User Guide
"i" Information Button
Press the
?
button and then any other button to gain
information on how to use the button or key.
Ringer Volume Settings
Press the
Volume
level.
Press the
Settings
Speaker Volume Setting
Press the
Speaker
Press the
Volume
Press the
Settings
Handset Volume Setting
Pick up the handset.
Press the
Volume
Press the
Settings
Headset Volume Setting
Put headset on.
Press the
Volume
Press the
Settings
Contrast
Press the
Settings
SL10020 (01) 2008
button
Scroll
key down to
softkey
EditDial
softkey as appropriate.
button
softkey
up and down arrows to desired
button and then the
Save
button.
up or down button to desired level.
button and the
Save
softkey.
up or down button to desired level.
and
Save
softkey.
up or down arrow to desired level.
button and
Save
softkey.
button
Ring Type
If you are in a
Settings) and you loose your place; simply lift your handset to
return to your main display.
NEED HELP?
For questions about your IP phone please visit
our
http://portal.singlelink.com
on the FAQ link.
To report a problem, please dial Enventis
Support at 888-258-5986 or 763-577-3963
softkey.
Page 3 of 3
Cisco IP Phone 7940/7960 User Guide
Press 1 on your keypad, or use the
highlight Contrast and press the
Use the
Up
and
Down
softkeys to change contrast,
then OK, then Save.
Press the
Settings
button.
Press 2 for Ring Type or arrow down to Ring type
Use the
Scroll
key to select a ring type. Press
hear a sample.
With new ring type selected, press
Feature Menu
(Directories, Services or
Scroll
key to
Select
softkey.
Play
to
Select,
then
OK.
- login and click