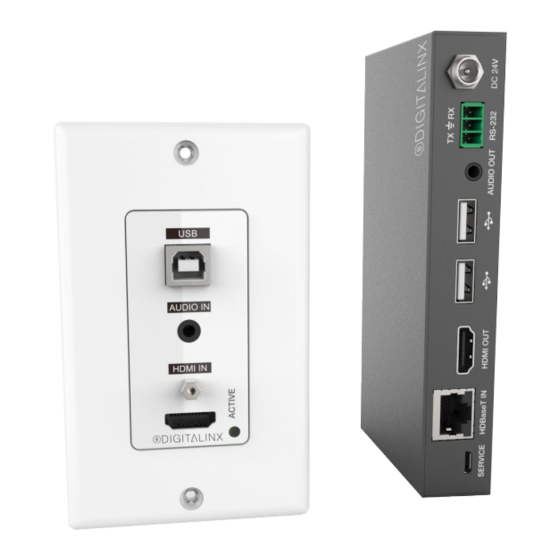
DigitaLinx DL-1H1A1U-WPKT-W Посібник з інсталяції - Сторінка 5
Переглянути онлайн або завантажити pdf Посібник з інсталяції для Подовжувач DigitaLinx DL-1H1A1U-WPKT-W. DigitaLinx DL-1H1A1U-WPKT-W 8 сторінок.

DL-1H1A1U-WPKT-W Install Guide
Connectivity Instructions
1. Verify all components included with the extender set are present before installation.
2. If the extenders are going to be permanently mounted to a surface, attach the
included mounting brackets with the supplied screws.
3. Turn off power and disconnect the audio/video equipment by following the
manufacturer's instructions.
4. Connect Category 6 or greater twisted pair cable with RJ45 connectors between the
transmitter (DL-1H1A1U-WPKT-W-TX) and the receiver (DL-H1A1U-WPKT-W-RX). TIA/
EIA-568B straight-through wiring connections must be used with all HDBaseT extenders.
5. Connect an HDMI cable and any desired control accessories between the display and
the receiver (DL-H1A1U-WPKT-W-RX).
6. Connect an HDMI cable and any desired control accessories between the source and
the transmitter (DL-1H1A1U-WPKT-W-TX).
7. Connect a computer USB port to the transmitter (DL-1H1A1U-WPKT-W-TX) USB host
port.
8. Connected USB peripherals such as white-boards and USB cameras the to USB client
ports of the receiver (DL-1H1A1U-WPKT-W-RX) USB ports.
9. Connect the included power supply to the DL-1H1A1U-WPKT-W receiver and lock
the power supply to the power connector by twisting the locking collar clockwise.
10. Power on attached audio/video devices.
5
