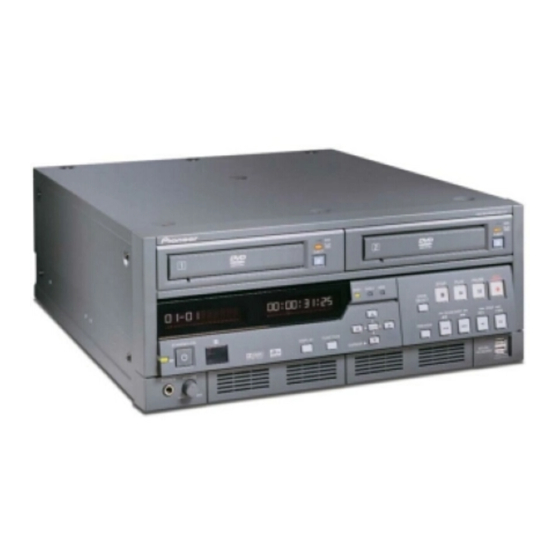
Pioneer PRV-LX1 Інструкція з експлуатації Посібник з експлуатації - Сторінка 27

Переглянути онлайн або завантажити pdf Інструкція з експлуатації Посібник з експлуатації для DVD-плеєр Pioneer PRV-LX1. Pioneer PRV-LX1 38 сторінок. Dvd-video recorder
Також для Pioneer PRV-LX1: Інформаційний бюлетень про продукцію (5 сторінок), Швидкий старт (5 сторінок), Додатковий посібник (1 сторінок), Посібник з командного протоколу (20 сторінок), Посібник з протоколу (14 сторінок), Редагувати список рішень (6 сторінок), Посібник з програмного забезпечення (24 сторінок), Обслуговування (5 сторінок), Інформаційний бюлетень про продукцію (6 сторінок), Посібник з оновлення (2 сторінок), Оновлення системи (10 сторінок), Оновлення системи (10 сторінок), Навчальний посібник (38 сторінок), Посібник (38 сторінок)

Pioneer PRV-LX1 Інструкція з експлуатації Посібник з експлуатації
8.3

Prepare The Custom Menu For Transfer to the PRV-LX1

Once all modifications have been applied to the preview screens, convert the Photoshop
file to a custom menu for the PRV-LX1.
7.
Click on OK to store the menu files in your custom menu folder.
8.
Copy the custom menu folder to recordable media (CD-R, CD-RW, DVD-R. DVD-
RW).
The entire folder must be copied rather than individual files in the folder. The
folder name appears as a selectable Menu name in the PRV-LX1.
Folder with Menu Files
The folder name, Sample01, becomes the menu name when imported in to the PRV-LX1.
9.0
I
Y
MPORT
OUR
Follow the steps below to import your custom menu in to the PRV-LX1 using a disc. You
may also import the folder from a connected PC using FTP to your PRV-LX1. Refer to
the PRV-LX1 operating instructions (Importing Image Data) to import the menu via FTP.
1) Insert the CD containing the custom menu folder in to the recorder's drive.
2) Press the Function button on the front of the PRV-LX1.
C
M
USTOM
ENU
If the unit has two drives, either drive may be used.
Page 27 of 38
Menu Maker Helper