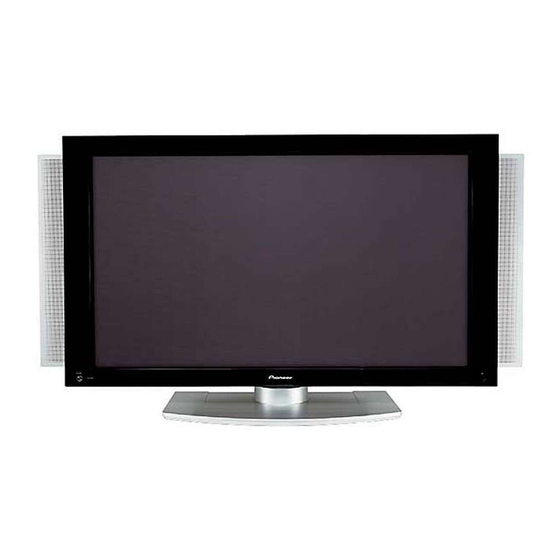
Pioneer Elite PureVision PRO 1110HD Брошура та технічні характеристики - Сторінка 3
Переглянути онлайн або завантажити pdf Брошура та технічні характеристики для Монітор Pioneer Elite PureVision PRO 1110HD. Pioneer Elite PureVision PRO 1110HD 4 сторінки. Plasma display system
Також для Pioneer Elite PureVision PRO 1110HD: Посібник (12 сторінок), Базова експлуатація та усунення несправностей (12 сторінок)
The PRO-1110HD, like other high-end plasmas TVs,
uses a separate media center for switching and signal pro-
cessing, but it is also the first plasma I've seen that comes with
a built-in over-the-air ATSC high-definition tuner. This set
was also my first encounter with what will someday become
the ubiquitous HDMI connector. This new interface provid-
ed a number of challenges. To begin with, I had to find a
cable with a male DVI-D connector on one end and a male
HDMI connector on the other—currently, not an easy feat,
though I eventually did get one from the folks at Meridian.
The media center (PRO-RO4U) is sold with the panel,
stand, and speakers as part of the package. It uses a combi-
nation umbilical cable, with a DVI-D connector for video
and a second connector for audio, to connect the media cen-
ter to the display. The PRO-RO4U offers a full array of
input choices, but only four sets of inputs, meaning that
most of the inputs will be doing double or triple duty. You
may choose to connect a composite, S-video, component
video, or HDMI source to any of them, but you only have
the ability to switch among the four. (A fifth analog/RGB
computer input, on 15-pin D-sub connector with left and
right audio, can be accessed by the PC button on the remote
control.) Given the relatively small number of inputs, the
set's big saving grace is Pioneer's inclusion of two FireWire
ports (called i.LINK) on the back of the media center.
The Pioneer remote is a learning type, with backlit but-
tons that include direct access for the four inputs. All other
adjustments are made via the graphic user interface, with its
typical multilayered menus. Each input has its own memo-
ry, thank goodness.
The unit has the usual aspect-ratio controls (4:3, two
L
zooms, a progressive S
INEAR
sidebar option for 4:3. This last allows you to change the
standard gray sidebars to slightly-blown-up black-and-
white repeats of what's being displayed in the left and right
quarters of the picture (I'm not kidding). This looks really
weird and confusing, and I cannot imagine why anyone at
Pioneer seriously believed that a consumer would choose to
view a movie or program this way.
There are five picture modes (S
M
, G
, and U
); as with other sets, these have pre-
OVIE
AME
SER
set values, though each is adjustable. A word of caution: I
tried the M
mode and discovered that there is a built-in
OVIE
dynamic brightness level, not described in the owner's man-
ual, that cannot be adjusted; in other words, stick with U
settings to make adjustments for all inputs.
Plasmas are made up of three important parts. First is
the glass itself. This controls the native resolution (in this
case 1280x768), as well as the potential brightness and
color accuracy. The second part is the drive electronics.
These circuits energize the plasma glass and influence such
things as the number of available colors and shades of gray,
power consumption/heat, plus certain types of artifacts and
video noise. The third part is the signal processing.
With this model, Pioneer has greatly improved both its
drive electronics and its signal processing. The glass itself is
similar to previous generation, though, sans a phosphor
, and F
), plus a
TRETCH
ULL
, D
TANDARD
YNAMIC
SER
change, the reds appear redder to me. The drive electronics
now have 10-bit video processing, which means 1024 levels
for each red, green, and blue phosphor between black and
white and a palette of over a billion colors. False-contour-
ing is not visible at any reasonable viewing distance—to the
point where it is not an issue, even with movies with the
word "dark" in their titles (like Dark Man)!
This 50" screen requires only 363 watts to light. It is cool-
er and consumes less power than its competition and should
actually save a few bucks on your energy bill compared to
This Pioneer has the best built-in
scaler I have seen on HD plasma.
other makes. By the way, it also failed my hand-warmer test.
With this display, if you have cold hands, get gloves.
All fixed-panel displays must take native video sources
(and in many cases computer scan rates) and convert the
signals to the native matrix of the panel. Even if the glass
and drive electronics are excellent, poor scaling will make
non-native content look bad. How does this one do? Let the
adventure begin.
Using the Unit
I was excited to sample this unit because of my high
regard for Pioneer's previous models, and I was not disap-
pointed by its performance. Right out of the box, the set's
black was neutral, not green as is the case with many price-
leader plasmas (such as Gateway and others).
I began by trying out DVI-equipped sources (DVD play-
ers and satellite boxes) with my DVI-HDMI cable. This pre-
sented a challenge. There is no mention of HDMI in the
owner's manual (something I made Pioneer aware of and
that, I hope, will be corrected by the time this goes to print).
I hooked up one end of the cable to Input 1 and the other end
to my VOOM receiver, and...there was no picture. I called
,
Pioneer and was informed that there is a toggle "on" for
HDMI connection in the set's GUI; nevertheless, none
showed up on-screen. My Pioneer contact speculated that this
could be because of improper communication from the
source, so after turning the plasma panel and media center off
and on again (always a good first move with digital compo-
nents), I connected my new Sencore 403 signal generator,
equipped with DVI, to the set. Sure enough, the letters
"HDMI" appeared on the GUI. I pushed E
to enable HDMI. I discussed this with some folks at Pioneer,
and they agreed the default should be "HDMI on," not
"HDMI off." (As noted, this may be corrected by the time
you read this.)
Next I connected my over-the-air antenna (OTA) to the
DTV antenna input. I quickly discovered that the unit will
not decode QAM cable signals, and all over-the-air stations
must first be scanned in to be received. Both omissions are
disappointing for an integrated HDTV of this caliber. Once
and toggled
NTER
March/April 2004 ❘ www.theperfectvision.com