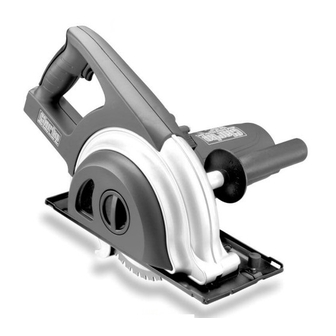
Clarke CT4014 Посібник з експлуатації - Сторінка 4
Переглянути онлайн або завантажити pdf Посібник з експлуатації для Пила. Clarke CT4014. Clarke CT4014 8 сторінок. Metal cutting circular saw

ADDITIONAL SAFETY RULES
FOR METAL CUTTING
CIRCULAR SAW
1. Do not use saw blades that are damaged or
deformed.
2. Use only saw blades recommended by the
manufacturer.
3. Select saw blades in relation to the material to
be cut.
4. Hold this saw firmly during operation.
5. Secure the workpiece firmly before operating.
6. Do not start the tool with a person in line with
the blade.
7. Allow cut off parts to cool before handling.
8. Do not move the machine backward until the
running blade has completely stopped.
9. When the chip compartment is completely full,
clean out when cool.
10. Do not use this tool in the presence of
flammable liquid, gasses and materials.
11. Do not use cooling oil.
12. Use the saw blade guard.
WARNING: Noise can be a health hazard. When
the noise level exceeds 85dB, be sure to wear ear
protection.
GETTING STARTED
Before operating your Metal Cutting Circular Saw ,
check the contents of the box to make sure you
have everything you will need.
Items included in the box:
1 Operating Manual
1 CT4014 Metal Cutting Circular Saw
1 Side Handle
1 Rip Cut Fence
1 Multi-Purpose Adjustment Wrench
1. Make sure the blade is securely in place.
Tighten any loose fasteners with the included
adjustment wrench.
2. Check the plug to make sure polarized feature is
in tact. The plug should fit into outlet only one
way. Do not attempt to circumvent this safety
feature
Once you have completed steps 1 and 2 of this
section you are ready to proceed.
INSTALLING THE SIDE
HANDLE
1. Insert the side handle into the left side of the
Metal Cutting Saw.
2. Tighten handle securely.
INSTALLING THE OPTIONAL
RIP CUT FENCE
1. Loosen the two wing nuts, one at front and
another at back.
2. Insert the rip cut fence into the base.
3. Tighten the two wing nuts, one at front and
another at back.
NOTE: This optional width bracket is for the ease of
controlling the width of cutting from the edge of the
workpiece.
3
FIGURE 1
