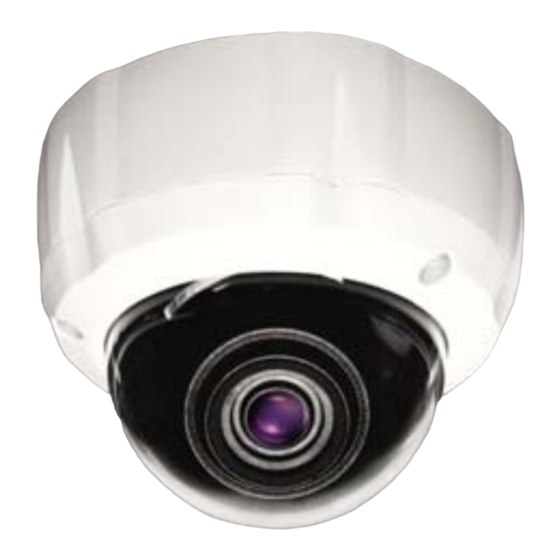
Divis CH 03204 Посібник
Переглянути онлайн або завантажити pdf Посібник для Камера спостереження Divis CH 03204. Divis CH 03204 2 сторінки. Day & night vandal dome camera
Також для Divis CH 03204: Інструкція (2 сторінок)

CH 03204
Day & Night Vandal DOME Camera
IP 65
!
C A U T I O N
RISK OF ELECTRIC SHOCK
DO NOT OPEN
CAUTION:
TO REDUCE THE RISK OF ELECTRIC SHOCK, DO NOT REMOVE
COVER OR BACK. NO USER SERVICEABLE PARTS INSIDE. REFER
SERVICING TO QUALIFIED SERVICE PERSONNEL.
!
To prevent fire or shock hazard, do not expose the unit to rain or moisture. The symbol is intended to alert
the user to the presence of important operating and maintenance (servicing) instructions in the literature
accompanying the appliance.
SA 1966
The symbol is intended to alert the user to the presence of uninsulated "dangerous voltage" within the
product's enclosure that may be sufficient magnitude to constitute a risk of electric shock to persons.
SA 1965
Installation & Connection
Installation
1. Place a camera to installation on
the wall / ceiling.
2. Drill three holes accordingly to insert
anchors into the drilled holes.
3. Draw out power /video wires to the
connecting places.
4. Fix the housing base by screws on
the ceiling.
5. Adjust desired focus and scene by
turning and moving the hemisphere
by hand.
6. Put the dome cover over the base.
7. Fix the dome cover on the base
using L-Wrench.
Connecting to Monitor and Power
- The wire is polarized.
- Use DC 12V power source.
#1
Video Output
Video
(Yellow)
GND
Power -DC12V
#2
(Black & Red )
No.
Function
Terminal Color
Remark
#1
Video Output
Y ellow
1.0 Vp-p
DC12V ±15%
#2
B & R
Power Input
All manuals and user guides at all-guides.com
-
axis
4
CAUTION:
To prevent electric shocks and risk of fire hazards,
DO NOT use other than specified power source.
P.C.D Ø115
Plastic Anchor
SCREW TP1 4x30 3EA
SCREW M4x20 3EA
L-Wrench
1
3
2
1
Function Selection Switch
2
Moving Selection Switch
[LEFT, RIGHT, UP, DOWN]
3
Service Monitor Connector:
Use service monitor
connector to set camera
angle & focus when installing
Caution
1. Do not attempt to disassemble the camera.
In order to prevent electric shock, do not remove screws or cover.
2. Handle the camera with care.
The camera could be damaged by improper handling or storage
3. Do not expose the camera to rain or moisture, or try to operate in wet
areas.
Take immediate action if the camera becomes wet. Turn the power off and
request service to qualified personnel. Moisture can damage the camera and
also create a risk of electric shock.
4. Do not use strong or abrasive detergents when cleaning the camera body.
Use a dry cloth to clean the camera when dirty. In case the dirt is hard to
remove, use a mild detergent and wipe gently.
5. Never point the camera toward the sun.
Whether the camera is used outdoor or not, never point it toward the sun. Use
with caution when operating the camera in the vicinity of spot lights or other
bright lights and light reflecting objects.
6. Do not operate the camera beyond its temperature, humidity, or power
source ratings.
Do not use the camera in an extreme environment where high temperature or
high humidity exists. Use the camera under conditions where temperatures are
o
o
o
between 14 F~122 F (-10 C~+50 C), and humidity is below 85%,
WARNING
This equipment has been tested and found to comply with the limits for a Class A. Digital
device. Pursuant to part 15 of the FCC Rules. These limits are designed to provide reasonable protection
against harmful interference when the equipment is operated in a commercial environment. This equipment
generates, uses, and can radiate radio frequency energy, and if not installed and used in accordance with
the instruction manual, it may cause harmful interference to radio communications. Operation of this
equipment in a residential area is likely to cause harmful interference in which case the user will be required
to correct the interference at own expense.
CAUTION
Any changes or modifications in construction of this device which are not expressly
approved by the party responsible for compliance could void the user's authority to operate the equipment.
Diagram
-
axis
4
Built-in
camera bracket will make
it much easier to rotate in any direction.
2
3
4
Composition
Mounting Screw
Owner's Manual
L-Wrench
o
1
Plastic Anchor
Dome Camera
Focus Driver
