dji Zenmuse X9 Посібник користувача - Сторінка 6
Переглянути онлайн або завантажити pdf Посібник користувача для Аксесуари для дронів та квадрокоптерів dji Zenmuse X9. dji Zenmuse X9 19 сторінок. M mount unit

EN
Disclaimer
Carefully read this entire document and all safe and lawful practices provided by DJI OSMO
before use. DJI OSMO accepts no liability for damage, injury, or any legal responsibility incurred
directly or indirectly from the use of this product.
DJI
TM
, ZENMUSE
TM
trademarks or registered trademarks of SZ DJI OSMO TECHNOLOGY CO., LTD. (abbreviated as
"DJI OSMO") and its affiliated companies. This product and document are copyrighted by DJI
OSMO with all rights reserved. No part of this product or document shall be reproduced in any
form without the prior written consent or authorization of DJI OSMO. This product and document
are copyrighted by DJI OSMO with all rights reserved. No part of this product or document shall be
reproduced in any form without the prior written consent or authorization of DJI.
Warnings
1. Install and remove the DJI Zenmuse X9 M Mount Unit in a dust-free environment.
2. DO NOT touch the camera sensor.
3. The M Mount lens adapter is a mechanical part with no pin connector. It does not support
communication between the lens and the camera.
4. For compatible lenses, see DJI Ronin 4D Lens Compatibility List.
Introduction
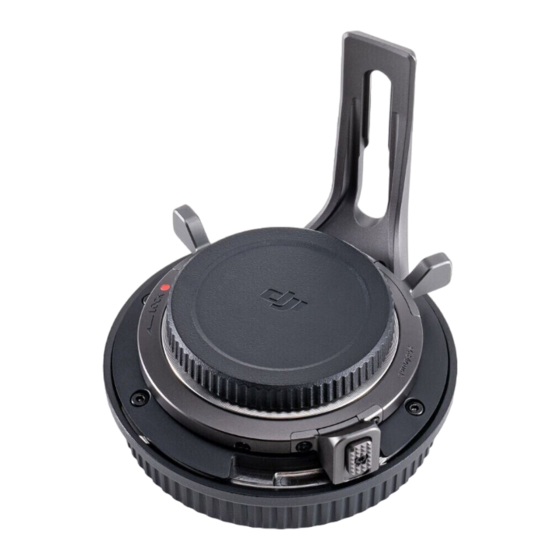
The DJI Zenmuse X9 M Mount Unit consists of the M Mount lens adapter, the M Mount body cap,
and the DX Mount lens cap. The M Mount lens adapter (hereinafter referred to as "the adapter") is
developed for adapting an M Mount lens to the Zenmuse X9 Gimbal Camera (hereinafter referred
to as "the camera"). The adapter also boasts a LiDAR Range Finder holder that makes it more
convenient to install the DJI LiDAR Range Finder. Note that the DJI Zenmuse X9 Focus Motor is
required for electronic focus control. The M Mount body cap (hereinafter referred to as "the front
cap") and the DX Mount lens cap (hereinafter referred to as "the rear cap") can be used to protect
the camera sensor and the lens respectively.
Installation
Make sure GIMBAL MODE on DJI Ronin 4D is toggled to OFF before installation.
1. Remove the DL Mount from the camera. (Figure A-1)
Press and hold the release button on the camera lever, rotate the lever counter-clockwise until it
is positioned left of the white mark, and remove the DL Mount.
2. Remove the rear cap. (Figure A-2)
Rotate and remove the rear cap off the M Mount unit.
3. Install the adapter with the front cap onto the camera. (Figure A-3)
Align the positioning notch on the adapter with the guiding pin on the camera and insert the
adapter in place. Rotate the camera lever clockwise until it is tight and secure.
4. Remove the front cap. (Figure A-4)
Toggle the lock on the adapter to the unlocked position. Rotate the adapter lever clockwise until
the red mark on the adapter aligns with the triangle mark on the front cap and remove the front
cap.
5. Install the lens. (Figure A-5)
Align the M Mount lens mounting mark to the corresponding red marks on the adapter and insert
the lens in place, turn the adapter lever counter-clockwise until tightened, and toggle the lock on
the adapter to the locked position.
Continue to install the DJI Ronin 4D X9 Focus Motor once the installation of the adapter and
lens is completed and adjust balancing. Refer to the DJI Ronin 4D X9 Focus Motor User
Guide and DJI Ronin 4D User Guide for more information.
Removal
Remove the lens
1. Toggle the adapter lock to the unlocked position. Rotate the adapter lever clockwise until the red
mark on the adapter aligns with the M Mount lens mounting mark and remove the lens. (Figure B-1)
2. Once the lens is removed, install the front cap to the adapter on the camera to protect the
camera sensor. (Figure B-2)
Remove the adapter and the lens
1. Press and hold the release button on the camera lever, rotate the lever counter-clockwise until it is
positioned left of the white mark, and remove the adapter and the lens together. (Figure C-1)
2. Install the rear cap to the adapter to protect the lens. (Figure C-2)
3. Install the DX Mount body cap of DJI Ronin 4D to the camera to protect the camera sensor. Align
the positioning notch on the cap to the guiding pin on the camera, insert the cap in place and
rotate the camera lever clockwise until it is tight and secure. (Figure C-3)
The DX Mount body cap (not included) comes with DJI Ronin 4D.
*
1
, and other products names and brands appearing in this document are
TM
