Daikin McQuay 910121754 Installation & Maintenance Data - Seite 11
Blättern Sie online oder laden Sie pdf Installation & Maintenance Data für Zubehör Daikin McQuay 910121754 herunter. Daikin McQuay 910121754 16 Seiten. Digitally adjustable display sensor for water source heat pumps smartsource gs series; smartsource gt series; with microtech iii controls enfinity cch series; enfinity ccw series; enfinity vfc series; enfinity vfw series; enfinity lvc series; enfinity lvw

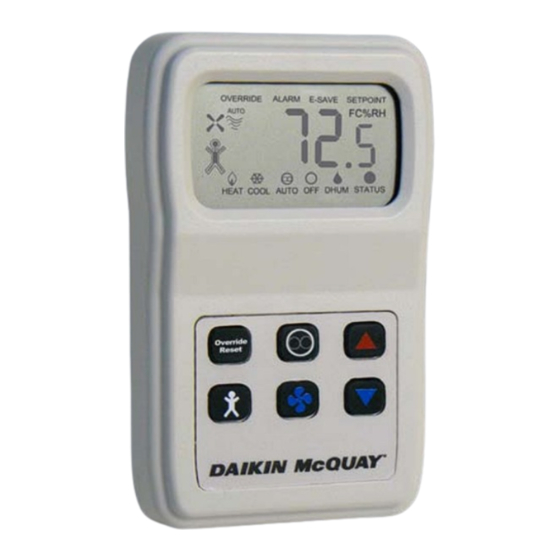
Front Panel Button Operation
Up & Down Setpoint Buttons
(Temp Or Humidity):
Press the Setpoint "Up/Down" Buttons once to enter the
Setpoint Adjustment Mode. View the display to see whether
the unit is in Temperature or Humidity Setpoint mode. If
needed, press the "System Mode" Button once to toggle to
the desired Setpoint. The current setpoint value will display
for 5 seconds. When the "Up/Down" Buttons are pressed in
this mode, the temperature or humidity setpoint will change
in one degree or percent (%) increments. It will only change
within the temperature setpoint range that was ordered (or the
setpoint range that was set via the Program Mode).
The humidity setpoint is always between 40% to 90%. After
5 seconds of no buttons being pushed, the sensor will go into
the standard display mode.
System Mode Button (FCU Has
Heat/Cool/Auto/Off) Or (WSHP Has
Heat/Cool/Auto/Off/Dhum):
When the "System" Button is pushed, the unit switches be-
tween system modes.
Fan Mode Button (FCU Has Auto/
High/Medium/Low/Off) (WSHP Has
Auto/On):
When the "Fan" Button is pushed, the fan speed changes in
order from one speed to another.
Optional Technician Adjustments
Note: The sensor setup is factory set per your order. Setup
adjustments are not required
The unit is shipped ready to install per the order and does
not require any special setup or programming. The following
Program Menu Changes are available if the installer decides
to change the factory settings. The Setpoint Up/Down Buttons
and System Mode Button are used in the Programming Mode
to make Menu changes and selection.
Set-Up Jumper (J50) Configuration:
(Factory Set Per Order)
CAUTION
Turn off power to the unit before reconfiguring the jumper set-
tings. Damage to the sensor board can occur if jumpers are
moved while there is power to the unit and sensor.
Figure 10: J50 Jumper (see
Figure 3 on page 5
for location)
Label Description Setting
PRG
Program Mode
or Run Mode
F/C
ºC Indication
or ºF Indication ºF = Jumper removed for ºF
MDL
Sets the Model
FCU or WSHP
Program Mode Menu Pages: (Display
Required)
Note: Both J50 "F/C" and J50 "MDL" jumpers must be
configured first before entering the program "PRG"
mode.
Entering Program Mode And Making
Changes:
1. Install the J50 "PRG" jumper onto both pins to enter
Program Mode.
2. Press the Up/Down Buttons to advance to the desired
program parameter from P1 through P14 (Parameters
described below).
3. Press the System Mode Button to select the specific
program parameter to change.
4. Change the parameter value as described in the Mode
Menus section below. (Usually with the Up/Down Button)
5. Press the System Mode Button again to set the selected
parameter.
6. Press the Up/Down Buttons to proceed to the next
parameter (as in Step 2 above).
7. When done making changes, remove the J50 "PRG"
jumper (and place over one pin). This action will end the
Programming Mode and store all the values. The sensor is
now in the Run Mode.
Program Mode Menu Pages:
P1
Setpoint Mode (Factory set to temperature value "S1".
J50 ºF/ºC must be set before entering the program
"PRG" mode).
• S1 – "UP/DOWN" to select setpoint to absolute
temperature setpoint value. Actual setpoint value set in
P4 and P5. Example: 55ºF (13º C) to 95ºF (35º C).
• S2 – "UP/DOWN" to select setpoint to relative
temperature setpoint value. Actual setpoint value set
in P4 and P5. Example: ±5.0ºF (±2.8ºC) or ±3.0ºF
(±1.6ºC) for Enfinity systems.
Program Mode = Jumper installed
for Program Mode (See Program
Menu below).
Run Mode = Jumper removed for
Run Mode (Place jumper on one
pin only).
ºC = Jumper installed for ºC .
Indication (Place jumper on one
pin only).
910113679 = Jumper removed for
FCU (Default for units ordered
as FCU).
910121754 = Jumper installed for
WSHP (Default for units ordered
as WSHP).
IM 1171-3 / Page 11 of 16
