Hidro-Water NEREO Handbuch für Benutzer und Installateure - Seite 4
Blättern Sie online oder laden Sie pdf Handbuch für Benutzer und Installateure für Medizinische Ausrüstung Hidro-Water NEREO herunter. Hidro-Water NEREO 13 Seiten.
4.- INSTALLATION
The system can be installed anywhere in the residence where there is a water input, a drain
for wastewater, a 220 – 240 V (only NEREO osmosis system with pump) socket within a metre and
sufficient space to be located. The most common place is under the kitchen sink. The installation
should be carried out by qualified personnel.
4.1.- Faucet installation (Figure-8)
a. Choose the location on the counter where you
want to install the faucet.
b. Use a drill with a 12mm bit to make a necessary
sized hole to put the faucet.
c. Fit the tap in the hole as indicated in the
image using a spanner (our reference: OI-
0207-128 not supplied with system) to adjust
it tightening the nut.
4.2.- Feed Adapter installation (Figure-13 & Figure-14)
The water supply input consists of two parts; a brass ball valve (Figure-14) and an adaptor
(Figure-13). The brass ball valve must be screwed to the adaptor using enough Teflon on its thread,
as shown in the image below.
a. Turn off the water supply at the point where you are installing the osmosis system.
b. The water supply input is designed to be used with hoses with a ⅜" connection. Insert the
water feed adapter with the brass ball valve between the cold water supply and the hose.
(Never install a hot water connection as the osmosis system will be damaged). Make sure that
the brass ball valve is closed.
Adapter
Connect to
water supply
Place Teflon
MA-EN-OSMOSIS NEREO-RO-0206-XX-PSM-21-V01.0
6
Connect 3/8 " Hose
Brass Ball Valve
Connect to the
Osmosis System
with 1/4 " Tube
4.3.- Drain clamp installation (Figure-12)
a. The drain clamp is designed to adjust the sealing
drainpipe to 1 ½".
b. The drain clamp should always be installed above the
U-bend (before it) and in the case of a horizontal drainpipe,
install it above (at the top). Do not install it near to the waste
outlet as it could clog the drainpipe.
c. Drill a 6mm hole in the drainpipe.
d. Align the clamp hole with the hole in the drainpipe and
carefully tighten the screws on the clamp until it is fixed into
place. Do not over tighten.
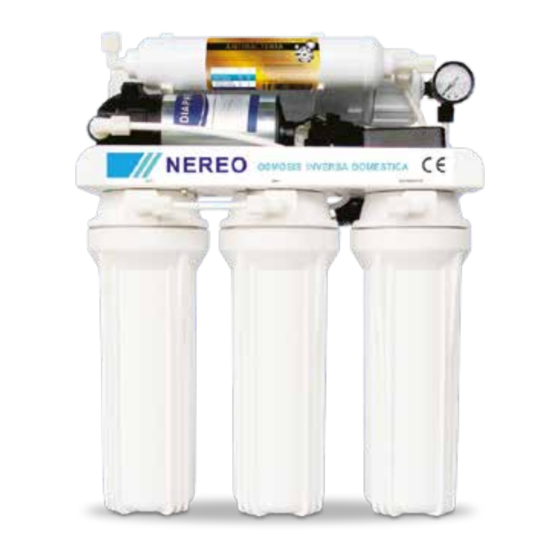
4.4.- Cartridge installation
a. The sediment (Figure-3), Carbon GAC (Figure-4) and Carbon CTO (Figure-5) cartridges be
taken out of the packaging and fitted in order as shown in the picture below to ensure a good
operation of the osmosis system.
NEREO
C
B
A
C
B
A
b. Screw in the housing filter carefully ensuring that the cartridges are centred so that they fit
correctly in the housing filter's adapter and cap.
c. Finish tightening the housing filters with the help of the wrench supplied with the
system (Figure-9).
MA-EN-OSMOSIS NEREO-RO-0206-XX-PSM-21-V01.0
NEREO WITH PUMP
C
B
A
C
B
A
7