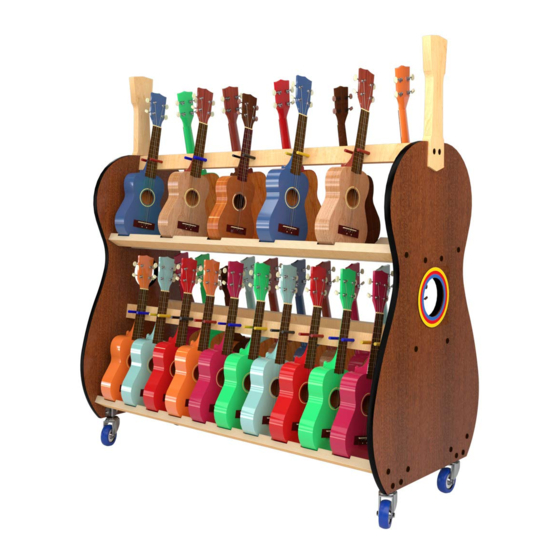
A&S CRAFTED PRODUCTS BAND ROOM BRUS18 Montageanleitung - Seite 2
Blättern Sie online oder laden Sie pdf Montageanleitung für Racks & Ständer A&S CRAFTED PRODUCTS BAND ROOM BRUS18 herunter. A&S CRAFTED PRODUCTS BAND ROOM BRUS18 2 Seiten. Soprano ukulele rack

3. Begin fastening one of the rails to one of the sides.
A. Holding the rail in position, remove one of the screws that you previously inserted.
Note the hole on the back side of the rail (Figure 3A).
B. Insert one of the barrel nuts into the hole on the back of the rail. The slot
should be visible and parallel with the length of the rail (Figure 3B).
C. Insert the tab portion of the rail end into the corresponding recess on the side panel
(Figure 3C-D).
D. Reinsert the screw and tighten it with a hex wrench so it is engaged in the barrel
nut (Figure 3C-D). Check to ensure that the rail tab is completely inserted into
the side panel recess.
4. Repeat steps 3A-3D for all the rails, connecting them all to the same side panel. Do not
Fig. 5
8. Attach the wheel brackets and wheels to the bottoms of the side panels.
The easiest way to do this is to rest the rack on its side (Figure 8).
A. The bracket goes on the inside of the panel, near the bottom rails. Line up the holes
in the bracket with the holes at the bottom of the side panel. The side panel should
rest on the little shelf of the bracket. The short hex screw goes into the holes from the bracket side, and
the nut goes into the holes from the outside of the panel. Use 2 hex wrenches to engage the screw in the nut. (Figure 8A)
B. Insert the stem of one of the wheels all the way into the bracket. (Figure 8B)
C. Repeat steps 8A-8B for the other 3 wheels.
9. Stand the unit upright on its wheels.
10. Install the vinyl sleeves and dowels. There are 4 colors of vinyl
sleeves that you can use for color coding, organizing, or to
provide students with choices. The vinyl sleeves cover the dowels,
and the dowels go into the holes on rails #1 and #3.
11. Remove the backing from the stickers and place them on the
outer side panels around the"sound hole" cutout (Figure 11).
A. The "sound hole" is slightly smaller than the center hole in the sticker, so
you should see a little bit of the side panel around the edges of the hole.
B. It might be helpful to fold back a portion of the backing, placing the
sticker in position, and then slowly removing the rest of the backing.
12. Insert the black ring into the "sound hole" from the same side you
applied the sticker. The ring should cover the edge of the sticker (Figure 12).
13. The long felt strips can be applied to the top surface of the #5 rails.
The felt pieces can be applied to the recessed surfaces of the #2 and #4 rails.
Enjoy your Ukulele Rack!
connect the other ends to the other side panel until all the rails
are connected at the same end to the same side panel (see step 5).
5. Stand the entire unit on end so the attached rail ends face the
floor and the unattached side panel sits on top of the rails
(Figure 5). It's a good idea to have someone help with this step.
6. At the unattached side panel (now on top), adjust the
tab ends of all the rails so they are completely inserted
into the side panel recesses.
7. Repeat steps 3A, 3B and 3D for all the rails.
ASCraftedProducts.com
Fig. 8
Fig. 8A
Fig. 11
267-626-6123
•
Back Side of Rail
Fig. 3A
Fig. 3B
Fig. 3C-D
Side
Panel
Back
Edge
Fig. 8B
Fig. 12
BRUS30/BRUS18 0517
©2017 A&S Crafted Products
