EasyPet EP-380R Benutzerhandbuch - Seite 5
Blättern Sie online oder laden Sie pdf Benutzerhandbuch für Haustierpflegeprodukt EasyPet EP-380R herunter. EasyPet EP-380R 19 Seiten. Easypet rechargeable multi-dog remote training system

Caution!
Always use the supplied power adaptor to charge the transmitter. Do
NOT charge the transmitter in an especially hot area. Do NOT leave charging
unattended or charge overnight!
If the battery status bar shows full bars ( i.e. 3 bars) and the transmitter is put on
charge, the background light will come up shortly when the charger pin is inserted,
but the battery status bar will not flash--this is normal as the battery is full and
transmitter will not take charge in this case.
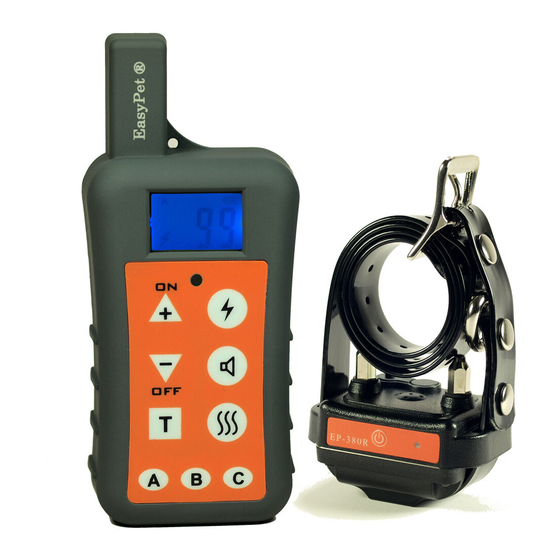
Transmitter Handset Buttons & Symbols Information:
Detailed Information on Symbols & Buttons:
Battery Status Bar: This indicates the capacity of the battery in the transmitter
handset ( i.e. the remote control). When transmitter handset is fully charged, it will
show three bars in full. As soon as the transmitter is used, it may drop to two bars,
this is normal. It will stay in two bars for very long time. The average battery usage
time for the transmitter handset is about one to two months before it needs a
recharge.
Dog Channel Indicator: The indicators are displayed on the top area of the LCD
screen in letter A, B or C. This indicates the current selected dog channel. Always
check the dog channel before sending out a command. If a wrong channel is selected
LCD Screen Info:
Battery Status Bar: Indicates the capacity of battery in the transmitter
Dog Channel Indicator (A, B or C): Indicates to which dog you are sending out
command(s)
Correction Level Indicator: Indicates the level setting of the current
correction mode
Correction Type Indicator: Indicates the current correction mode in symbols
Charger port: charger port is located at the bottom part of the transmitter
Buttons info:
1. ON button: hold down this button for 3 seconds to turn on transmitter
Or "+" button: Short press to increase the correction level setting
2. OFF button: hold down this button for 3 seconds to turn off transmitter
Or "–" button: Short press to decrease the correction level setting
3. T Button (Transmit button): Short press to send out a command of the
current correction mode to the selected dog channel
4. Dog Channel A: Short press to select Dog channel A (for Dog A)
5. Static pulse stimulation button: Short press to choose static pulse
stimulation mode
6. Warning tone button: Short press to choose warning tone mode
7. Vibration button: Short press to choose vibration mode
8: Dog channel C: short press to select dog channel C (for Dog C)
9. Dog channel B: short press to select dog channel B (for Dog B)
