EasyPet EP-380R Benutzerhandbuch - Seite 6
Blättern Sie online oder laden Sie pdf Benutzerhandbuch für Haustierpflegeprodukt EasyPet EP-380R herunter. EasyPet EP-380R 19 Seiten. Easypet rechargeable multi-dog remote training system

(sometimes accidentally), the collar receiver will not receive the command sent out
from the transmitter handset.
Correction Level Indicator: This indicates the level settings of the current correction
mode.
If it displays "– –" on the Correction Level Indicator (with no numbers), it means the
transmit function on the transmitter is disabled temporally: When in this "No
Transmit" mode, transmitter will NOT send out any commands even if T button
(transmit button) is pressed. This feature is to avoid the T button (transmit button)
to be pressed by accident during a walk or a training session while the transmitter is
turned on. To enter this "No Transmit" mode, simply press the current selected
correction mode button once - or press any other correction mode button twice. To
quit this "No Transmit" mode, simply press any correction mode button (button 5, 6
or 7 in the picture) once.
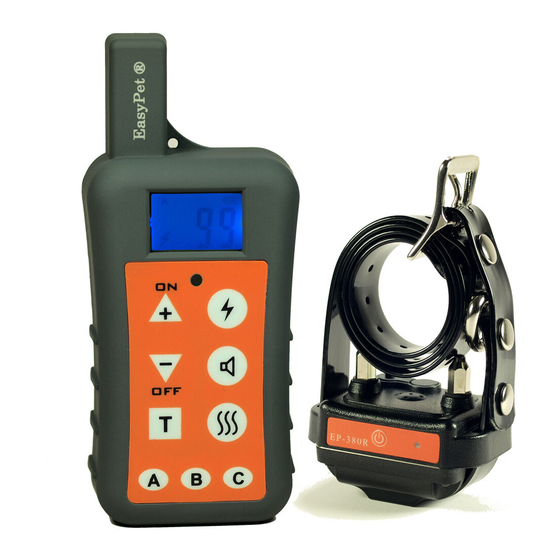
Correction Type Indicator: This indicates the current selected correction mode in
symbols (Lightening symbol for static pulse stimulation mode. Speaker symbol for
warning tone mode. Shaking symbol for vibration mode).
ON/OFF (+/–) Button(s): Press and hold down ON button for 3 seconds, this will turn
on the transmitter handset. Press and hold down the OFF button for 3 seconds, this
will turn off the transmitter handset.
When transmitter is ON, short press "+" or "–" button will adjust the correction level
setting on selected correction mode. When the correction level is at the lowest
setting (Level 1), short press "–" button once will change the level setting to the
highest level of the selected correction mode. When the correction level is at the
highest setting, short press "+" button once will change the level setting to the
lowest level (Level 1) of the selected correction mode.
T Button (Transmit Button): Short press this button will send out a command of the
current correction mode to the selected dog channel. The command is sent out as
soon as this button is released (but not pressed down). The green signal indicator
light on the transmitter handset will come up to indicate the command is being sent
out to the selected dog channel. This indicator light will stay on for about 2 seconds,
the transmitter handset will not take a new command during this period.
Correction Mode Buttons: These are buttons 5, 6 and 7 in the picture. Short press
any of these buttons will allow you to select the correction mode (static pulse
stimulation, warning tone, or vibration). You may short press on these buttons to
select the correction mode to be used and then press T button to send out the
command to the selected dog channel.
