Nikon P-FLA2 Anleitung Handbuch - Seite 43
Blättern Sie online oder laden Sie pdf Anleitung Handbuch für Kamera-Zubehör Nikon P-FLA2 herunter. Nikon P-FLA2 43 Seiten. Fluorescence attachment 2
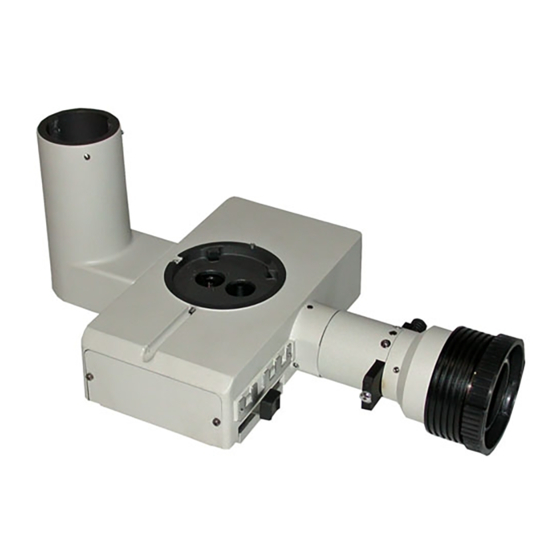
Fluorescence photomicrography or TV
5
observation
To take photos or to monitor fluorescence images, attach the fluorescent
attachment port P-FLAP or P-FLAP2 onto the port mount. And then,
attach the proper adapter and a photomicrographic device or high sensitive
TV camera. (Examples follow: The direct photo tube and the PL
projection lens are required for the photomicrographic device. The C-
mount direct TV adapter is required for the TV camera.) The P-IBSS
beam splitter S/S2 and P-IBSD beam splitter D/D2 cannot be used for this
purpose. Be careful.
When taking a photo or monitoring an image, move the optical path
switchover lever to the "PHOTO" position. The image passes the optical
path for the port. (Note that when the lever is set to the "PHOTO"
position, the image cannot be observed through the left eyepiece.) Please
refer to the instruction manual of the photomicrographic device or the TV
camera for details about the photomicrography or image monitoring.
For photomicrography
When using a fluorescent specimen, the florescence may fade during
exposure. To avoid this, use the high-sensitive film. Use "Tri-X
(ISO400)" for monochrome shots, and for color shots, use daylight-type
high-sensitive film, such as "Kodak Ektachrome 400 (ISO400)" or
"Fujichrome 400 (ISO400)".
For TV observation
When monitoring a sample using a high-sensitive TV camera, it is
sometimes best to insert an infrared (IR) cut filter in front of the camera
receptor. Experiment, and use the IR cut filter when needed.
Usage
III
E-23