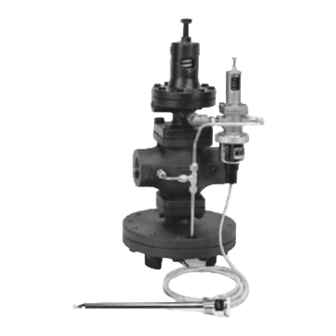
Armstrong OB 2000PT Anweisungen für Installation, Betrieb und Wartung - Seite 3
Blättern Sie online oder laden Sie pdf Anweisungen für Installation, Betrieb und Wartung für Kontrolleinheit Armstrong OB 2000PT herunter. Armstrong OB 2000PT 6 Seiten. Pressure/temperature regulating valve

2. Close inlet and outlet valves to OB 2000PT and
open bypass line to clean the system. Be sure to
close bypass line after cleaning the system.
During blow down, make sure that the
temperature does not rise higher than the limit of
the capillary unit, otherwise damage to capillary
may occur.
3. Loosen lock nut (16) on the temperature pilot and
turn the adjusting screw (15) and align the needle
with the required temperature position on the dial.
See Table 2-1. Note that the number on the dial
will give an approximate temperature value with
the corresponding temperature range.
4. Loosen lock nut (28) on the pressure pilot and
turn adjusting screw (27) counterclockwise
removing all tension from adjusting spring (24).
5. Open valve on outlet of OB 2000PT and also on
control pipe.
6. Open inlet valve to OB 2000PT – SLOWLY.
7. Turn the adjusting screw (27) on pressure pilot
valve clockwise until the heater output is 5°F
above the desired temperature setting. If
temperature adjustment in step 3 limits this
operation, adjust temperature pilot adjusting
screw accordingly. Make sure all valves between
the OB 2000PT and equipment are open and
equipment is calling for steam.
8. Turn adjusting screw (15) on temperature pilot
counterclockwise, lowering to the desired
temperature.
9. Allow system to stabilize and adjust temperature
accordingly.
10. Tighten lock nut (16) on the temperature pilot and
lock nut (28) on pressure pilot.
11. If adjustments are made at partial load the
temperature will sag under heavier loads. When
maximum load occurs increase pressure setting
enough to maintain desired temperature.
Note: Make sure the set pressure temperature does
not exceed the temperature limit of the capillary.
Capillary can withstand a maximum of 68°F above the
rated range.
Example – Capillary range of 131-201°F will
withstand temperature of 269°F.
E.
Maintenance Inspection
1. Troubleshooting Hints – many of the problems
that occur with pressure/temperature regulators
are due to dirt holding the main or pilot valve open.
Additionally make sure that the thermometer
sensing the fluid temperature is operating
correctly.
2. Check that the bellows follower was installed.
Disassembly
Before disassembly, make sure the inlet and outlet valves
to the regulator are closed and the pressure has been
relieved.
A.
Disassembly of Temperature Pilot Valve
(See Figure 4-1 on Page 4)
1. Loosen capillary ring union (22) and temperature
sensor bellows (35). Make sure not to lose
bellows follower (10).
2. Loosen lock nut (16) and turn adjusting screw (15)
counter clockwise (left), freeing up adjusting
spring (14).
3. Remove four hexagonal bolts (17) from the spring
housing (2) and remove adjusting spring (14).
4. Remove top bellows plate (6) and top seal bellows
(5).
5. Loosen the guide (7) and remove the bottom
bellows plate (8) and the bottom bellows seal (5)
from the bottom half of temperature pilot.
6. Remove pilot valve and stem (3).
7. For assembly procedure, follow reverse order.
B.
Disassembly of Pressure Pilot Valve
(See Figure 5-1 on Page 5)
1. Loosen the lock nut (28) and the adjusting
screw (27) counterclockwise (left) and turn
until the pressure is relieved from set point
adjusting spring (24).
2. Remove four hex head bolts and take out
adjusting spring (24), bottom spring plate (26), top
spring plate (25), and two pilot diaphragms (23).
3. Remove pilot valve assembly (17, 18, 19, 20, 21)
at the center of the pilot body (2).
4. Pilot body can be removed from main valve by
disconnecting fitting (30A) and removing four hex
bolts (38). Care should be taken when removing
pilot from main valve. The main valve is held by a
spring which is compressed.
C.
Disassembly of Main Valve
(See Figure 5-1 on page 5)
1. Disconnect the copper tubing on the side of the
valve (See Fittings 30A, 30B, 30C).
3
