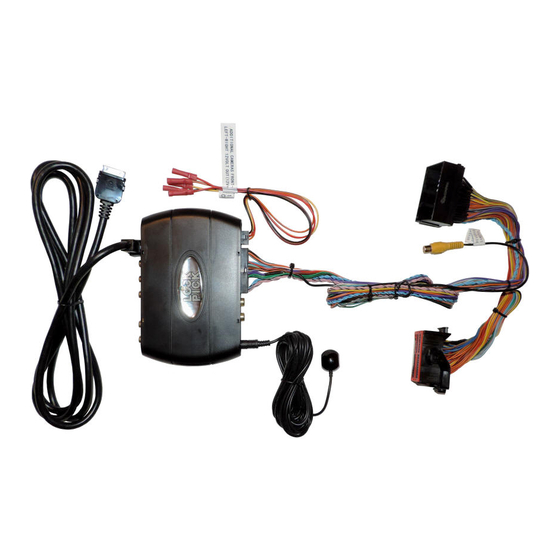
Coastal MYGIG LOCKPICK PRO Manual de instrucciones de instalación y funcionamiento - Página 6
Navegue en línea o descargue pdf Manual de instrucciones de instalación y funcionamiento para Accesorios para automóviles Coastal MYGIG LOCKPICK PRO. Coastal MYGIG LOCKPICK PRO 15 páginas. Adapter for chrysler/dodge/jeep

4.
On the back of a MYGIG radio may be additional
equipped, there will be a BLUE connection for the GPS antenna. A GPS antenna is necessary for
navigation equipped MYGIG radios to provide map and route guidance. If you did not receive one with
your new radio, they are available at your local Chrysler/Dodge/Jeep dealer or online from several
sources. GPS antennas can be installed directly on top of the radio or further back inside the dash as
long as there is not substantial metal blocking reception from above. Also, your radio may have a TAN
connector for attachment of a Sirius Radio antenna. The MYGIG radio is designed with an internal
Sirius satellite radio tuner built in so all you need is an antenna for satellite radio reception. If your
vehicle already had a separate Sirius tuner, it is not used or compatible with the MYGIG which already
contains one internally.
and Bluetooth Uconnect phone use will be active. Plug in a MYGIG microphone to the 10 pin connector
present on the rear of your MYGIG radio and place the microphone in a convenient location.
Microphones are available from your local dealer, or aftermarket solutions are available online.
5.
Plug in any multimedia video or audio desired at this time to your
RCA connections for Video and Audio inputs. Also labeled on your cable are standard RCA connections
for Video and Audio outputs.
6.
If your original radio was a navigation radio equipped with a rear view camera, your radio had a 3 pin
white connector plugged in.
off and replace it with an RCA connector to plug into the MYGIG camera input provided on the
multimedia harness. The center wire is video signal and the outside wires are ground and can be
connected together. If you would like to view your present camera while in DRIVE or other gears, the
included REVERSE CAMERA POWER output wire must be connected as the power source for your
camera. This 12V power output will turn on when the vehicle is placed in reverse and also when selected
by the user using the radio buttons. Currently, your factory camera is powered from the reverse taillight
source. This power is only present while you are in reverse.
If you choose not to connect the REVERSE CAMERA POWER wire provided by the Lockpick
harness to your factory rear camera, the rear camera view while backing up will continue working as
normal. However, because the rear camera will have no power in other gears, it cannot be activated by
the Lockpick and will display as a blank or flashing picture if activated manually while in Drive.
Installation of the REVERSE CAMERA POWER wire to enable factory camera operation in all
gears
is simply a matter of running a wire to the factory camera and connecting it in place of the original
power wire. Remove any panels covering the rear hatch in your vehicle. Then use a meter or indicator
lamp to determine the reverse power connection on the factory camera connector. Make sure you are
measuring directly on the connector at the camera location and not further back in a different location.
This wire will switch to 12V while the vehicle is in REVERSE and will be zero at other times. Then cut
this wire and connect the REVERSE CAM 12V+ power connection from the Lockpick to the camera
directly. Do not reconnect the original camera power source wire or fail to cut the wire at the camera.
Instead tape it up and disregard it. The Lockpick will provide all necessary power and timing for the
factory camera. Failing to cut the wire or connecting the Lockpick power and factory power at the same
time could cause the reverse tail light to illuminate at improper times. Also, cutting the wire at a different
location other than directly on the camera connector could possibly interrupt power to other functions
such as the actual reverse taillights or rear obstacle detection systems.
7.
If you do not currently have a rear view camera and want to add one to your vehicle, the Lockpick
makes it easy.
The REVERSE CAM 12V + power output provided on the Lockpick will be your source
for powering the 12V needs of your aftermarket rear camera. Also, a GROUND connection is already
provided for you on the Lockpick harness to make powering your camera simple.
8.
The Lockpick includes the option for a 2
the back of a trailer automatically while in reverse. Plug your camera into the 2
input and the camera power to the REVERSE CAMERA 12V power and GROUND connection on the
Lockpick harness.
Also, if your radio is navigation
If you would like to continue using your present camera, cut the connector
nd
Reverse camera (CARGO CAM)
connectors. If your MYGIG radio is navigation
equipped, the functions for voice recognition
harness. On your cable are standard
for viewing of a truck bed or
nd
REVERSE CAMERA
