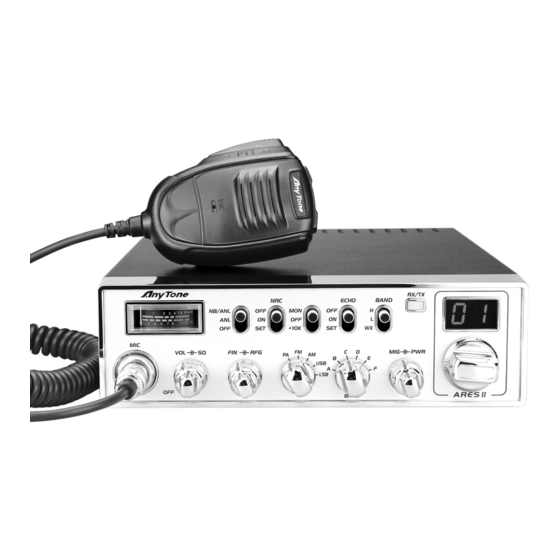
AnyTone ARES II Manual de instrucciones - Página 12
Navegue en línea o descargue pdf Manual de instrucciones para Radio AnyTone ARES II. AnyTone ARES II 16 páginas.
También para AnyTone ARES II: Manual de instrucciones (16 páginas)

HOW TO USE YOUR RADIO
Power OFF/ON
1. Turn VOL clockwise to switch the radio ON, the radio may emit a beep (if the
beep function is enabled). The LED display will show a channel number.
2. Turn VOL anti-clockwise to switch the radio OFF.
Volume Control
When the radio is turned on, turning VOL clockwise will increase the Volume level.
Turning VOL anti-clockwise will reduce the Volume level.
Note: Adjust the Volume during communication to obtain a suitable level.
Squelch Control
When the radio is receiving, turn SQ control clockwise to adjust the Squelch level.
Mic Gain Control
When the radio is transmitting, turn MIG control to adjust the Microphone Gain. Turn
the control clockwise to increase Mic Gain, and anti-clockwise to reduce Mic Gain.
RF Gain Control
When the radio is receiving, turn RFG control to adjust the RF Gain. Turn the control
clockwise to increase RF Gain, and anti-clockwise to reduce RF Gain.
RF POWER Control
Valid for AM/FM/LSB/USB modes. Turn PWR control to adjust the TX Output Power.
Turn the control clockwise to increase Power, and anti-clockwise to reduce Power.
SCAN Function
1. With the radio in receive mode, press and hold the [UP] or [DN] key on
the microphone for approximately 7 seconds until the SCAN feature
starts. The dot "." between the two channel digits on the LCD display
flashes to indicate that the SCAN feature is active.
2. Rotate the Channel switch or press either of the [UP/DN] keys on the
microphone to change the SCAN direction.
3. Short press [PTT] to exit SCAN mode.
Note: SCAN mode is available in all modes where the squelch is closed
(audio muted), including WX/FM Receiver 140-170MHz mode.
MODE Switch Control
Turn the mode switch to choose between PA/FM/AM/USB/LSB modes.
BAND Switch Control
Turn the band switch to select A/B/C/D/E/F band.
Channel / Frequency Control
Turn the channel control to select the desired channel.
Turn the control clockwise to increase, and anti-clockwise to decrease.
Scrolling Frequency Display
Hold the microphone [UP] and [DN] keys simultaneously, the LED display will show
the working frequency. For example, 28.2050MHz will display as 28-20-50 repeatedly
until the [UP] and [DN] keys are released.
8
◆
