Apollo 51000-355 Manual de instalación - Página 3
Navegue en línea o descargue pdf Manual de instalación para Alarma de humo Apollo 51000-355. Apollo 51000-355 16 páginas. Wireless smoke heat alarm

BATTERY INSTALLATION AND REPLACEMENT
To replace the batteries:
1. Remove the detector from its mounting base by twisting the detector
counterclockwise. Remove and dispose of the batteries according to
your local regulations.
2. To ensure proper power-down sequence, wait a minimum of 20
Off
seconds before installing new batteries.
3. Install 3 new AAA batteries (available from your local Duracell or
Energizer dealer) in the battery compartment. Follow the polarity
diagram inside the compartment. If the batteries are incorrectly
inserted please remove gently with a non-conductive tool and
correctly reinsert
4. Reinstall the detector onto the mounting base by turning the detector
clockwise until the mating marks align.
5. After the power-up sequence the green LED should blink about once
every 12 seconds to indicate normal operation. If the batteries are not
installed correctly, the detector will not operate and the batteries may
be damaged. If the detector does not power-up, check for correct
batteries installation and for a fully charged batteries.
Off
6. Test the detector (as described later).
CONSTANT EXPOSURES TO HIGH OR LOW TEMPERATURES OR HIGH
HUMIDITY MAY REDUCE BATTERY LIFE.
Off
HUSH/TEST BUTTON
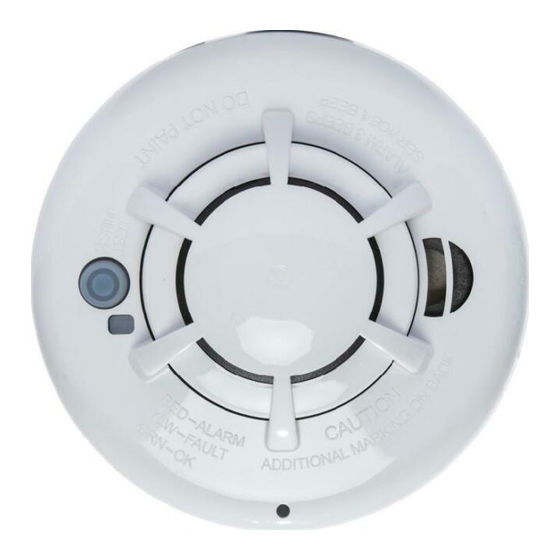
Fig 1. Wireless Smoke Heat Alarm
the transmitter sends a low battery message to the control panel, which
displays the detector's ID at low battery. In addition, the yellow LED of the
detector will blink every 12 seconds. The detector's sounder will chirp every
48 seconds (yellow LED continues to blink) until the batteries are replaced.
Pressing the hush button will silence the chirps for 12 hours, if no other
trouble conditions exist. The batteries should be replaced WHEN the chirps
begin. Be sure to replace the batteries with fresh ones.
BATTERY INSTALLATION AND REPLACEMENT
To replace the batteries:
1. Remove the detector from its mounting base by twisting the detector
counterclockwise. Remove and dispose of the batteries according to your
local regulations.
2. To ensure proper power-down sequence, wait a minimum of 20 seconds
before installing new batteries.
3. Install 3 new AAA batteries (available from your local Duracell or Ener-
gizer dealer) in the battery compartment. Follow the polarity diagram inside
HUSH/TEST BUTTON
BATTERY COMPARTMENT
Fig 1. Wireless Smoke Heat Alarm
relative to the stairway so as to intercept smoke coming from a fi re in the
basement before the smoke enters the stairway.
Smoke detectors are optional where a door is not provided between living
PROGRAMMING
room and recreation room (Figure 5).
The smoke from a fi re generally rises to the ceiling, spreads out across
Refer to the appropiate compatible control panel programming guide for
the ceiling surface, and begins to bank down from the ceiling. The corner
the proper procedure required to enroll the wireless smoke/heat into the
where the ceiling and wall meet is an air space into which the smoke could
system.
have diffi culty penetrating. In most fi res, this dead air space measures
about 0.1m (4in.) along the ceiling from the corner and about 0.1m (4in.)
RECOMMENDED LOCATIONS FOR SMOKE HEAT ALARM
down the wall. Detectors should not be placed in this dead air space, see
Figure 6,7 and 8.
According to National Fire Protection Association (NFPA) the major threat
from fire in a dwelling unit occurs at night when everyone is asleep.
Where NOT to install the alarm:
The principal threat to persons in sleeping areas comes from fires in
the remainder of the unit; therefore, a smoke detector(s) is best located
- Directly above a sink, cooker, stove or oven
between the bedroom areas and the rest of the unit. In units with only one
- Do not locate detector within 5 feet (1.5 m) of any cooking appliance
bedroom area on one floor, the smoke detector(s) should be located as
- Next to a door or window that would be affected by drafts i.e. extractor fan
or air vent
shown in Figure 2. In dwelling units with more than one bedroom area or
- Outside
with bedrooms on more than one floor, more than one smoke detector is
- Do not install in any environment that does not comply with the detector's
required, as shown in Figure 3.
environmental specifi cations
Dining
room
Living room
Fig 2. Location of the detectors
in units with only one bedroom
area on one fl oor
In addition to smoke detectors outside of the sleeping areas, the device
2
should be installed on each additional story of the dwelling unit, including
the basement. These installations are shown in Figure 4. The living area
smoke detector should be installed in the living room or near the stairway
to the upper level, or in both locations. The basement smoke detector
should be installed in close proximity to the stairway leading to the floor
above. Where installed on an open-joisted ceiling, the detector should
be placed on the bottom of the joists. The detector should be positioned
relative to the stairway so as to intercept smoke coming from a fire in the
basement before the smoke enters the stairway.
1
INST APD0601 A140513
3
TV
Kitchen
BedroomBedroom
room
Bedroom
Bedroom
Fig 3. Location of the detectors in
dwelling units with more than one
bedroom area or with bedrooms on
more than one fl oor
Fig 7. Example
Dining
Kitchen
Bedroom
room
Living room
Bedroom
INST APD0601 C160927
F
