Appendix A
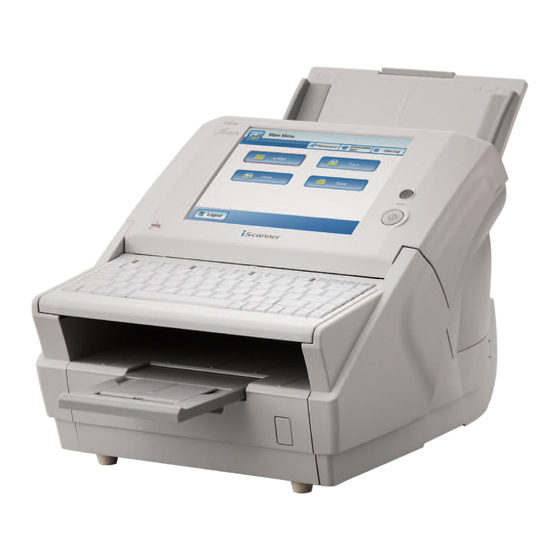
Calibrating the Touch Panel
This should be done if and when the touch panel
responses seem out of alignment with the positions of
objects on the LCD screen.
1. Login as the administrator.
For details, refer to "3.1 Logging in" (page 5).
D The "System Settings" screen appears.
2. Select the [System Settings] tab on the top
menu.
3. Select the [Screen Calibration] tab on the left
side menu.
D The "Calibration Screen" appears.
4. Press the [Calibrate Screen] button.
D A blank calibration screen appears, with a red
"+" (adjustment mark) in the top-left corner.
5. Touch the "+" with your fingertip.
After being touched, the "+" will move to
the next calibration position. Each time
it stops, touch it again.
The keyboard may also be used on the
HINT
calibration screen:
z Press the [Home] key to jump
straight to the post-calibration test
screen.
z Use the arrow keys to move the "+"
to a different calibration point. This
allows a bad touch to be redone.
z Press the [Esc] key to stop the cali-
bration process and return to the
"Screen Calibration" screen.
z Press the [Enter] key to close the
error dialog. (Not normally needed.)
Repeat until the test screen appears, with the fol-
lowing "Calibration" dialog box:
6. Trace a line on the screen with your fingertip.
D A corresponding line will appear on-screen.
If the line does not appear correctly, press the
[Calib screen] button to return to Step 5.
If the screen becomes cluttered, press the
[CLR screen] button to remove all the lines.
The [Cursor on/off] button cannot be used.
7. When you are satisfied with the touch screen
response, press the [Update] button.
D This saves the current calibration data, com-
pleting the calibration process, and returns you
to the "Screen Calibration" screen.
If the calibration is not performed
ATTENTION
carefully, or the [Enter] key is pressed
before all the calibration points have
been touched, the following error
message may appear:
Parameter Error. Please input, again
Press the [Enter] key to dismiss the
error dialog, and perform the calibra-
tion again, being careful to touch each
calibration point accurately.
17
Appendix B
Scanner Care
The glass scanner windows
AUTION
inside the ADF can become hot
when the scanner is used.
Before cleaning inside the
scanner or replacing any parts,
turn off the power, unplug the AC
adapter from the outlet, and wait
for at least 15 minutes.
The power does not need to be
turned off when cleaning the
feed rollers.
ARNI N G
Do not use any aerosol sprays
or alcohol based sprays to clean
the scanner.
Dust blown up by strong air from
the spray may enter the inside of
the scanner. This may cause the
scanner to fail or malfunction.
Sparks, caused by static
electricity, generated when
blowing off dust and dirt from the
outside of the scanner may
cause a fire.
■ Cleaning Materials
Cleaning
Part No.
Remarks
Materials
Cleaner F1
PA03950-
1 bottle
0352
Used to moisten the
cloths before wiping
parts clean.
Cleaning Paper CA99501-
1 pack (10 sheets)
0012
For use with Cleaner
F1.
Cleaning Wipe PA03950-
1 pack (24 sheets)
0419
Pre-moistened with
Cleaner F1, Cleaning
Wipes are used instead
of moistened cloths.
Soft, dry cloth
Any commercially available lint-
free product
Contact your FUJITSU scanner dealer or an authorized
FUJITSU scanner service provider to obtain these products.
■ Which Parts and When
Clean all parts after every 1,000 sheets scanned.
z Pad assy
z Feed rollers
z Pick roller
z Idler rollers
z Glass scanner windows
z Ultrasonic sensor
The scanner must be cleaned more
ATTENTION
frequently when the following types
of documents are used:
z Coated paper
z Documents with large areas of
printing
z Chemically treated paper such as
carbonless paper
z Paper containing large amounts of
calcium carbonate filler
z Documents written in pencil
z Documents with insufficiently fused
toner
For more details, refer to the "Operator's Guide".
■ Cleaning the ADF
Clean the ADF with a soft cloth moistened with Cleaner
F1. For details, refer to the "Operator's Guide".
■ Cleaning the LCD Touch Panel
To prevent the touch panel screen from becoming dirty,
it should be regularly cleaned with a soft, dry cloth.
Take care when cleaning the touch panel. It can be eas-
ily damaged, and should never be scratched or banged
with hard objects.
Always use a dry (not damp) cloth to
ATTENTION
clean the screen. Do not apply
Cleaner F1.
If dust is allowed to collect and
harden around the frame of the
screen, it can cause the touch panel
to malfunction.
18

