Diamond OX-MS Manuel de l'utilisateur - Page 4
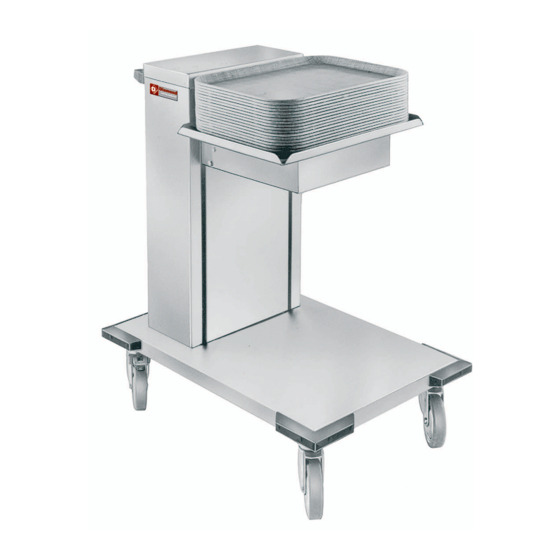
Parcourez en ligne ou téléchargez le pdf Manuel de l'utilisateur pour {nom_de_la_catégorie} Diamond OX-MS. Diamond OX-MS 7 pages. Self levelling dispensers for crockery

MANUAL MOBILE UNITS
a) a)
rollers,
b) as a frame with or without platform,
c) with spring-ring.
4) ) Springs, between
acking-unit and platform.
5) ) Electrical heating-installatio
a) a) spiralc
b) switch,
c) c) thermo
d) heating element with or without fan.
On the front-side of the cabinet an identification-label is placed. On this identification-label you will find the model
and type.
The appendix A gives a listing with:
- dimensions of the crockery,
- dimensions of the dispenser,
- power supply of the heating.
The description tells you whether your model is equiped with platform, fix or adjustable guiding-rods and/or heating.
Whether the instructions further on are applicable for you, depends on the model you own.
Just aside the identification-label you will find a second label with a serialnumber on it.
Write down the type(s) and serialnumber(s) on page 1 (registration file).
3. . Operating of the dispense
When the upward spring-strength has been adjusted correctly to the weight of the crockery, the upper crockerypart
of the stack is at the same level as the end of the guiding-rods. When the upper crockerypart is taken away, the
next crockerypart replaces it. The total number of springs determines the total spring-strength of the disipenser.
Too much springs and the crockeryparts are above the guiding-rods and the cover does not fit properly. Not enough
springs, the upper crockerypart cannot or is difficult to be reached.
When you have a unit with heating, you have the possibility to warm the crockery.
The heating-element warms the air in the dispenser; this air gives its warmth to the crockery. A cover locks the
dispenser, so that less warm air (energy) is wasted. We advise you to use a cover. The brakes on the 2 castors are
operated with the feet and block turning and swivelling of the castors.
4. . Checking at arriva
During production and preparation for transport every dispenser is checked on:
1) damages,
2) ) complete deliver
3) ) operating of the stacking-mechanis
4) ) operating of the switch, the th mostat and the heating-element and
the electrical safety.
Check directly upon arrival of the goods:
1) is the package undamaged,
2) is the dispenser undamaged,
3) ) is the dispenser
mplete; have all accessories been provided.
REPORT DAMAGES ON THE DISPENSER WITHIN 8 DAYS TO YOUR SUPPLIER
5. . Installation of the dispense
1) ) Remove the packag
2) ) Remove the plastic foliage om the cabinet and the platform.
3) ) Adjust the spring.stren h with a stack of crockery:
a) remove one or more of the following parts:
- removable platform form the carrier-frame,
- removable panel (only OX-MS),
MANUAL MOBILE UNITS
4
- partly detachable inside-panel (only types with stacking unit with all 4 sides closed
and without flange), by unlocking 2 panels on the upper-side,
- removable stacking-unit (only types with stacking-unit with all 4 sides closed and
with flange), by taking out the stacking-unit itself out of the cabinet, the springs
can now be reached,
b) loosen springs (less spring-strength) or fasten springs (more spring-strength) until
the upper part of the stack is at the same level as the end of the guiding-rods.
All delivered springs are fastened during production of the dispenser.
DO NOT PUSH THE PLATFORM DOWNWARD DURING ADJUSTING OF THE
SPRING STRENGTH; THERE SHOULD BE NO TENSION ON THE SPRINGS
LOOSEN THE SPRING AT THE UNDERSIDE, THERE WHERE THE SPRINGS ARE
FASTENED TO THE SPRING-RING OF THE PLATFORM
DIVIDE THE SPRING-STRENGTH EQUALLY ON THE SPRING-RING; NOT ALL SPRINGS
ON ONE SIDE AND ON THE OTHER SIDE NO SPRINGS
4) ) Place the adjustable guidin rods in the right position:
a) lift up the guiding-rod and turn it in the required position,
b) lower the guiding-rod and search for the nearest fixation-hole.
BE CERTAIN THAT THERE IS ENOUGH SPACE FOR THE CROCKERY BETWEEN
THE GUIDING-RODS SO THAT THE CROCKERY WILL NOT BE TIGHTENED
5) Plug the cable into the power supply.
SWITCH TO "0" BEFORE YOU PLUG INTO THE SOCKET
ONLY USE A PLUG-SOCKET WITH EARTH CONNECTION
HANG THE CABLE AT THE PANELSIDE IN THE BRACKET, WHEN TAKING THE
PLUG FROM THE POWER-SUPPLY
6. . Using the dispens .
1) ) Use the brakes of the castors wh
of the crockery.
2) ) Do not use the brake when moving the dispenser.
BE CAREFUL WITH DOORSTEPS; DO NOT DRIVE TOO FAST NEITHER WITH
LOADED OR UNLOADED DISPENSER
BE CAREFUL WITH SLOPING FLOORS; LET SOMEONE HELP YOU
3) ) Place the crockery only with smal stacks at a time in the dispenser.
AVOID DAMAGE TO CROCKERY AND/OR INJURIES TO PERSONS
4) ) Swich to "1"; th pilot-light will light.
Turn the thermostatknob to the desired temperature; the heatingelement gets warm.
The level of adjustment, the space of time, the crockery and the use or no use of a
cover can influence the temperature of the crockery.
Find for your situation the best temperature-level and space of time.
Start heating up about 2-3 hours before issue and meanwhile use a cover on the
filling and emptying and during heating
5
