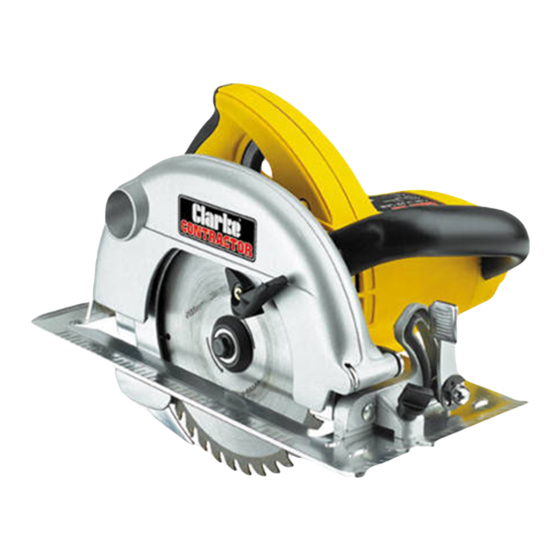
Clarke Contractor CCS2 Manuel d'utilisation et d'entretien - Page 4
Parcourez en ligne ou téléchargez le pdf Manuel d'utilisation et d'entretien pour {nom_de_la_catégorie} Clarke Contractor CCS2. Clarke Contractor CCS2 6 pages. 185mm

15. ALWAYS wear proper apparel. Loose clothing or jewellery may
get caught in moving parts. Wear protective hair covering to
contain long hair.
16. ALWAYS remove plug from electrical outlet when adjusting,
changing parts, or working on the machine.
17. NEVER operate machine while under the influence of drugs, alcohol
or any medication.
18. NEVER leave machine running unattended. Turn power off. Do not
leave the machine until it comes to a complete stop.
19. NEVER force the machine, it will do a better and safer job at
the rate for which it was designed.
20. NEVER use power tools in damp or wet locations or expose
them to rain. Keep your work area well illuminated. Do not use
in explosive atmosphere (around paint, flammable liquids etc.).
Avoid dangerous environment.
Additional Precautions For Circular Saws
1.
ALWAYS wear ear protectors/defenders when using this machine.
2.
ALWAYS use the appropriate saw blade for the material being cut.
3.
ALWAYS keep the mains cable well away from the machine and ensure an adequate
electrical supply is close at hand so that the operation is not restricted by the length of
the cable.
4.
ALWAYS ensure the Riving Knife is in place and directly in line with the blade.
5.
ALWAYS allow sufficient clearance beneath the work to ensure the blade does not
come into contact with the work bench or any other object.
6.
ALWAYS ensure the blade is fully tightened before use.
7.
ALWAYS use a rip fence or guide when ripping.
8.
ALWAYS check blade guard has returned FULLY before putting saw down.
9.
ALWAYS ensure that nails have been removed from a workpiece beforehand. Nails will
damage the saw blade.
10. NEVER operate the saw when the blade guard is not working properly. The Guard
should be checked for correct operation before each use.
11. NEVER use abrasive disks with this machine, it is designed to cut wood ONLY
12. NEVER start the saw when the blade is in contact with the work.
13. NEVER allow the ventilation slots in the motor to become blocked.
14. NEVER use the machine if the electric cable, plug or motor is in poor condition.
15. NEVER reach beneath the workpiece whilst cutting
16. If the blade binds whilst cutting, or cutting is interrupted, hold the saw firmly, release
the trigger and allow the blade to stop completely. NEVER attempt to remove the saw
when the blade is in motion, otherwise kickback will occur.
17. NEVER use the saw with the blade guard jammed open.
Note : The guard is operating correctly when it moves freely and readily returns to closed position
Additionally, please keep these instructions in a safe place for future reference.
4
Kickback
Kickback is when the saw is driven back fiercely into the hands of the operator, and may
be caused by the following:
a.
The blade becoming twisted or misaligned in the cut.
b.
Dull Blades...ALWAYS use a sharp, perfectly serviceable blade.
d.
Workpiece not properly secured, or held down adequately
e.
Wet, warped, green or pressure treated timber.
f.
Riving Knife misaligned.
g.
Sawing into knots, nails etc.
h.
Forcing the tool.
i.
Using improper saw blades.
j.
Depth setting too great....do not exceed 3-4mm.
Always hold the saw firmly so as not to loose control should kickback occur.
Maintenance
The Saw is generally maintenance free, except for occasionally changing the saw blade,
described below, and maintaining in a clean condition, ensuring the motor vents are clear
at all times. Do not use solvents to clean body parts
Changing the Saw blade
Ensure the saw is isolated from the mains supply, by removing the plug from the socket.
Press the Spindle Locking Knob (N, Fig. 1) in order to hold the blade securely, then, using the
special wrench, (supplied), unscrew (anticlockwise) and remove the Blade Centre Bolt and
washer, followed by the Outer Flange.
Retract the Lower Blade Guard all the way up into the Upper Guard, and slide the blade
off the spindle and down through the slot, taking great care not to damage hands on the
saw's teeth.
Replace in reverse order, ensuring the blade is the correct way round...i.e. The teeth
should be pointing FORWARDS at the bottom. Ensure also, the blade sits snugly on its
registration on the spindle before replacing the outer flange, washer and centre bolt,
which should then be tightened but taking care not to overtighten.
Riving Knife Adjustment
It is vital that the Riving knife is perfectly in-line with
the blade at all times with a gap of no more than
5mm exsisting between the blade and knife.
Should it be necessary to adjust the Knife, ensure the
tool is disconnected from the mains, then lower the
Guide Plate so that the blade depth is zero using the
locking lever, O Fig. 1, to reveal the two Riving Knife
securing screws - A, Fig.4. Slacken the screws sufficient
for the knife to be adjusted, ensuring the gap
between blade and knife - B, is no more than 5mm,
and constant along the length of the knife.
Additionally, the blade should not extend more than
5mm below the end of the riving knife.
Ensure the securing screws are tight before use.
NOTE: It may be necessary to bend the knife slightly to ensure it is directly in-line with the blade.
Fig. 4
9
