Alentec & Orion 24702 Panduan Pengguna - Halaman 2
Jelajahi secara online atau unduh pdf Panduan Pengguna untuk Alat Ukur Alentec & Orion 24702. Alentec & Orion 24702 8 halaman. Hose end meter pre set version
Manual 24702_EN_2B
General
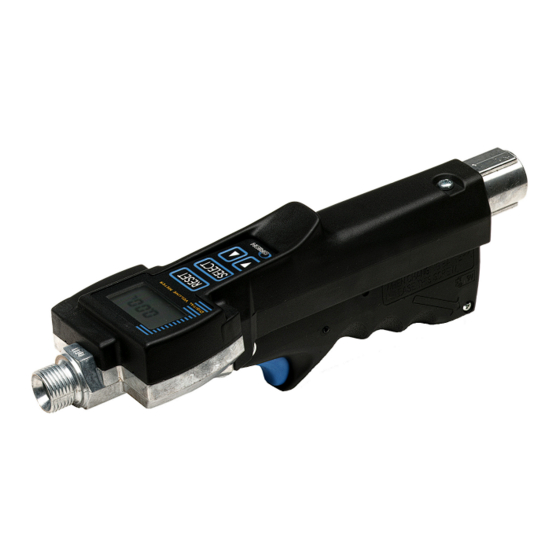
Even though it's designed for heavy-duty use the Meter is a High Precision Measuring Device and should be treated as such.
It is possible to calibrate the Meter to a specific oil viscosity. See instructions on page 6.
The Meter's default setting displays volume in liters. This setting can be changed to US quarts, US pints or US gallons. See
instructions on page 7.
The Meter has the following features:
• BATCH volume counter with a range
of 0.01- 999.99 liters (or quarts/pints/
gallons) that can be reset to zero.
• VOLUME PRE-SET function with a range of 0.1 – 999.9 liters (or quarts/
pints/gallons).
• TRIP volume counter with a range of
1 - 99999 liters (or gallons *) that can be reset to zero.
• TOTAL volume counter with a range of 1 - 99999 liters (or gallons *) that cannot be reset to zero.
*) The unit of measure in TRIP and TOTAL is always gallons even when the BATCH volume counter is set for pints, quarts
or gallons.
The Meter is for use with mineral oils. It could also be used to measure pure glycol.
NOTE! The Meter is not to be used with water based products or glycol mixed with water (antifreeze fluid)!
The Meter is for "indoor use", i.e. it should not be mounted outdoors without shelter against the elements!
NOTE! The built–in circuit board is well protected against moisture but the Meter should not to be washed with solvents or
directly sprayed with high-pressure water!
1.
Battery
When the Meter is delivered it's not yet activated. Before activating the unit, mount a 9V battery as shown in the illustrations
below.
The reason the unit is not activated before delivery is to spare the built in lithium battery that keeps the calibration memory
intact even when changing the 9V battery.
The "Low Battery indicator" is triggered when it's time to change the 9V battery.
NOTE! Be sure to position the
spring accurately before
closing the trigger handle.
2(8)