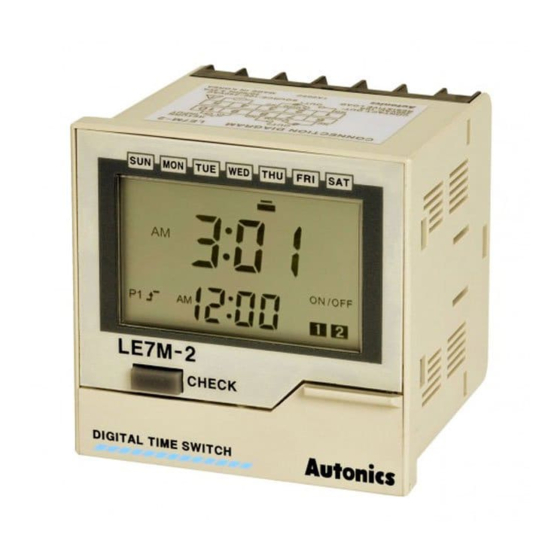
Autonics LE7M-2 Manual - Halaman 5
Jelajahi secara online atau unduh pdf Manual untuk Pengatur waktu Autonics LE7M-2. Autonics LE7M-2 13 halaman. W72xh72mm lcd week/year digital timers
Juga untuk Autonics LE7M-2: Manual (13 halaman), Manual (13 halaman), Panduan Produk (5 halaman)

• Set range for ON/OFF time width
: 1min. to 12 hour 59min.
• One record in 3 steps(ON day/ON time, OFF day/OFF
time, ON time width/OFF time width)
OFF width
ON time
● Weekly pulse mode
Output turns ON at ON time for a specified pulse width.
(Pulse width : 1 to 59sec., 1 to 60min.)
• One record in two steps(ON day/ON time, pulse width)
Pulse width
(1 to 59sec., 1 to 60min.)
ON Time
● Yearly ON/OFF mode
Output turns ON at ON time on START date and turns OFF
at OFF time on STOP date.
• One record in three steps(START/STOP date, ON/OFF
time)
● Yearly pulse mode
Output turns ON at ON time on START date and turns
OFF at OFF time on STOP time for a specified pulse width
repeatedly.(Pulse width : 1 to 59sec., 1 to 60min.).
• One record in three steps(START/STOP date, ON time,
pulse width)
Program operation
Weekly setting 1 of Program1
Weekly setting 2 of Program1
Yearly setting 1 of Program1
Program1 mode
● ① to ② : Operated by weekly setting 1 of Program 1.
● ② to ③ : Operated by weekly setting 2 of Program 1.
● ④ to ⑤ : Operated by weekly setting 1 of Program 1.
● ⑤ to ⑥ : Operated by yearly setting 1 of Program 1.
(During weekly program operation at 12:00 AM on
START date, the weekly program operation stops, and it
changes to yearly program operation mode. The yearly
program operation stops at 12:00 AM on the next day of
STOP date.)
ON width
OFF time
①
② ③ ④ ⑤ ⑥
Weekly/Yearly Timer
Display and change of next mode
● The day of next mode in Program1 or Program2 is
displayed on the day indicator, and the time of next mode
is displayed on the lower row of screen. Press
in RUN mode it is changed from program1 to
program2 or from program2 to program1.
● In ON/OFF operation mode, set ON time and OFF time
to next mode. In Pulse operation mode, set Pulse ON
time to next mode.
Power restore mode
In setting group 2-Level 2(Power restore), select auto [ AT ]
or normal [ NOR ] by
or
● Auto [ AT ] power restore mode
Output(OUT1, OUT2) operates according to program when
power turns on again after power failure.
● Normal [ NOR ] power restore mode
When power turns on again after power failure, output is
kept OFF and RET.IN flashes on the panel. When power
restore input is detected, RET.IN turns off and output
operates according to program.
• Power restore input
Input contact signal in external "Return input terminals (⑨
to ⑩)" by switch or relay, or press
RUN mode.
Please use reliable contacts enough to flow 0.1mA of
current at 5VDC when use switch or relay.
Season switching mode
This feature uses for setting seasonal weekly operation
mode.
To operate this mode, save starting month and date,
ending month and date of each season which displays S1,
S2, S3, S4 then set day and time of each season in weekly
program setting. It is also able to operate only in summer
and winter season. (S1: set summer season, S2: set winter
season, S3/S4: do not set)
At the season switching selection LEVEL 2 status in setting
2 group ( SEN turns ON, OFF flashes), select ON [ ON ] by
pressing
or
key and press
season switching.
Be sure that if changing season switching from OFF to ON
or, ON to OFF , the weekly program 1(P1) and the weekly
program 2 (P2) which are set before are deleted.
● ON [ ON ] mode
Weekly program is switched automatically by season
switching.
• Period setting per season
① At the season switching selection LEVEL 2 status in
setting 2 group ( SEN flashes, the set season turns ON,
START and STOP turn ON), press
② Advance to the flashing position of season selection
among S1, S2, S3, S4 by
key.
③ After set START month, date per season and press
key.
④
key is pressed after set STOP month, date per season,
it is advanced to LEVEL1 of period setting per season.
Add or adjust the period setting by
● It is disable to use when it is OFF [ OFF ].
● If season terms are overlapped, these are prioritized in
S4>S3>S2>S1 order.
+
key, and press
key to set.
key for 3sec. in
key to complete the
key.
or
key and press
key.
K-79
(A)
Photo
electric
sensor
(B)
Fiber
optic
sensor
(C)
Door/Area
sensor
(D)
Proximity
sensor
(E)
Pressure
sensor
(F)
Rotary
encoder
(G)
Connector/
Socket
(H)
Temp.
controller
(I)
SSR/
Power
controller
(J)
Counter
(K)
Timer
(L)
Panel
meter
(M)
Tacho/
Speed/ Pulse
meter
(N)
Display
unit
(O)
Sensor
controller
(P)
Switching
mode power
supply
(Q)
Stepper
motor&
Driver&Controller
(R)
Graphic/
Logic
panel
(S)
Field
network
device
(T)
Software
(U)
Other
