Adesys SVA Manual - Halaman 6
Jelajahi secara online atau unduh pdf Manual untuk Modem Adesys SVA. Adesys SVA 13 halaman.

Adesys B.V. | Wateringen
The use of a 'Prepaid' SIM card for dialling purposes is strongly discouraged. The mobile network cannot
automatically request the call credit, which means that this can be run down without anyone noticing,
resulting in outgoing notifications coming to a standstill.
2.4.
Antenna
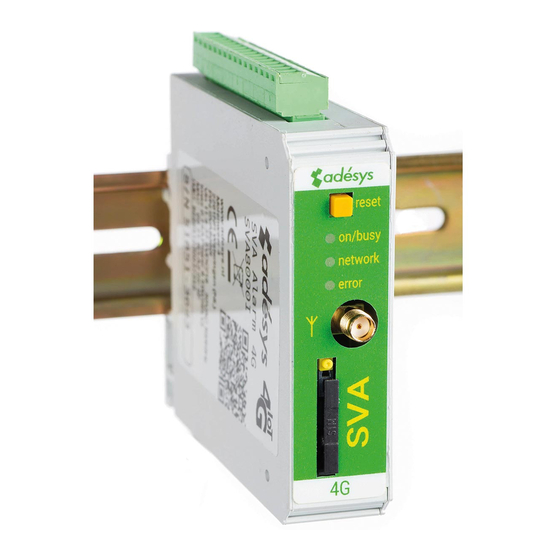
Connect the antenna cable to the SVA's antenna connection. The antenna plus associated cable can be
obtained from Adésys. The antenna should be affixed to as high a point as possible to obtain the best
possible range.
After installation, always check the field strength of the antenna signal (max. is 5 flashes of the yellow
'network' LED). Notification of changes in signal strength will always take place after a long delay (± 30
seconds). Take this into account if, for example, the antenna is moved.
2.5.
Power supply
2.5.1. SV-20 mains adapter and SV-19 DIN rail power supply
To power the SVA, a 230VAC / 24VDC mains adapter with article number SV-20 or a 100-240VAC / 24VDC
DIN rail mounting power supply with article SV-19 can be ordered as an option via the webshop.
When fitting the terminal block to the power supply cable, ensure that the polarity plus (+) and minus (-) is
correct.
An extra power supply fuse is not necessary here.
If the SVA is not supplied with power using the above-mentioned mains adapter or DIN rail power supply,
the connection regulations in the section below apply.
2.5.2. Power supply
Connect the SVA to a DC power supply of 15 to 35VDC (at least 8.5 W) or a transformer of 20 to 30VAC.
The power supply input of the SVA is not galvanically isolated from the other connections. The GND
connection of the power supply connector is directly connected internally to the GND connection of the
input connector and the COM port.
If the SVA is connected to an application (process controller, PLC, computer, active sensor, etc.) without
galvanic isolation and the SVA is connected to the same power supply, there is a real chance of earth loops
and/or short circuits in this power supply.
2.6.
Reset key
The reset key has four functions: first of all, it is used to interrupt the alarm. Pressing this briefly ends the
current notification; the SMS messages that have not yet been sent are not sent.
A second function of the reset key is to restart the dialler. The dialler can be restarted by holding this key
down for a period of 8 seconds. This only occurs if a power supply is connected.
If no power supply is connected, the reset key functions as an off button. Holding the key down for a
period of 8 seconds switches off the dialler.
Statuses of inputs will not be stored in a permanent memory. If the supply voltage fails, and the built-in
supercap is entirely discharged, the contents of this memory is lost. If the SVA is restarted manually, this
status will also be reset. When the supply voltage is restored, the SVA behaves as if it is being started up
for the first time. This means that:
• After the supply voltage has been restored, only active inputs are reported once again;
• No recovery message will be sent if the status of the input has been recovered during this power failure.
The fourth functionality is for when there is something wrong and there seem to be no connection. By
pushing the reset key for a duration of 3 seconds, releasing it 3 seconds and doing this 3 times the DHCP
will be enabled. By enabling the DHCP it is possible to make changes with SV-prog.
2.7.
Ethernet
The Ethernet connection can be used for an external connection. This is set up in the SVA: see chapter "3.
SV-prog". By default this is set up to connect to Checkmyproces.com.
Manual SVA alarm dialler | Back to
Index
Page 6
