HIKVISION HiWatch Series Panduan Pengguna - Halaman 7
Jelajahi secara online atau unduh pdf Panduan Pengguna untuk DVR HIKVISION HiWatch Series. HIKVISION HiWatch Series 15 halaman. Hd turret and bullet camera
Juga untuk HIKVISION HiWatch Series: Panduan Memulai Cepat (15 halaman), Panduan Memulai Cepat (20 halaman), Panduan Memulai Cepat (18 halaman), Bagaimana-Cara (4 halaman), Panduan Pengguna (15 halaman)
Note:
The supplied screw package contains self-tapping
screws, and expansion bolts.
For cement wall, expansion bolts are required to
fix the camera. For wooden wall, self-tapping
screws are required.
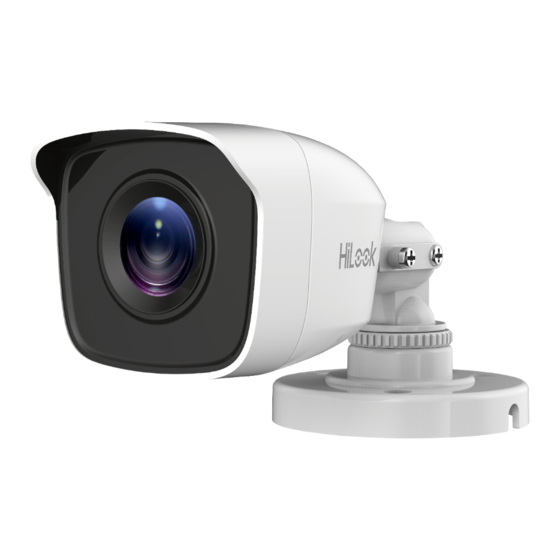
5. Connect the corresponding power cord, and video
cable.
6. Power on the camera to check whether the image
on the monitor is gotten from the optimum angle. If
not, adjust the surveillance angle.
1) Loosen the No.① adjusting screw to adjust the
pan position [0° to 360°]. Tighten the No.①
adjusting screw.
2) Loosen the No.② adjusting screw to adjust the
tilting position [0° to 90°]. Tighten the No.②
adjusting screw.
3) Loosen the No.③ adjusting screw to adjust the
rotation position [0° to 360°]. Tighten the No.③
adjusting screw.
2.2 Installation of Type II Camera
Before you start:
Both wall mounting and ceiling mounting are suitable
for the camera. We take ceiling mounting as an example
in this section. You can take the steps of ceiling
mounting as a reference, when adopting wall mounting.
Steps:
1. Disassemble the turret camera.
1). Use the screw driver to loosen the screw on the
mounting base.
2). Pull the clip plate out.
3). Take out of the camera body.
Figure 2-4 Disassemble the Camera
2. Paste the drill template (supplied) to the place
where you want to install the camera.
3. Drill the screw holes and the cable hole (optional)
on the ceiling according to the drill template.
Figure 2-3 3-axis Adjustment
Screw
Clip
Plate