Gardena 1806 Petunjuk Pengoperasian - Halaman 8
Jelajahi secara online atau unduh pdf Petunjuk Pengoperasian untuk Peralatan Rumput dan Taman Gardena 1806. Gardena 1806 20 halaman.
7.3 Other products which can be connected
Fig. D
Anti-theft protection
With special one-way screw and bracket.
Available from GARDENA Services.
Fig. E
GARDENA Soil Moisture Sensor (Art. No. 1187)
Fig. F
GARDENA Rain Sensor (Art. No. 1189)
Fig. G
GARDENA Automatic Water Distributor (Art. No. 1198)
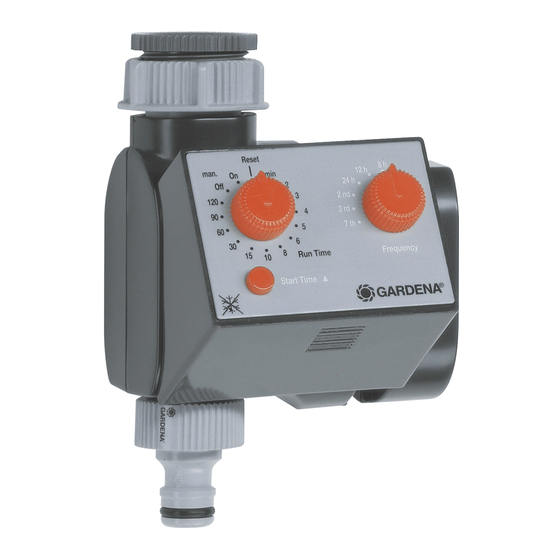
8. Preparation for Use
Before you use your water timer you must:
1. Insert the battery
2. Connect the water timer to the tap
3. Ensure the new battery works properly.
8.1 Inserting the battery (Fig. A)
1. Remove the control unit
pressing the release button
2. Insert the battery in the battery compartment
battery type IEC 6LR61) (Fig. A).
Note : When inserting the battery pay attention to the + / – markings.
3. Reattach the control unit to the housing. The water timer beeps to signal
it is ready to be programmed.
After another 5 seconds a double beep confirms that the current settings
have been accepted (except when Run Time is set to Reset).
Note : the current time is taken to be the starting time.
4. To delete the current settings, turn the knob to Reset. Set the timer as
described under "Setting the Watering Data".
8.2 Connecting to the Tap (Fig. C)
The Water Timer is fitted with a sleeve nut for taps with a
USAS .75-11.5 NH thread.
8.3 Checking the new battery
To check the new battery, turn on the tap and turn the knob on the water
timer to On (valve opens) and then shortly afterwards to Off (valve closes).
If the battery capacity is too low a warning tone which beeps at intervals
will sound.
Note : To ensure that the water does not cause any damage make sure
that the water flow is directed away from the water timer (connect hose,
stand a bucket underneath, etc.).
8
0
from the housing of the water timer by
7
(see Fig. B / C).
5
(only use a 9 V alkaline